Ombre Puff Quilt
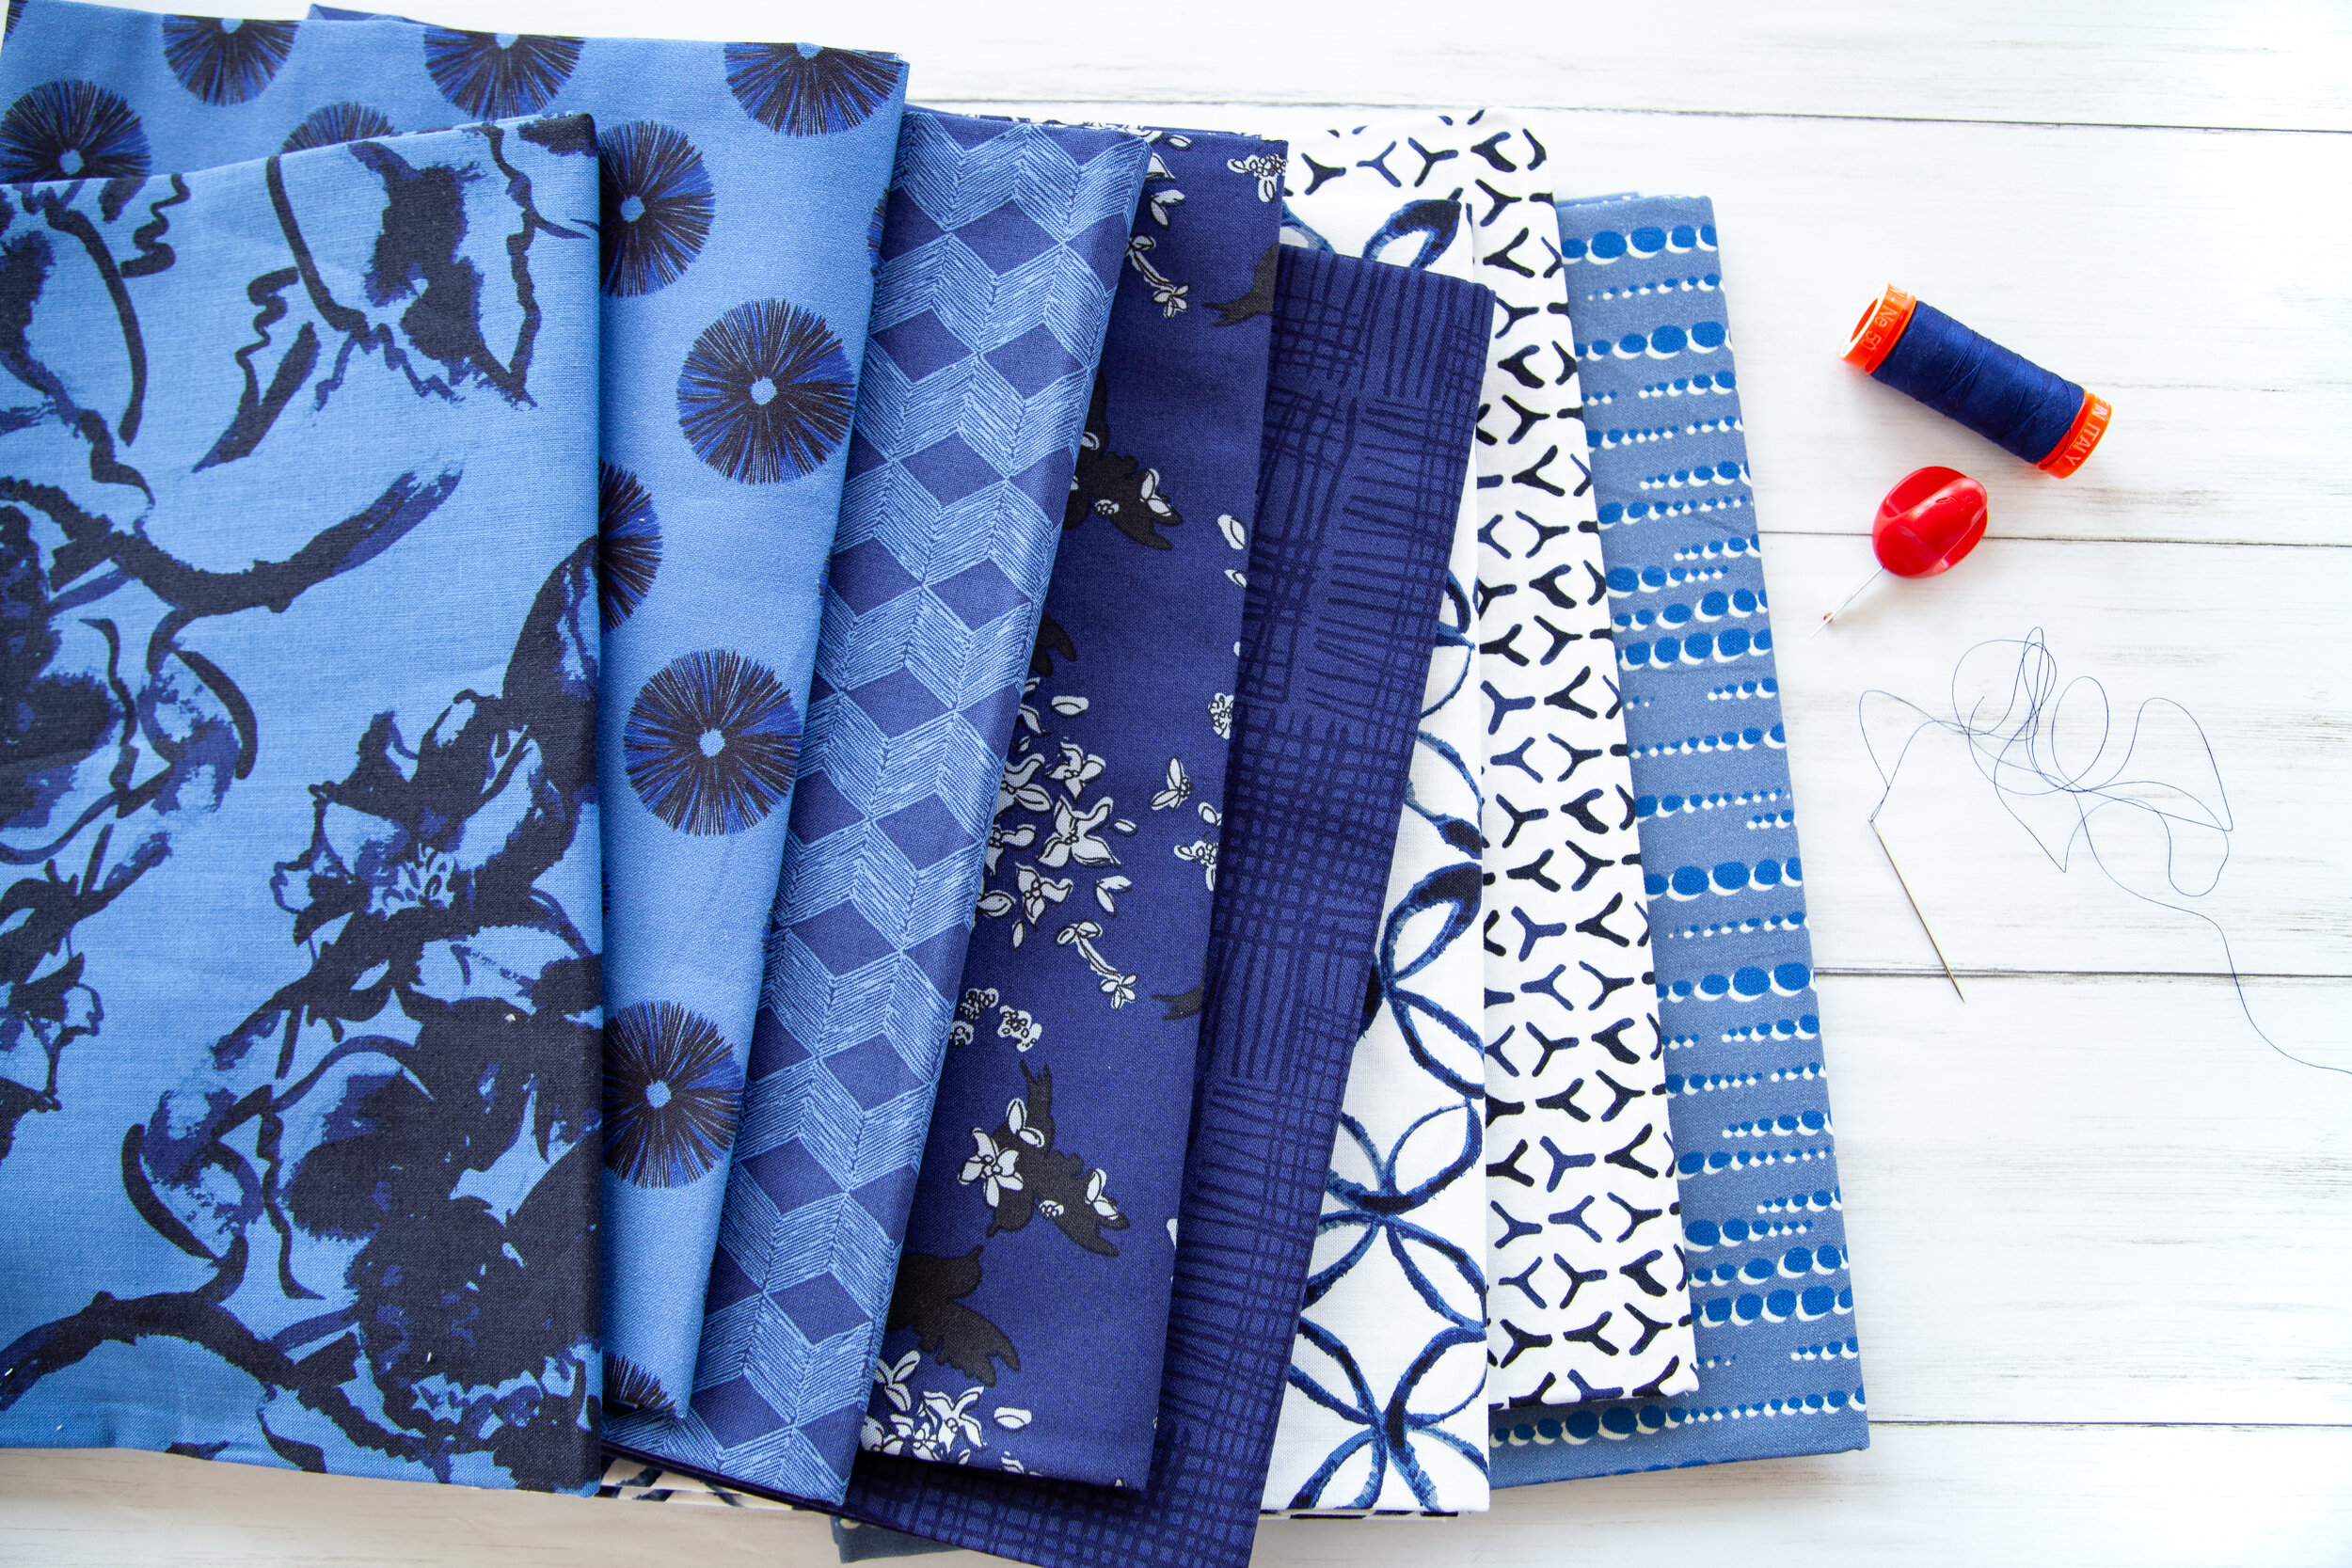
When I saw this gorgeous Watermark fabric line by Tammie Green of Studio T. Green I knew I had to create something special with it. Living on the NC coast for several years gave me a love for the ocean, and this collection definitely gave me those cool coastal vibes. The palette ranges from black and deep blue to a soft, light denim blue, to Tan, Gray, and White.
I have been watching tutorials for puff quilts on YouTube the past few months. My mom made my sister and I matching puff quilts when we were kids, and I have been dreaming of making my own. When I saw the free pattern from Lo & Behold Stitchery, I felt the universe was practically screaming at me to make a puff quilt already! I decided to make the large throw size, which measures 63” x 70”.

The large throw uses 360 4 1/2” squares. These are the nice fabric that will be visible on the quilt top. You will also need the same quantity of 4” squares using scrap fabric. I had a bolt of muslin sitting around, so that is what I opted to use. This scrap fabric, or muslin, will not be visible on the finished quilt.

The piecing process is super easy. Simply pair a 4 1/2 square with a scrap square. Start with a few stitches, then make a small pleat. In doing so, you will make the 4 1/2” square the same size as the 4” scrap square. Continue sewing. Repeat these steps for three sides. I chain pieced one side at a time which makes the process a bit faster.

Here are my stacks of fabric organized by print and color. I added a few Riley Blake Designs basics and misc. fabrics in the mix as well.

Laying out the quilt was so much fun! There are countless ways you can do this. I opted for a horizontal fade layout, so I started with the darkest fabrics on the bottom row and worked my way up to the lightest fabrics.

Next the rows needed to be transported back up to my sewing studio, so I arranged them in stacks (keeping the blocks in order) and numbered each stack according to their row.

Watching the rows come together is seriously satisfying. This is just half the quilt, but I had to stop and take a picture. I will say, as you go along, the quilt gets quite bulky and a bit heavy. I had to stop and walk away when I noticed my shoulders getting pretty sore. Take it slow and enjoy the process.

Here is the backside of the quilt top. It’s looking like ravioli! Don’t worry about the messy look, none of this will show in the end. After the quilt top is complete, you will make your quilt sandwich, adding batting and a quilt back, and this mess will all disappear.

Make a traditional quilt sandwich here — it seems strange because you already have so much bulk, but just go with it. Quilt back + batting + quilt top.


I used the gorgeous Water Mark Main Blue print for the quilt back.

The binding is the Navy Water Mark Flower print. I think it might be my favorite print in the entire collection, but my favorite seems to change every time I play with these fabrics. They are all so dreamy!


Our pup, Tim, immediately made himself at home as I was taking pictures.

As in, laying his head down and actually snoring. No joke! I think I’ll have to make a smaller version to put in his kennel.
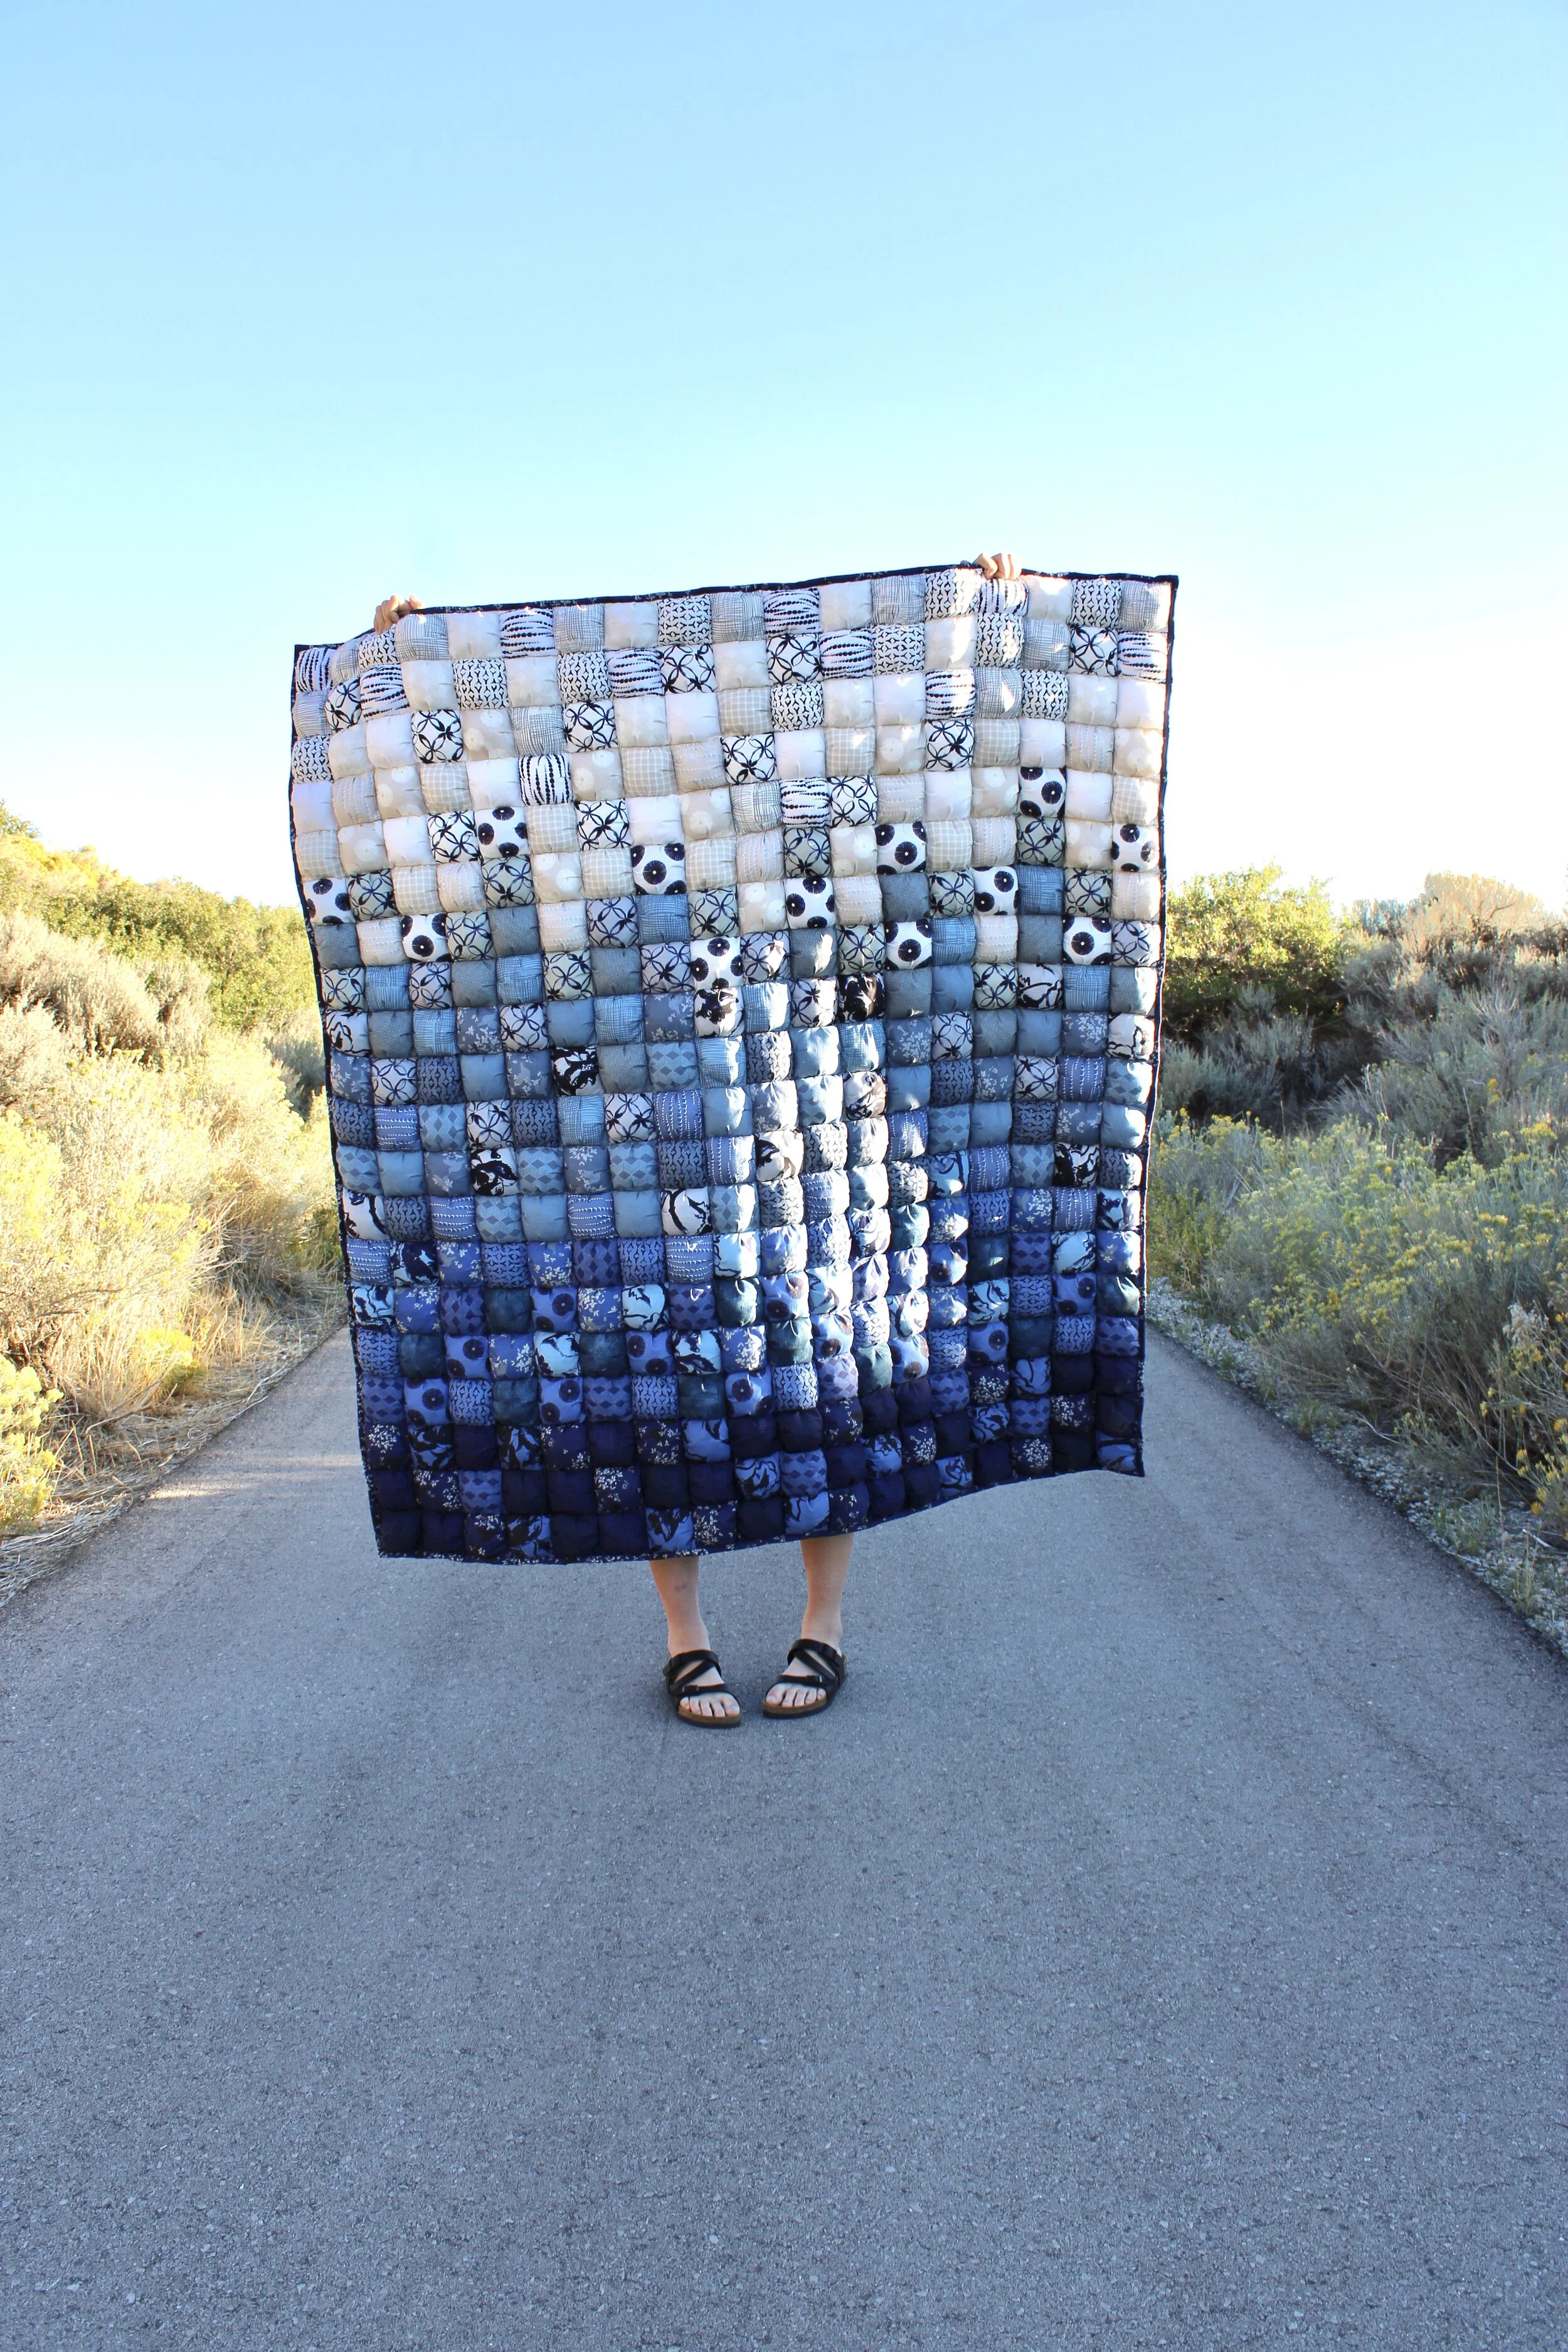
And here are a few pictures of the finished quilt. This thing is pretty heavy! Some have said it is similar to a weighted blanket. I would agree. It definitely doesn’t have the same weight as weighted blankets, but still it is surprisingly weighty and oh, so comfy.


This might be my favorite quilt ever I have two more puff quilts in mind…maybe more than two if I’m being honest. I’m totally hooked! Get the free pattern/tutorial over at Lo and Behold Stitchery. Water Mark fabric, by Tammie Green of Studio T. Green, is coming to stores next month. You’ll definitely want to pre-order yours to get your hands on one of these gorgeous bundles of fabric goodness!