How to Make a Prairie Braid Quilt Border
You know I love a quick and easy panel quilt, but I refuse call it in and sacrifice design in favor of speed and ease. A Prairie Braid Border is just thing to add a fun, unique touch to a quilt, and yes, it is seriously easy to make!
One of the biggest hang ups people have when thinking about working with a fabric panel is getting the measurements for the pieced border exactly right. The are so many ways to create gorgeous pieced borders without having to spend hours figuring out the quilt math down to the half inch. I am a huge believer in keeping these borders fun and simple, and totally awesome — just like the panel itself.
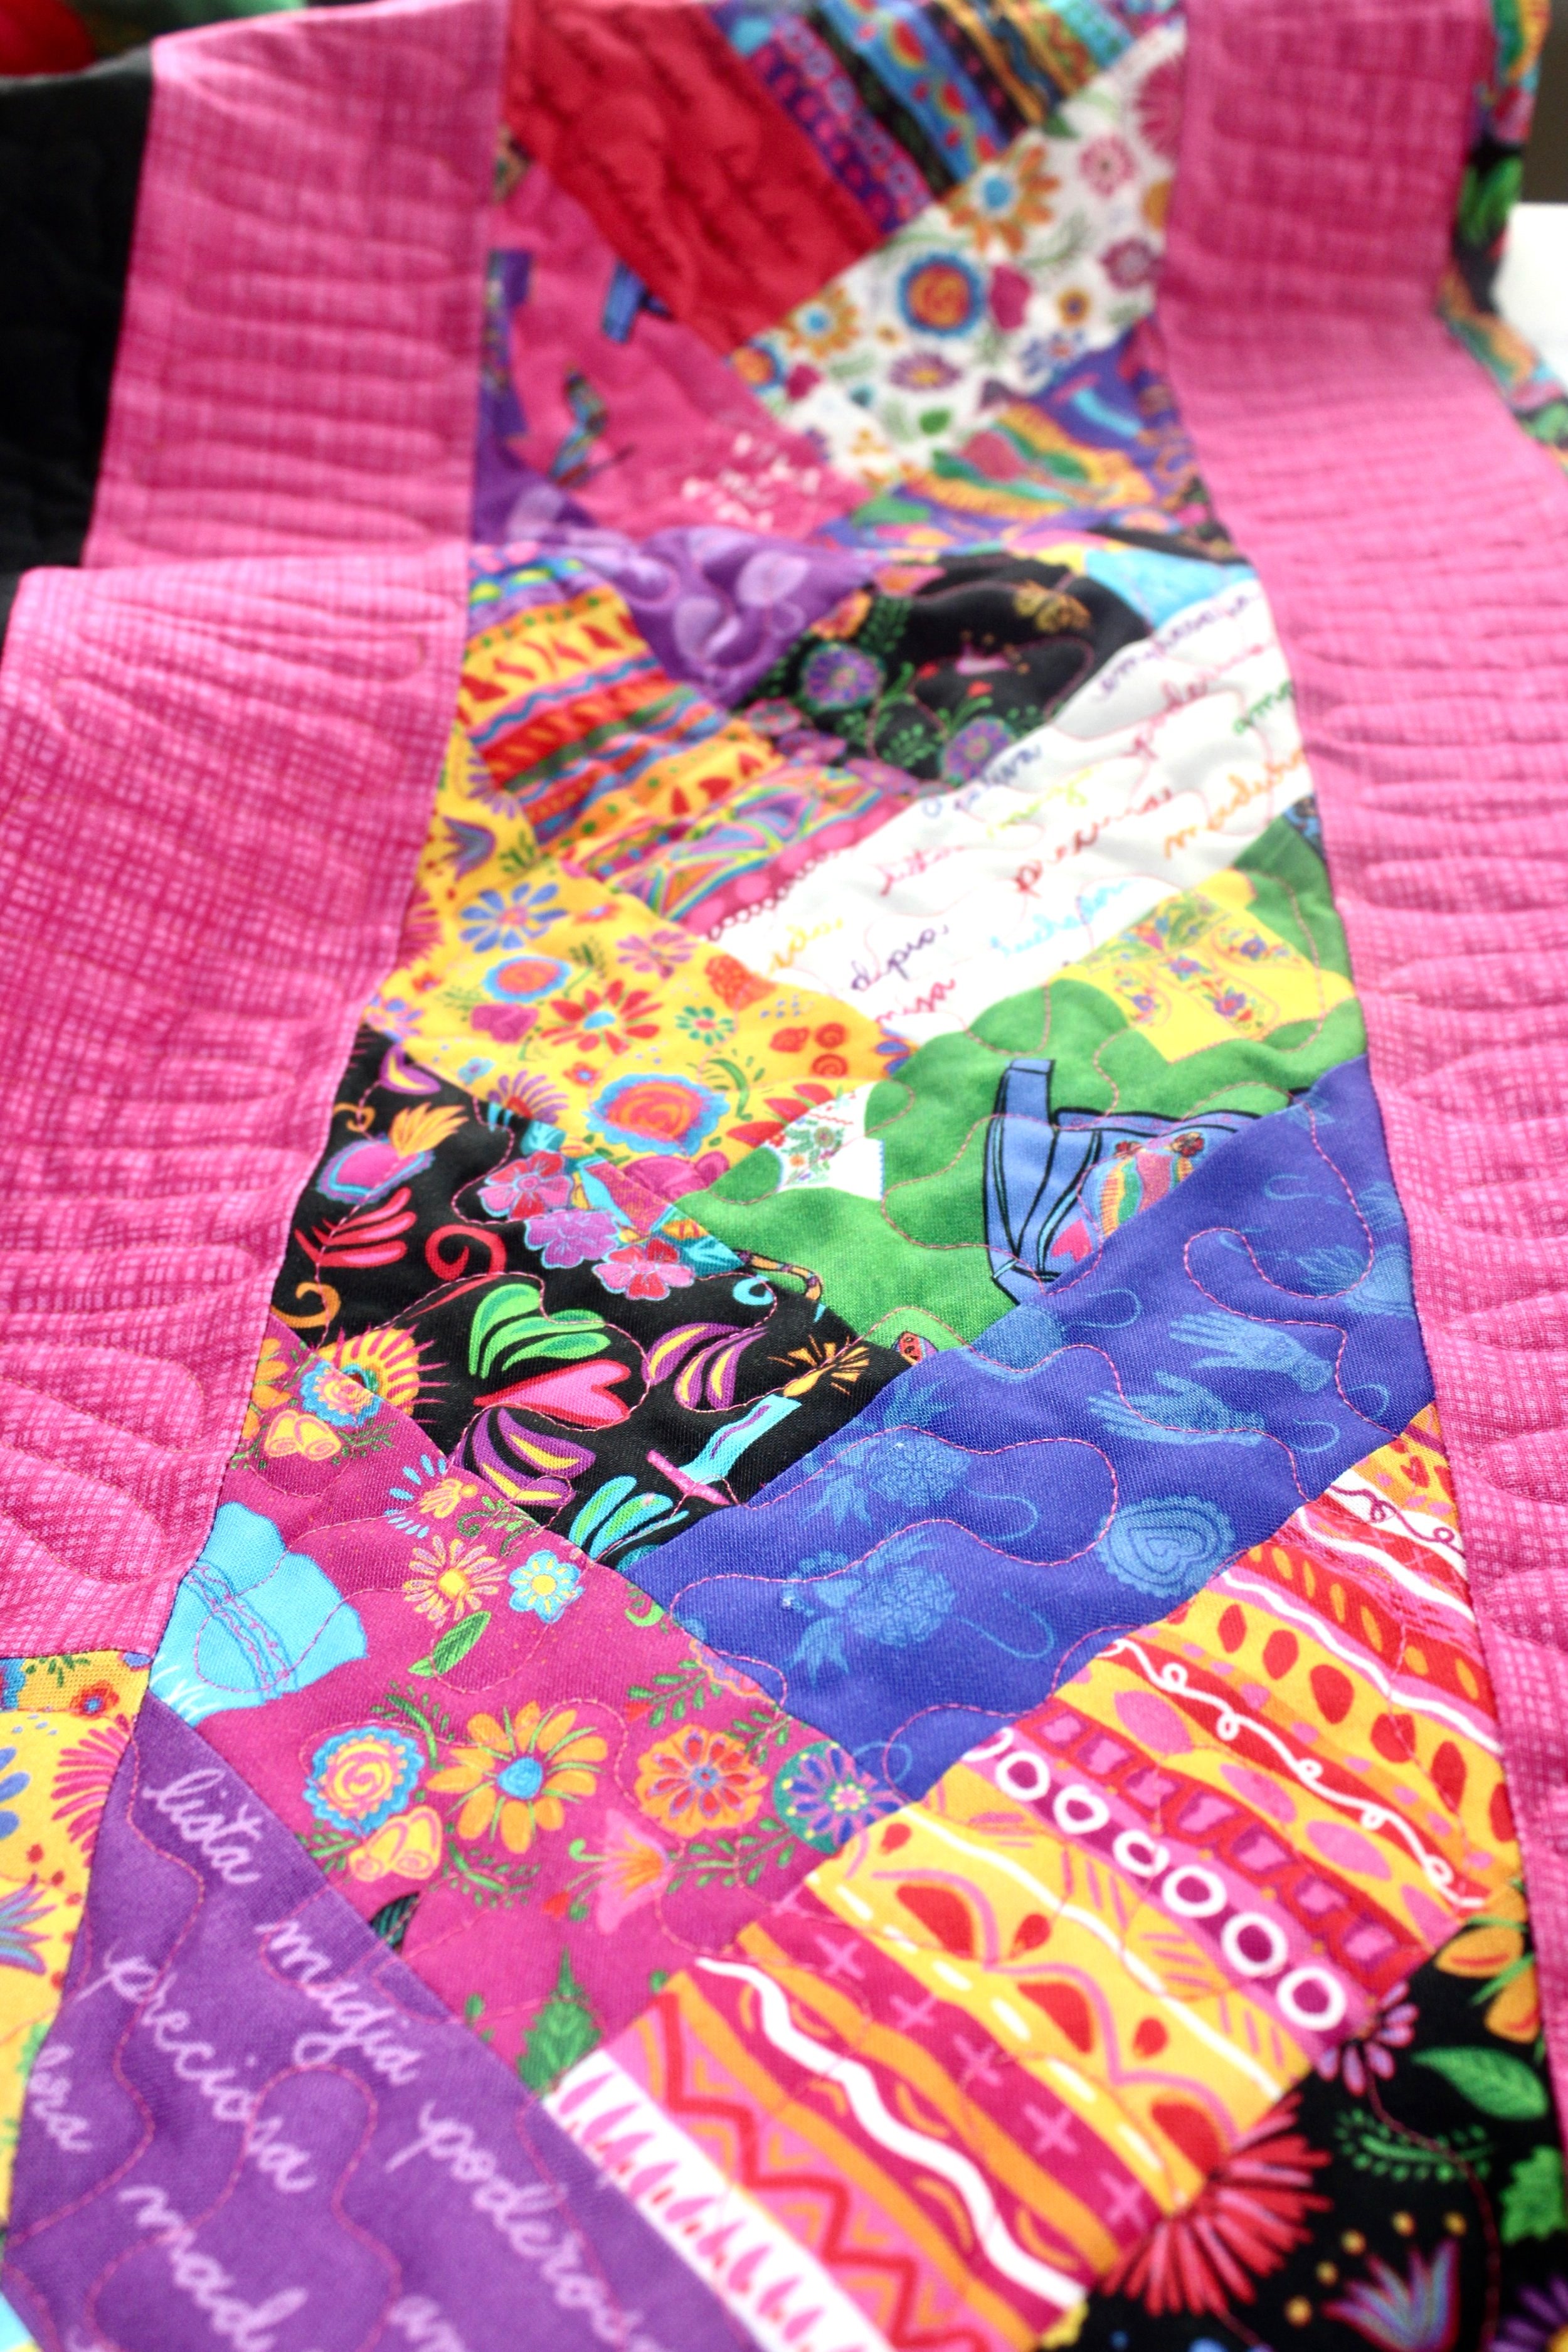
The Prairie Braid (also called the French Braid, Friendship Braid, or Scrappy Braid) is a great option for quilt borders. Make them as long and wide as you want. To make this wider than the 6 1/2” width I made here, just cut your strips longer. To make it narrower, cut the strips shorter.
Check out my detailed video tutorial here along with a simple step-by-step tutorial below.

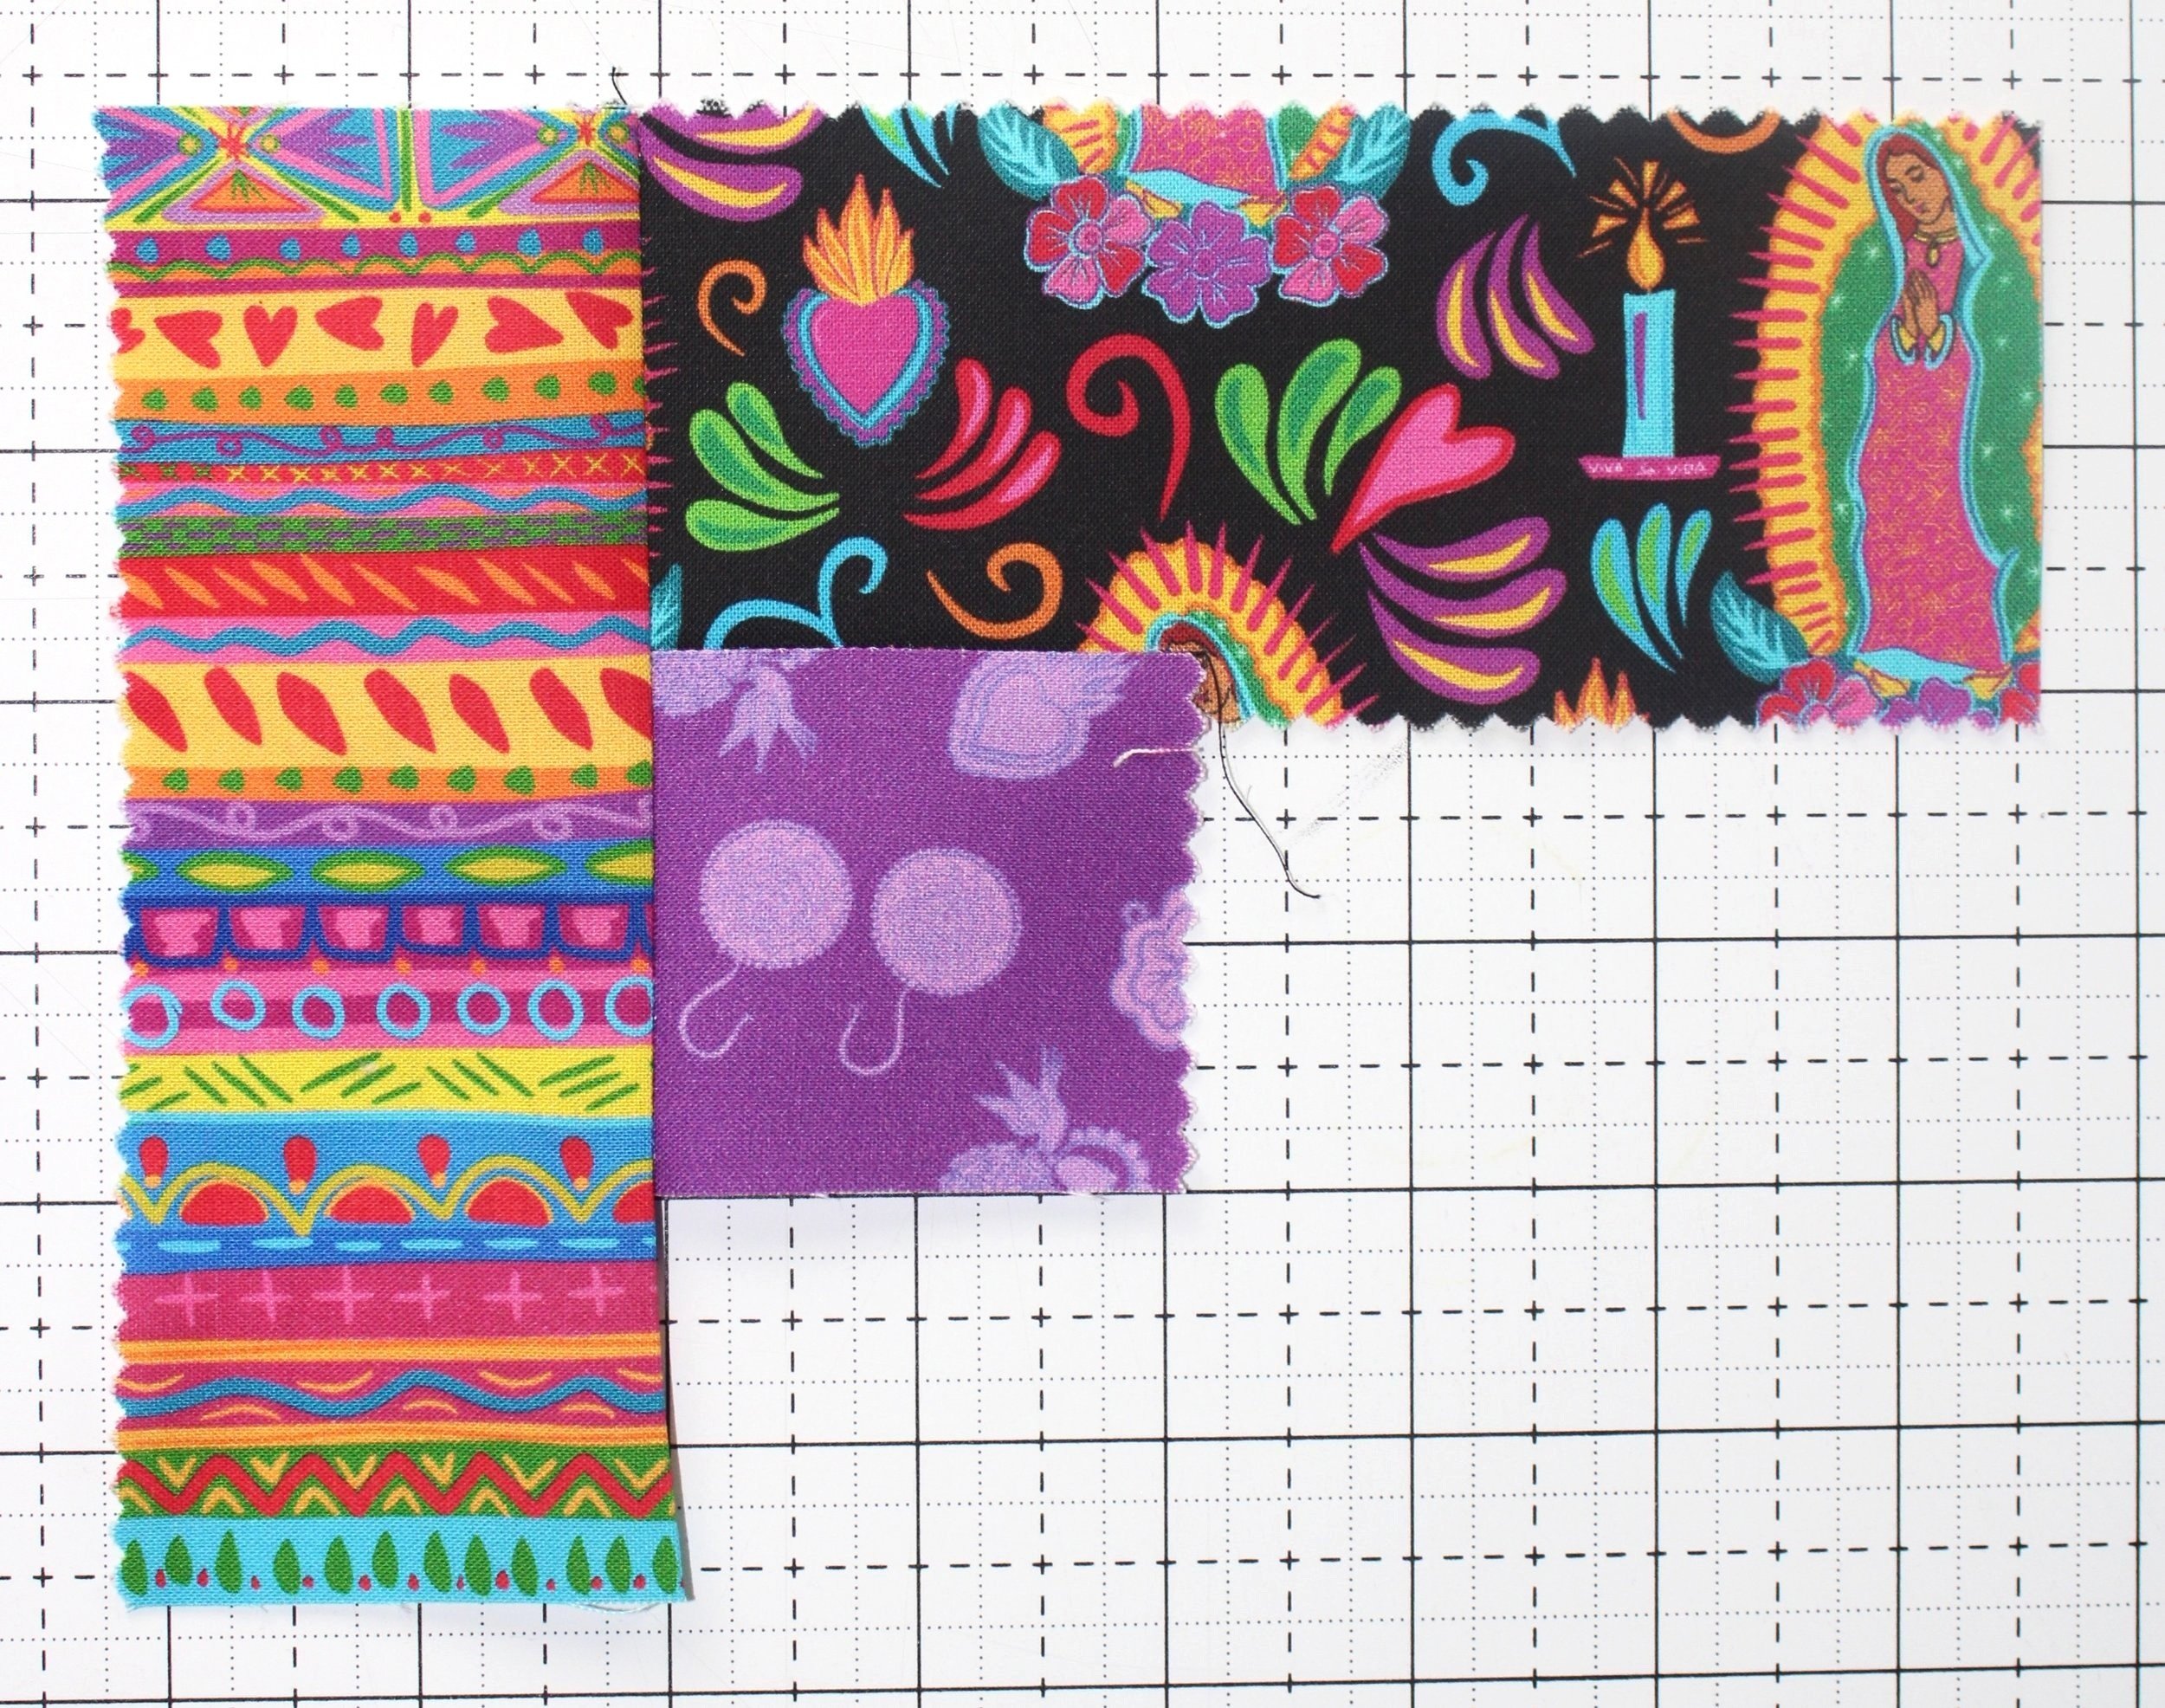
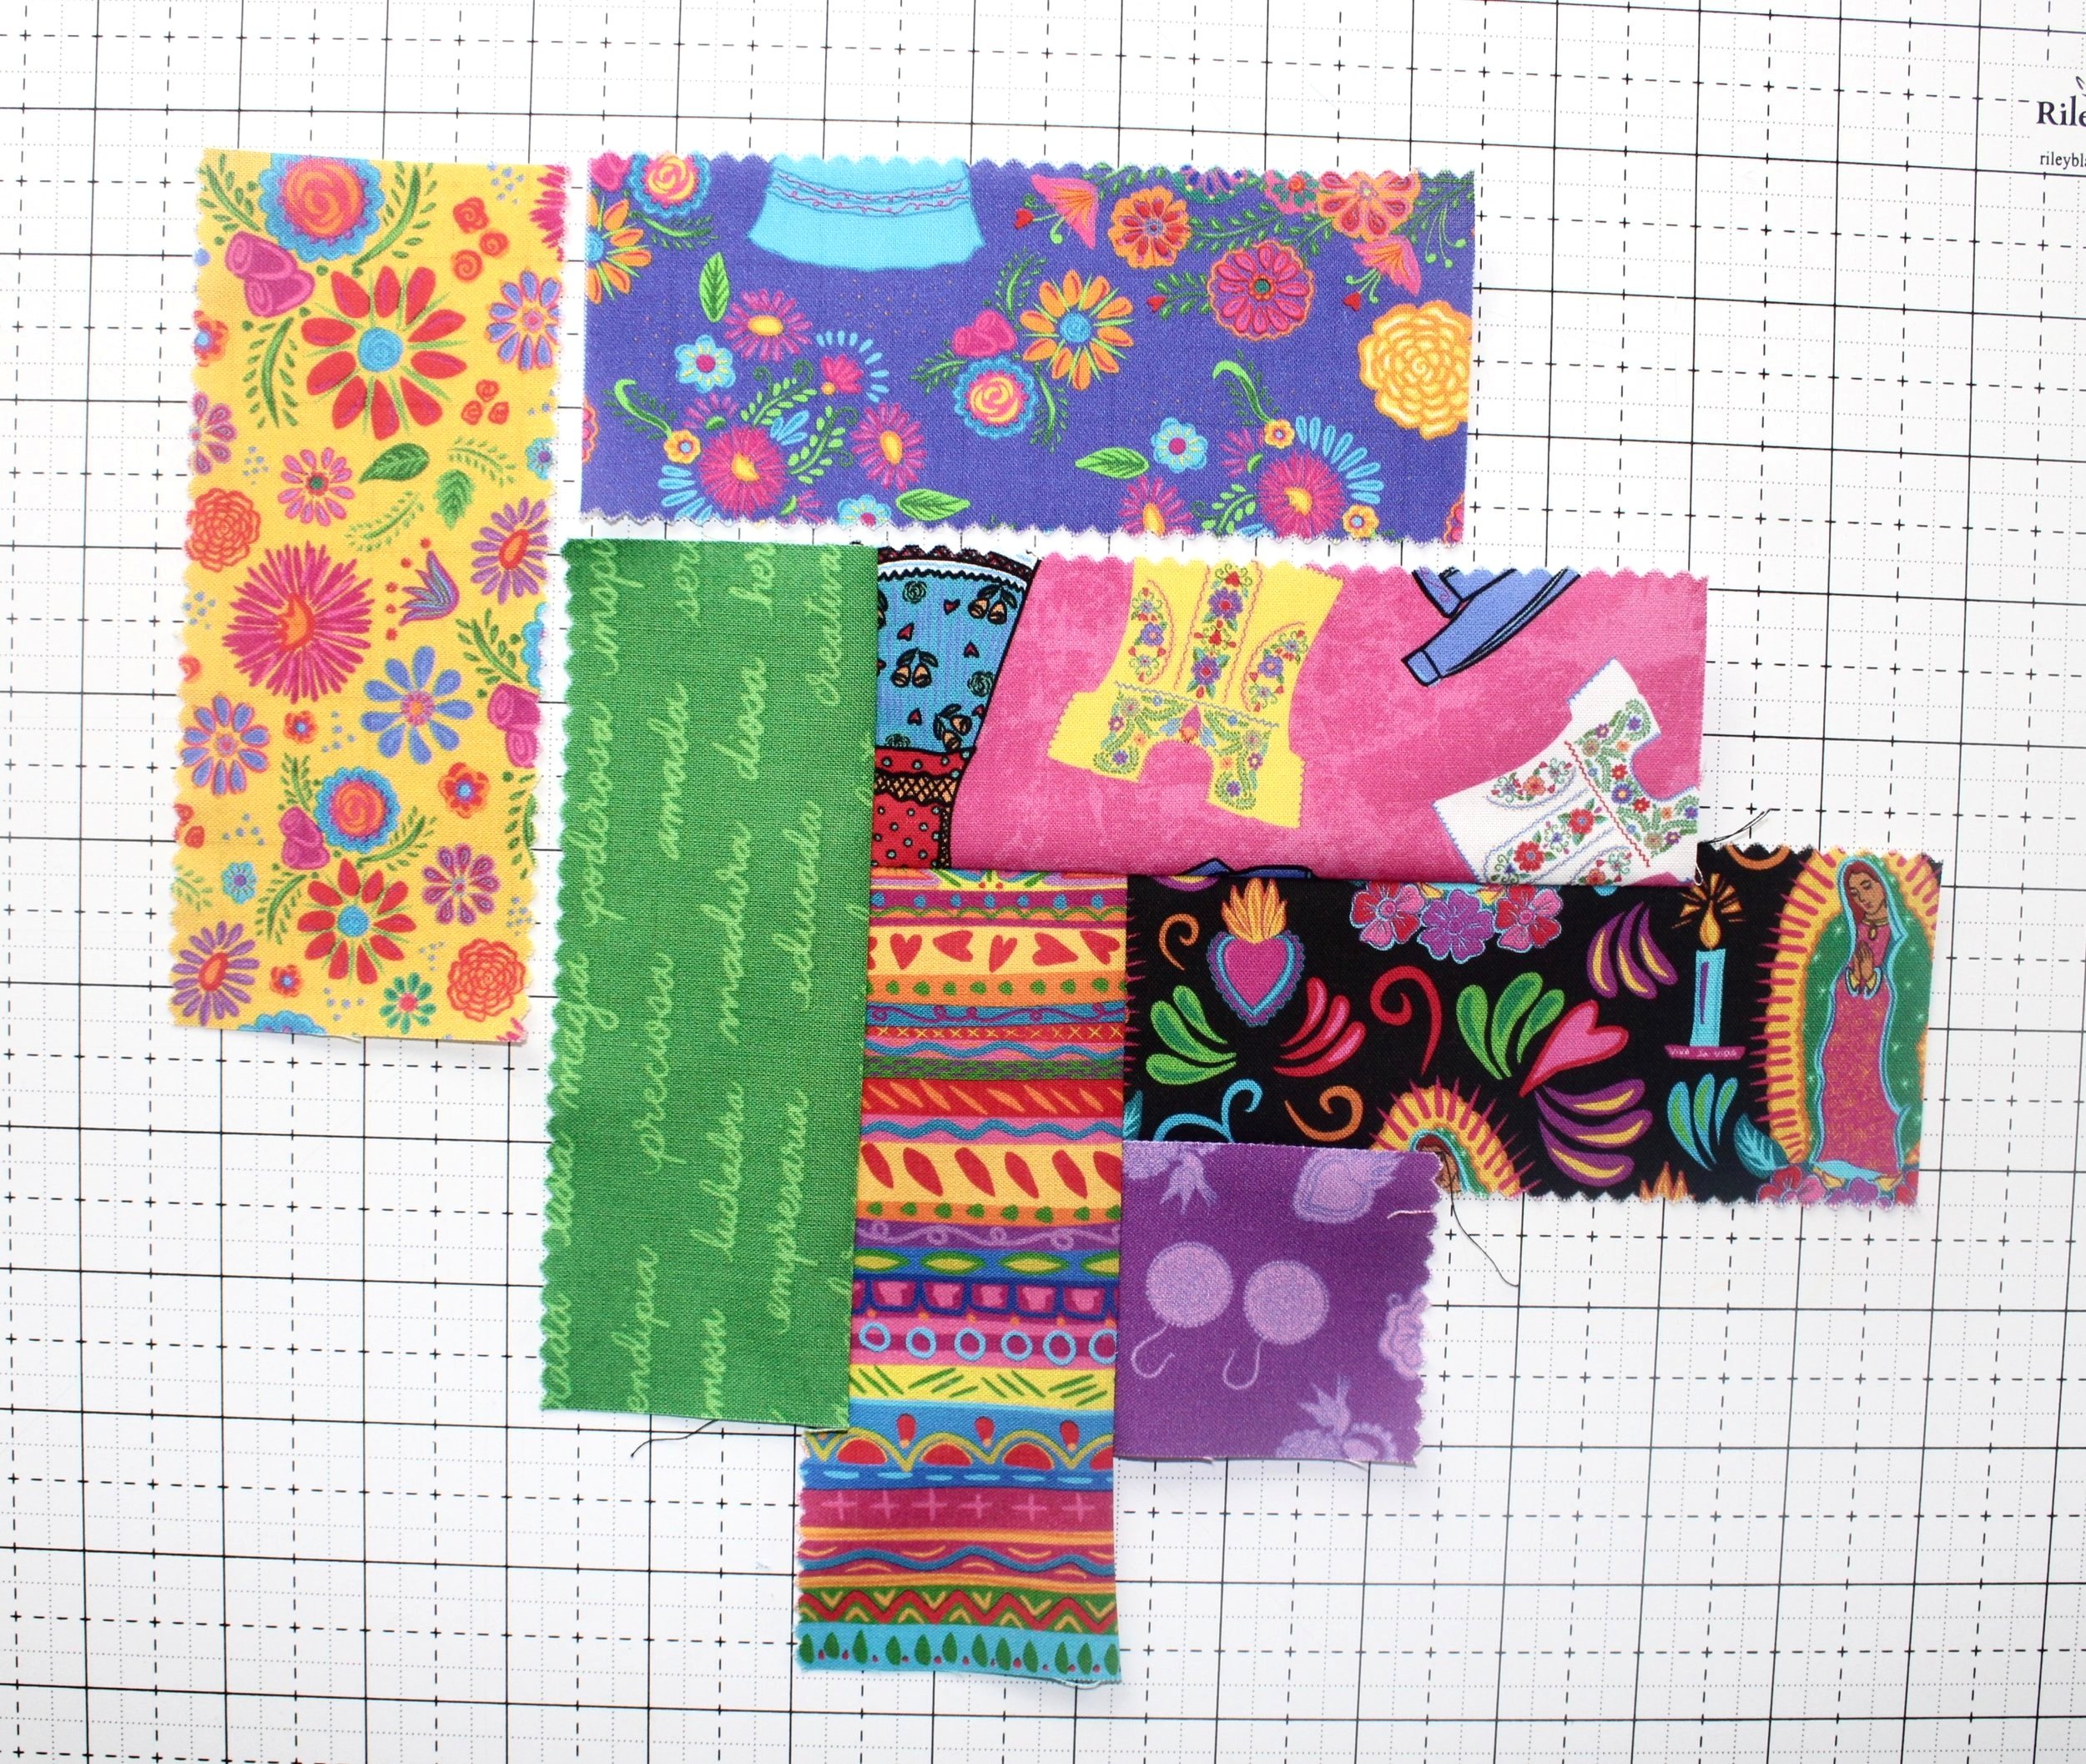
For the Prairie Braid quilt border, you will need a jelly roll (also called a rolie polie).

Step 1
Cut a 2 1/2” square to use as your “starter square.” Cut a stack of 2 1/2” x 6” strips. A jelly roll (also called a rolie polie) is great for this because the strips are already 2 1/2” wide.

Step 2
Begin with a 2 1/2” square and two 6” strips. Arrange them as shown.

Step 3
Stitch the 2 1/2” square to one of the strips as shown.

Step 4
Press.

Step 5
Stitch the remaining 6” strip as shown.
Step 6
Press open.

Step 7
Repeat the process — adding two more 6” strips. Press open each time you add a strip.
Step 8
Continue adding strips until you have reached the length you need. Carefully trim the points off each side so the strip measures 6 1/2” wide.
Keep going like this until you get the length you need. You will be trimming off the ends, so keep that in mind when you are figuring out your length. You can make one super long strip and then cut the sides, top and bottom from that, or you can sew one side at a time. I prefer to sew one side at a time because it is easier to manage when you are trimming the sides.
After you have the length you want, trim the sides to 6 1/2” wide. You’ll see in my video that I like to fold the strip over on itself to make trimming easier.
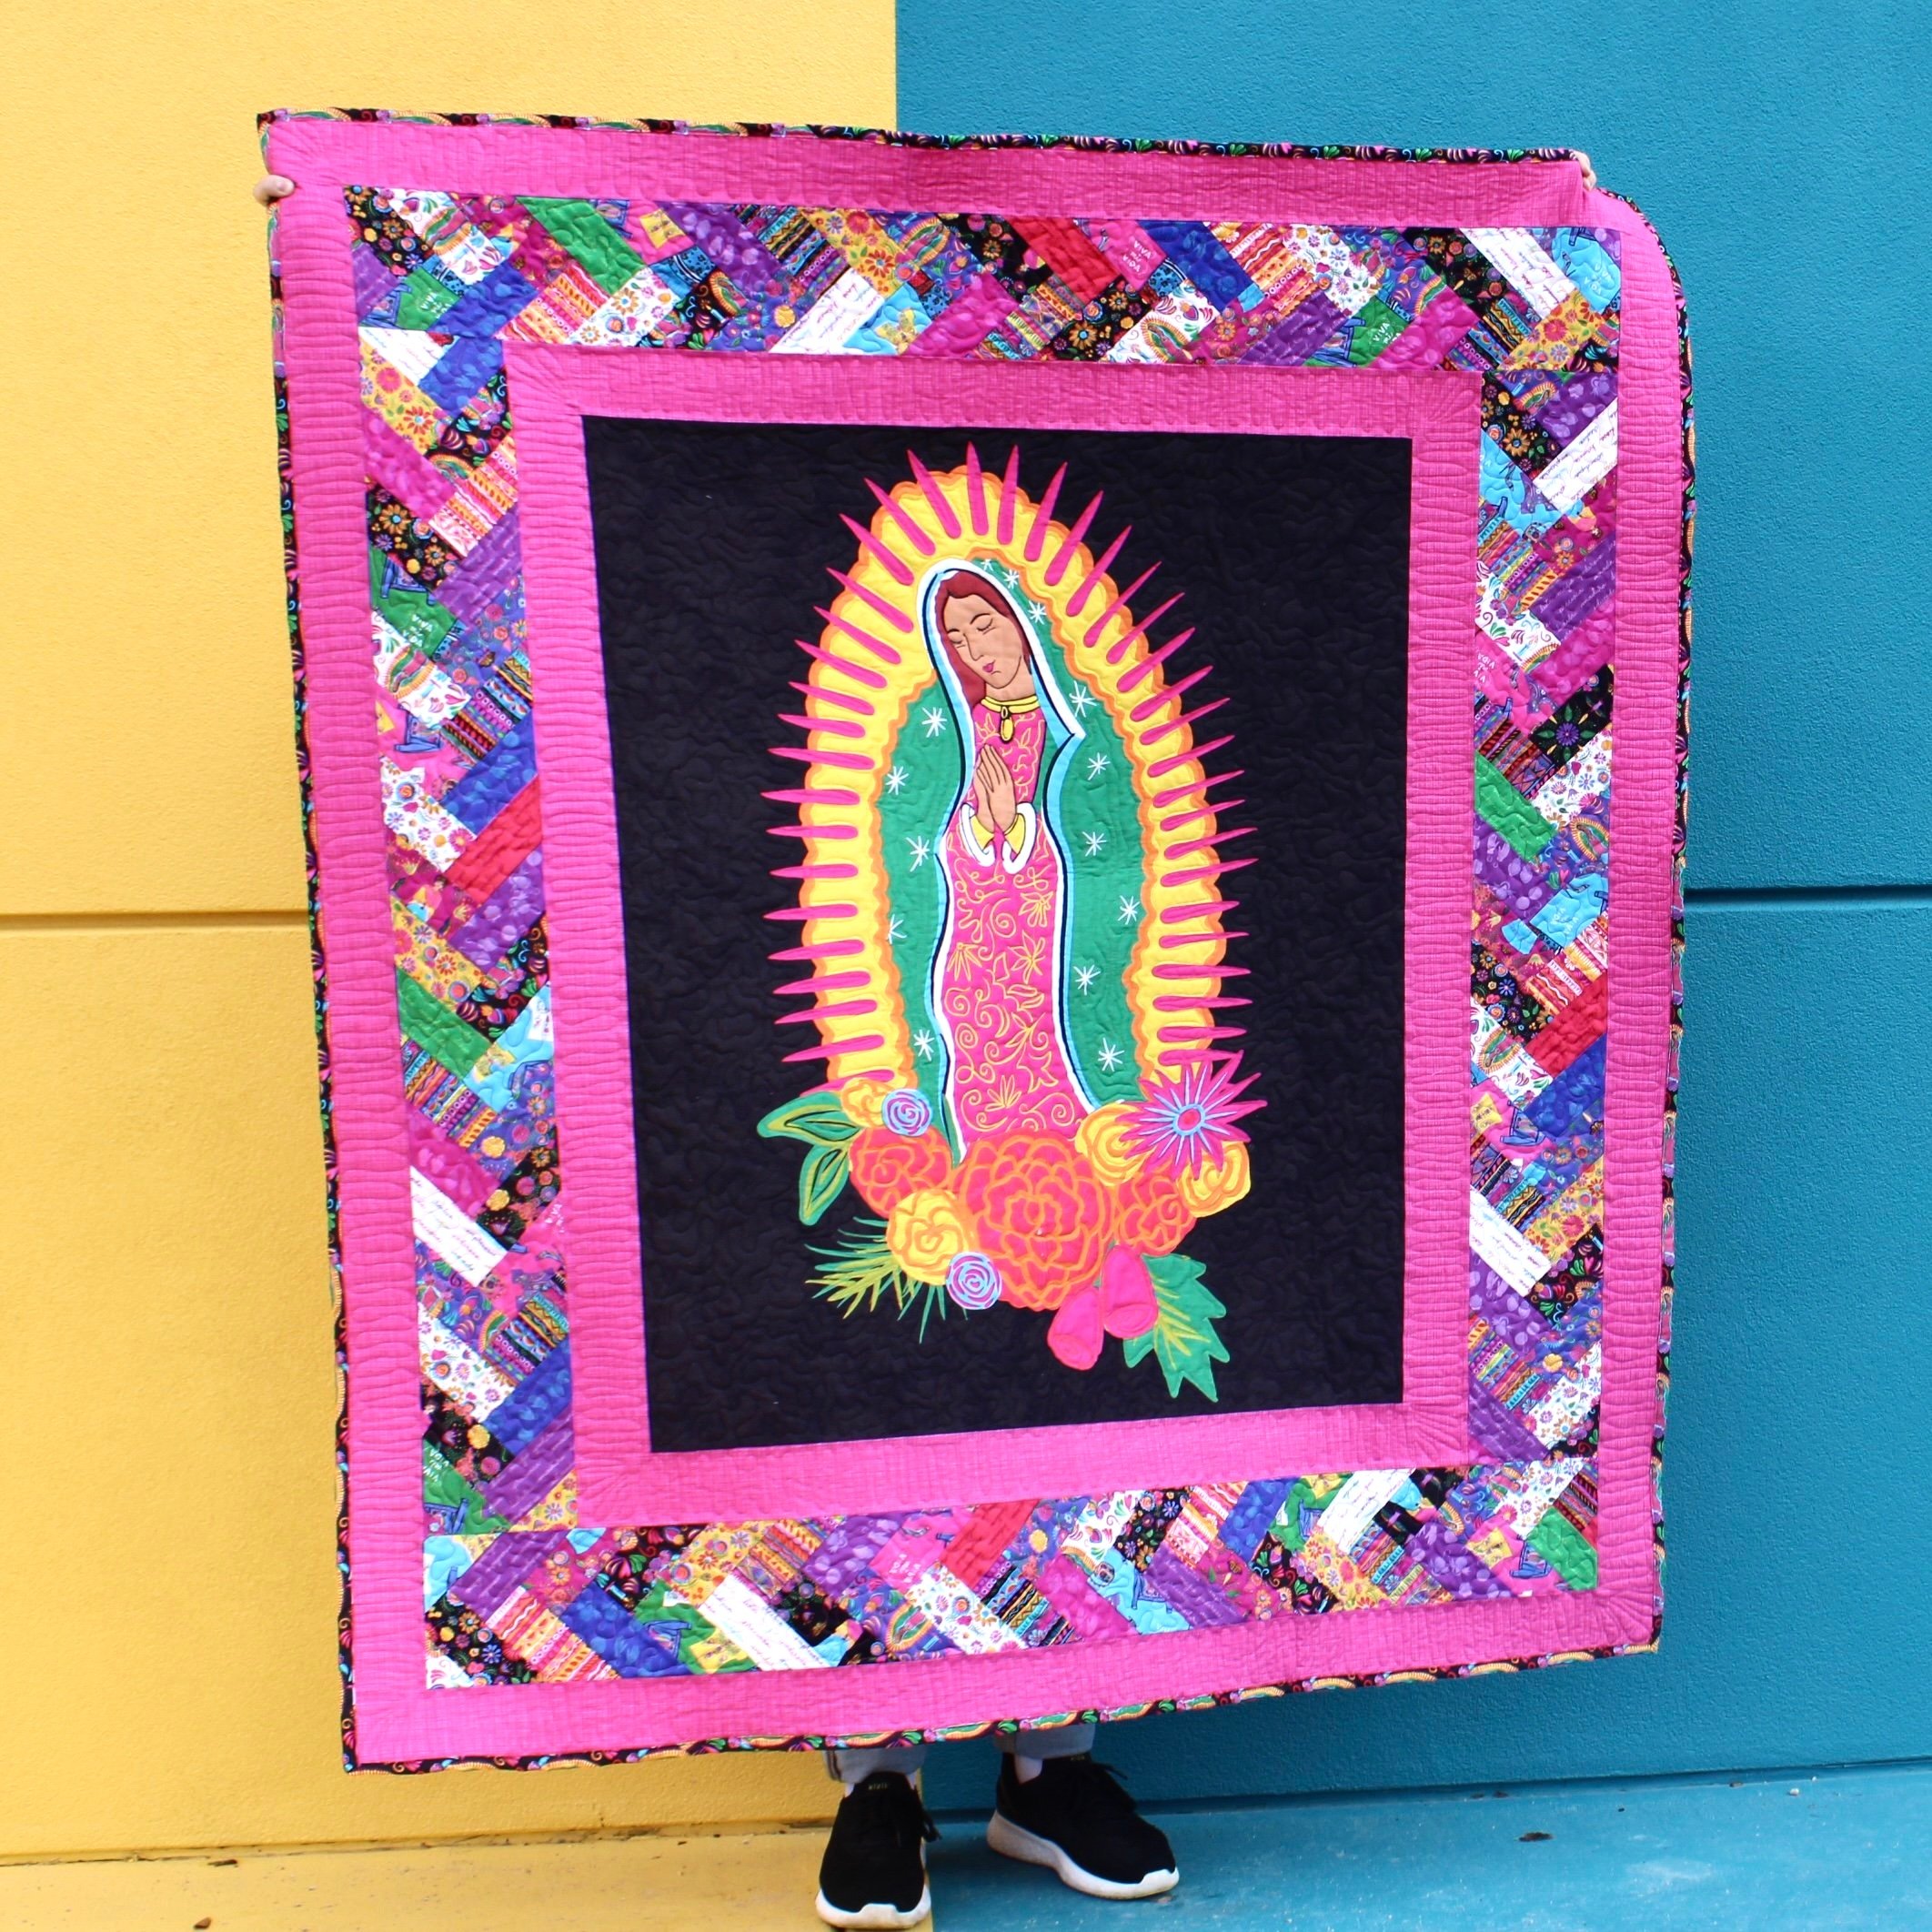
After the sides and ends are trimmed, add the strip to your quilt to create a fun border. I added a 3 1/2” strip (or 3” finished) of Super Pink Texture + the Prairie Braid Border + another 3 1/2” strip of Super Pink Texture.

The finished border is loaded with color and movement thanks to the unique braid design and vibrant fabric selection — so fun!

I love how it pairs with the Riley Blake Designs Super Pink Texture Basic. Wowza!

I decided to do free motion quilting around the Guadalupe medallion. I didn’t like the idea of stitching straight lines through her and I felt the free motion quilting would help emphasize the color and features of this beautiful artwork.

I stuck with a simple free motion meandering stitch for the black backdrop and the Prairie Braid Border. The Super Pink borders got an easy squiggly line treatment. For the quilt binding, I used the lovely Guadalupe print. I loved using this print in my Our Lady Paper Pieced Zipper Pouch, and was happy to bring it into this Guadalupe panel quilt.

Isn’t she gorgeous?! I love everything about this panel — the beautiful Our Lady of Guadalupe, the bright colors, and the bold black backdrop. Please share your versions of the Prairie Braid Border by tagging me on Instagram @bayhillstudio, and feel free to reach out with any questions or comments.