Our Lady Zipper Pouch Tutorial
You all know I am always looking for gift ideas for my teens and young adult kids, and who doesn’t love and need a zipper pouch in their life? I took the classic zipper pouch and bumped it up a notch with this fun foundation paper pieced version.

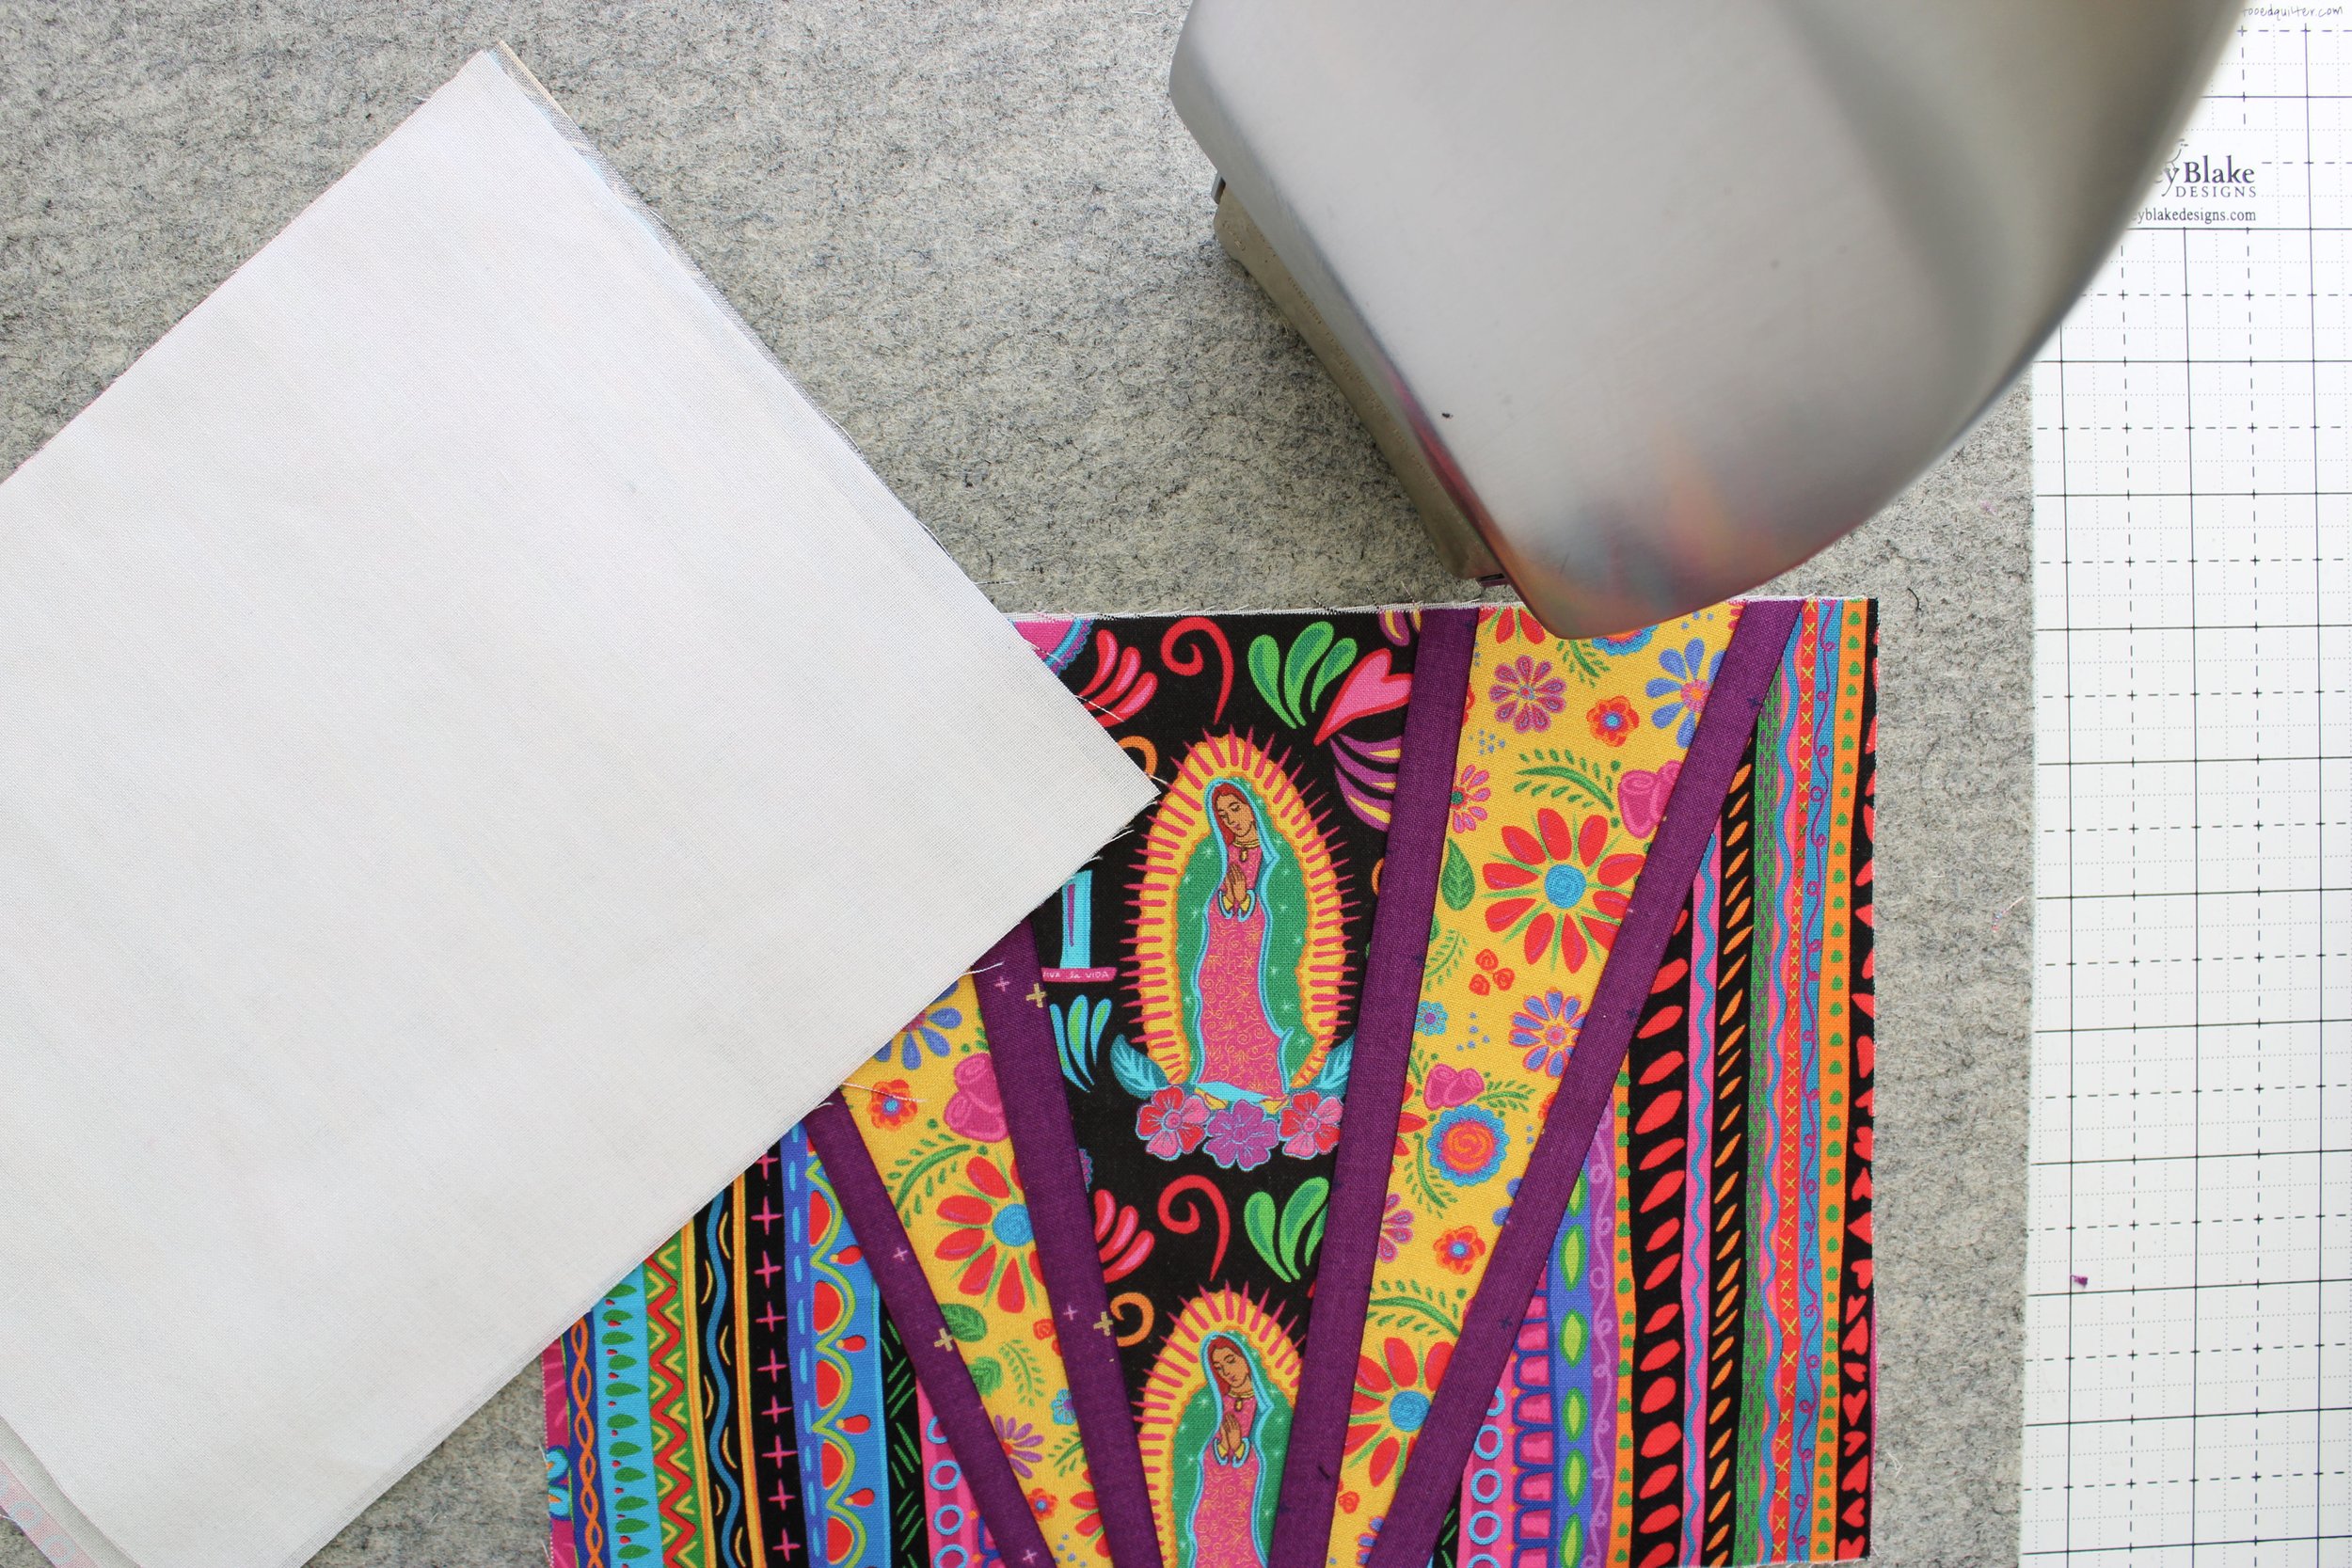
For my zipper pouches, I used this gorgeous fabric from the Eleanor collection designed by Crafty Chica for Riley Blake Designs. The focal point at the center of the pouch is the beautiful Our Lady of Guadalupe print.
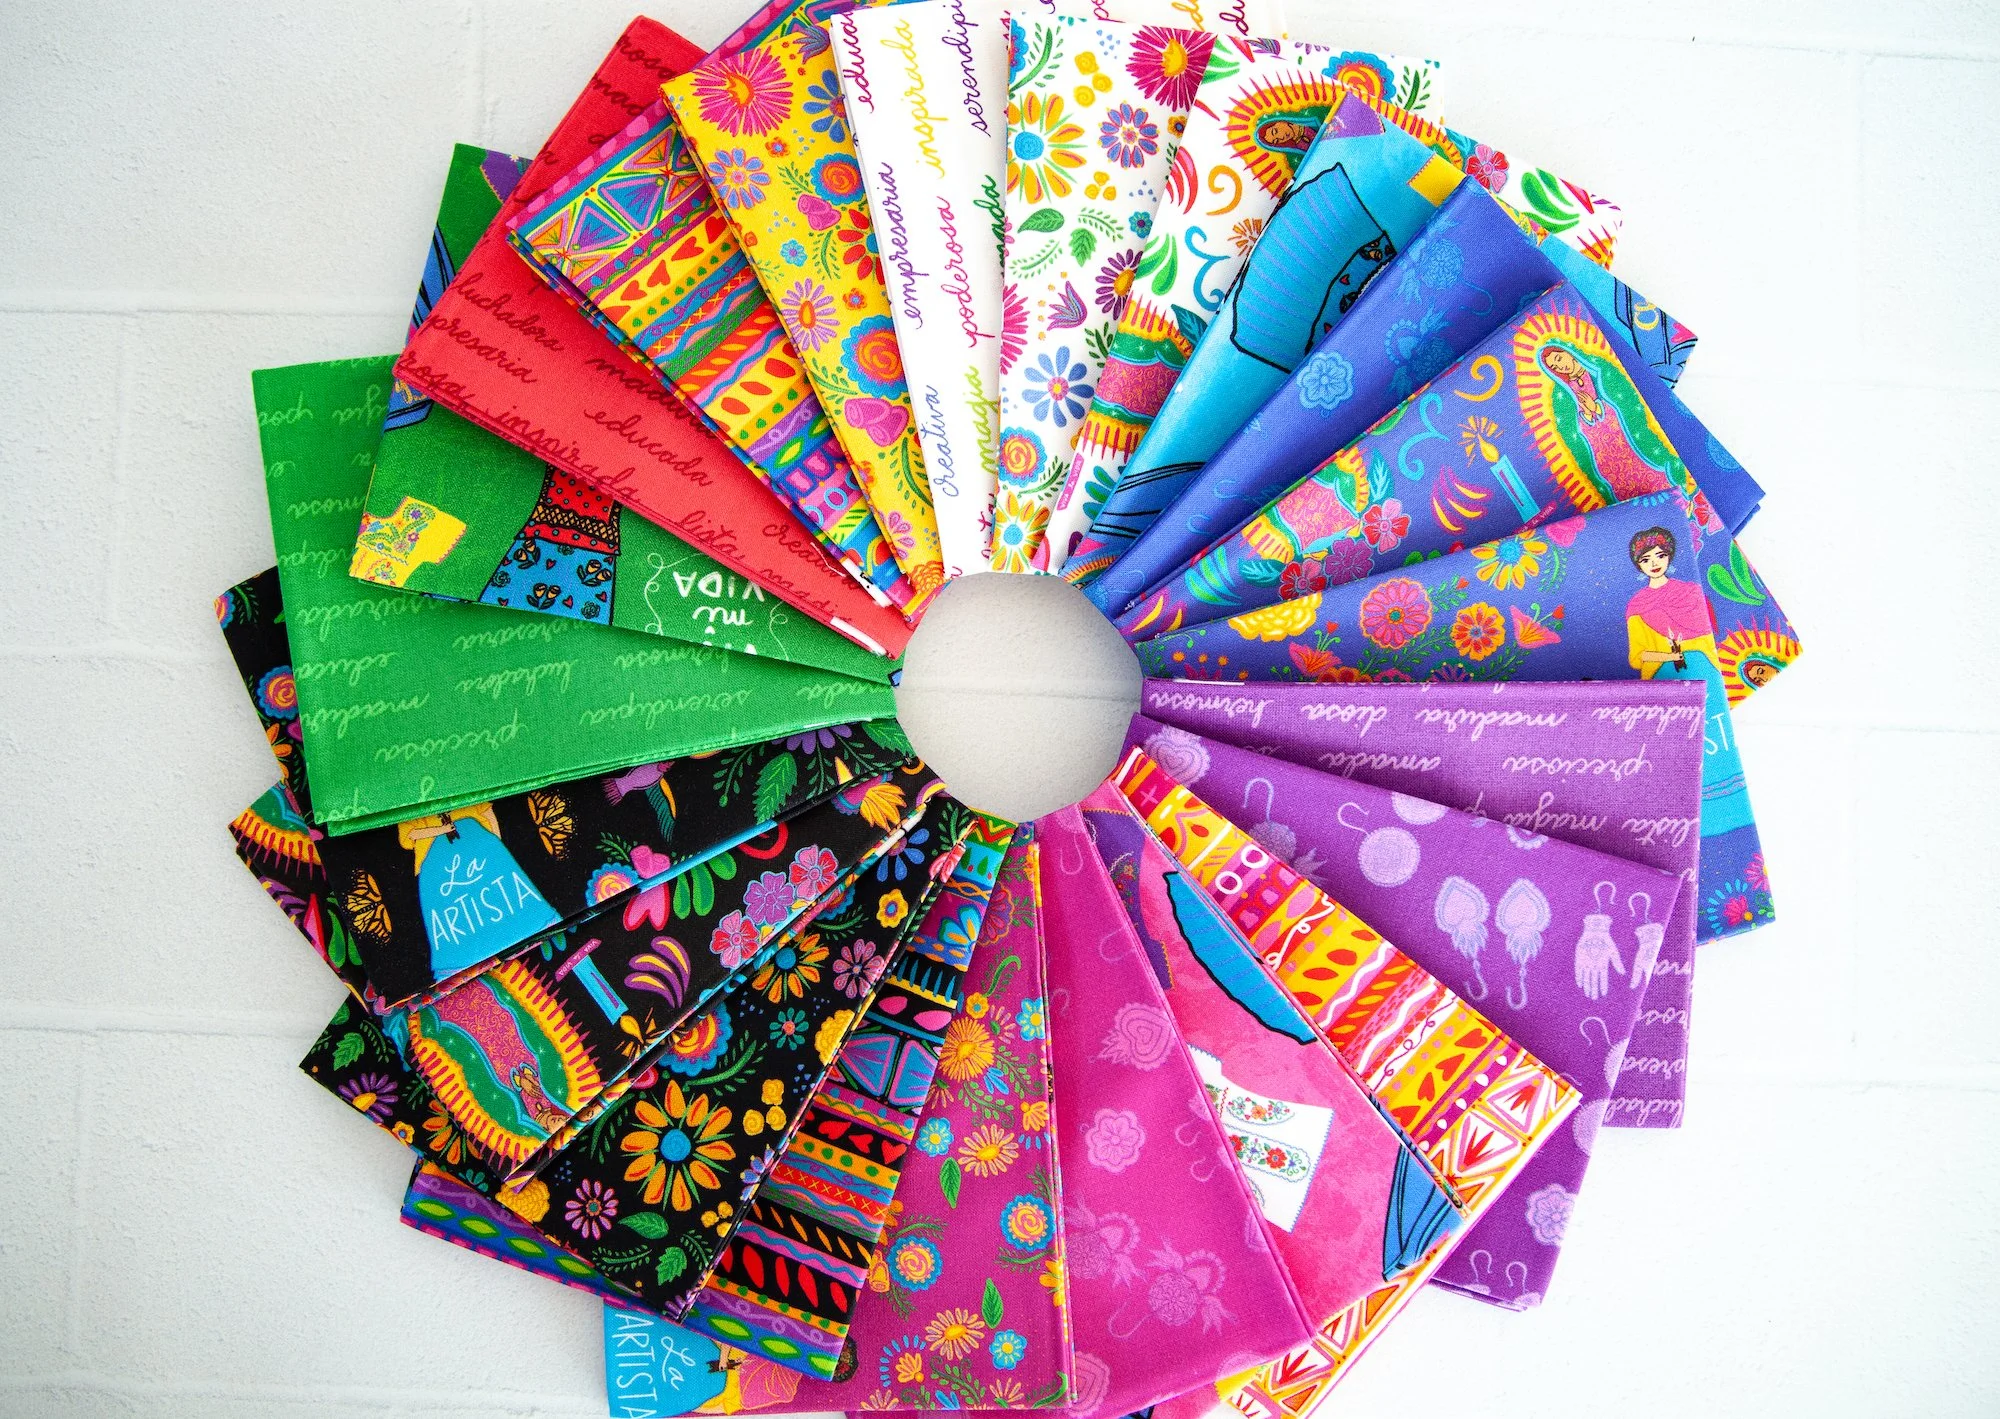
Here is a look at the entire Eleanor collection. Don’t you just love the super saturated color palette? I am loving the bold colors and floral and geometric motifs in this fabric line.


To help each fabric pop, I accented my zipper pouches with a deep purple print from the Sparkler collection designed by Melissa Mortenson for Riley Blake Designs. The little bit of gold sparkle is perfect!

Once you make one of these, you won’t be able to stop! They come together quickly and have tons of “wow factor.” Whip up a stack — one for yourself and a handful to give away.

Here is a look at the white floral version. I used the Cobalt Our Lady of Guadalupe for the center fabric, paired with the Fuschia stripe and White Floral.

And here is a look at the second version featuring the Black Our Lady of Guadalupe print paired with the Yellow Floral and Black Stripe. They are all my favorite!

I used the Purple Sparkler fabric for the lining, which adds a fun contrast.

Doesn’t this look cool? A fun bonus feature is that the large Our Lady Template is the perfect size for my Quilted Hydro Flask Holder! The only change I made when assembling this version is that instead of regular quilt batting, I used fusible fleece. I didn’t want to quilt over my paper piecing, and the fusible fleece was able to add the structure and stability I was looking for. In addition, I added fusible interfacing (Pellon SF101) to my lining pieces for additional structure.


To make the SMALL Our Lady Zipper Pouch you will need:
5” x 7 1/2” Our Lady Template
5” x 7 1/2” fabric for Zipper Pouch Back
2 pieces 5” x 7 1/2” fabric for Zipper Pouch Lining
2 pieces 5” x 7 1/2” Fusible Interfacing (I use Pellon SF101)
2 - 1 1/2” x 4” strips for Fabric Tabs
8” or longer polyester zipper
Our Lady Foundation Paper Piecing Templates (if you want to skip the paper piecing, cut another 5” x 7 1/2” piece for outer fabric)
Fabric scraps for paper piecing the zipper pouch front
For MEDIUM Zipper Pouch:
7” x 9 1/2” Our Lady Template
7” x 9 1/2” fabric for Zipper Pouch Back
2 pieces 7” x 9 1/2” fabric for Zipper Pouch Lining
2 pieces 7” x 9 1/2” Fusible Interfacing (I use Pellon SF101)
2 - 1 1/2” x 4” strips for Fabric Tabs
10” or longer polyester zipper
Our Lady Foundation Paper Piecing Templates (if you want to skip the paper piecing, cut another 7” x 9 1/2” piece for outer fabric)
Fabric scraps for paper piecing the zipper pouch frontFor Large Zipper Pouch:
For LARGE Zipper Pouch:
8 1/2” x 12 1/2” Our Lady Template
8 1/2” x 12 1/2” fabric for Zipper Pouch Back
2 pieces 8 1/2” x 12 1/2” fabric for Zipper Pouch Lining
2 pieces 8 1/2” x 12 1/2” Fusible Interfacing (I use Pellon SF101)
2 - 1 1/2” x 4” strips for Fabric Tabs
13” or longer polyester zipper
Fabric scraps for paper piecing the zipper pouch front
**NOTE before we begin — The foundation paper piecing templates for the small, medium and large zipper pouch covers are available for sale in my shop. If you want to make the zipper pouch without the templates, you can still follow the tutorial below, substituting a piece of fabric (see measurements above) the same size as your zipper pouch back and lining pieces.
If you are a visual learner, watch this video where I walk you through the steps of paper piecing and zipper pouch construction from start to finish.

Step 1
Begin by using my Our Lady Foundation Paper Piecing Template to piece the zipper pouch top. I am demonstrating with the Medium size pouch, but the instructions are identical for each size.
Step 2
Press the fusible interfacing to the wrong side of the outer pieces. Set the outer pieces aside for now.

Step 3
Take your 1 1/2” x 4” fabric tab strips and press them in half. Then press 1/4” on each short end.

Step 4
Carefully cut the stopper off the end of your zipper.

Step 5
Place the trimmed zipper end on the inside of the fabric tab and enclose it.

Step 6
Top stitch.

Step 7
You want the fabric tab to come in about 1” from the edge of the pouch. You can use a ruler to line up the tab at the 1” mark. At the same time, align the edge of the zipper tape with the top edge of the zipper pouch fabric. Repeat this on the other side of the zipper, except this time, open the zipper before you snip the ends so you don’t lose the zipper pull. **Make sure the right side of the zipper is facing the right side of the zipper pouch fabric.

Step 8
Using a zipper foot, stitch along the zipper tape. When your presser foot approaches the zipper pull, lift the presser foot and open/close the zipper pull to move it out of the way and continue stitching.
Next, align a lining piece so it lines up with the zipper pouch outer fabric, right sides facing each other. Stitch along the same zipper tape you sewed in Step 7.

Step 9
Open fabric and press.

Step 10
Top stitch 1/8” to 1/4” from edge.

Step 11
Arrange the back outer zipper pouch fabric so it lines up with the remaining zipper tape edge. Stitch the same way you did in Step 8.

Step 12
Add your lining piece. The right side of this lining piece will be facing the right side of the first lining piece. Align it so the edges all match up with the other zipper pouch pieces. Stitch along the same line you stitched in Step 11.

Step 13
Open the fabric — the lining pieces will be on the same side, and the outer pieces will be on the other side. Press open.

Step 14
Top Stitch.

Step 15
OPEN your zipper. Arrange the pieces so the right sides of the outer fabric are facing and the right sides of the lining pieces are facing.

step 16
Pin our clip into place.

Step 17
IMPORTANT TIP: Make sure the fabric tabs are pinched to face the LINING fabric. Clip in place.

Step 18
Leaving a 3” - 4” opening at the bottom of the lining, stitch around the bag perimeter using a 1/4” seam allowance.

Step 19
Clip the corners, clipping near the thread but NOT through the thread.

Step 20
Reach through the opening in the lining and turn the bag right side out.

Step 21
Hand or machine stitch the lining opening closed.
Put the lining back into the zipper pouch and press the pouch so the edges are nice and crisp.
And that’s all there is to it! Easy to make and fun to give.

Mix and match any of your favorite fabrics or bust through your fabric stash to create a big stack of these little lovelies.

I hope you enjoyed this tutorial. Be sure to follow me on Instagram and YouTube for all of the latest projects and tutorials. Happy Quilting!