Easy! Around the Corner Strip Border Panel Quilt
I love panel quilts and the unique challenge they present each and every time I work with them — what kind of border will I add? And most importantly — how can I create a border that is quick and easy? I’m excited to share this Natures’s Window fabric panel and the “Around the Corner” border that came about at the very last minute.

Isn’t that a gorgeous fabric panel? This is the Bison panel from the Nature’s Window collection from Riley Blake Designs. I specifically chose this panel because it brought back a memory from my teenage years. In high school, I went with a group of girls from church to Catalina Island for a three day hiking adventure. We were there to do a five mile hike from the coast, to some preplanned destination on the other side of the island, where we camped, fished, explored, and finally hiked back.
A fun fact about Catalina Island is that it was used to film western movies back in the day, and buffalo were brought over from the mainland as “props”, I guess you would say. The film crews eventually left, but the buffalo stayed and are still there to this day.

Photo taken after our Catalina hike — exhausted, sunburned, and grateful to be alive!
On our return hike, I was with two friends, about a half mile ahead of the rest of the group. We hadn’t heard about the buffalo and knew nothing about them. As we reached a valley, we saw it was filled with a large herd of buffalo, and they were standing directly on our path. Well, they looked fuzzy and friendly to us, so we casually walked straight through the buffalo herd they were just feet away from us, singing songs as we walked. The buffalo stared at us, but left us alone.
After reporting the story to friends and family, we were surprised to learn that we were extremely lucky to be alive! So, here’s a big thanks to the Catalina buffalo herd for leaving three silly girls alone that summer day in 1987.
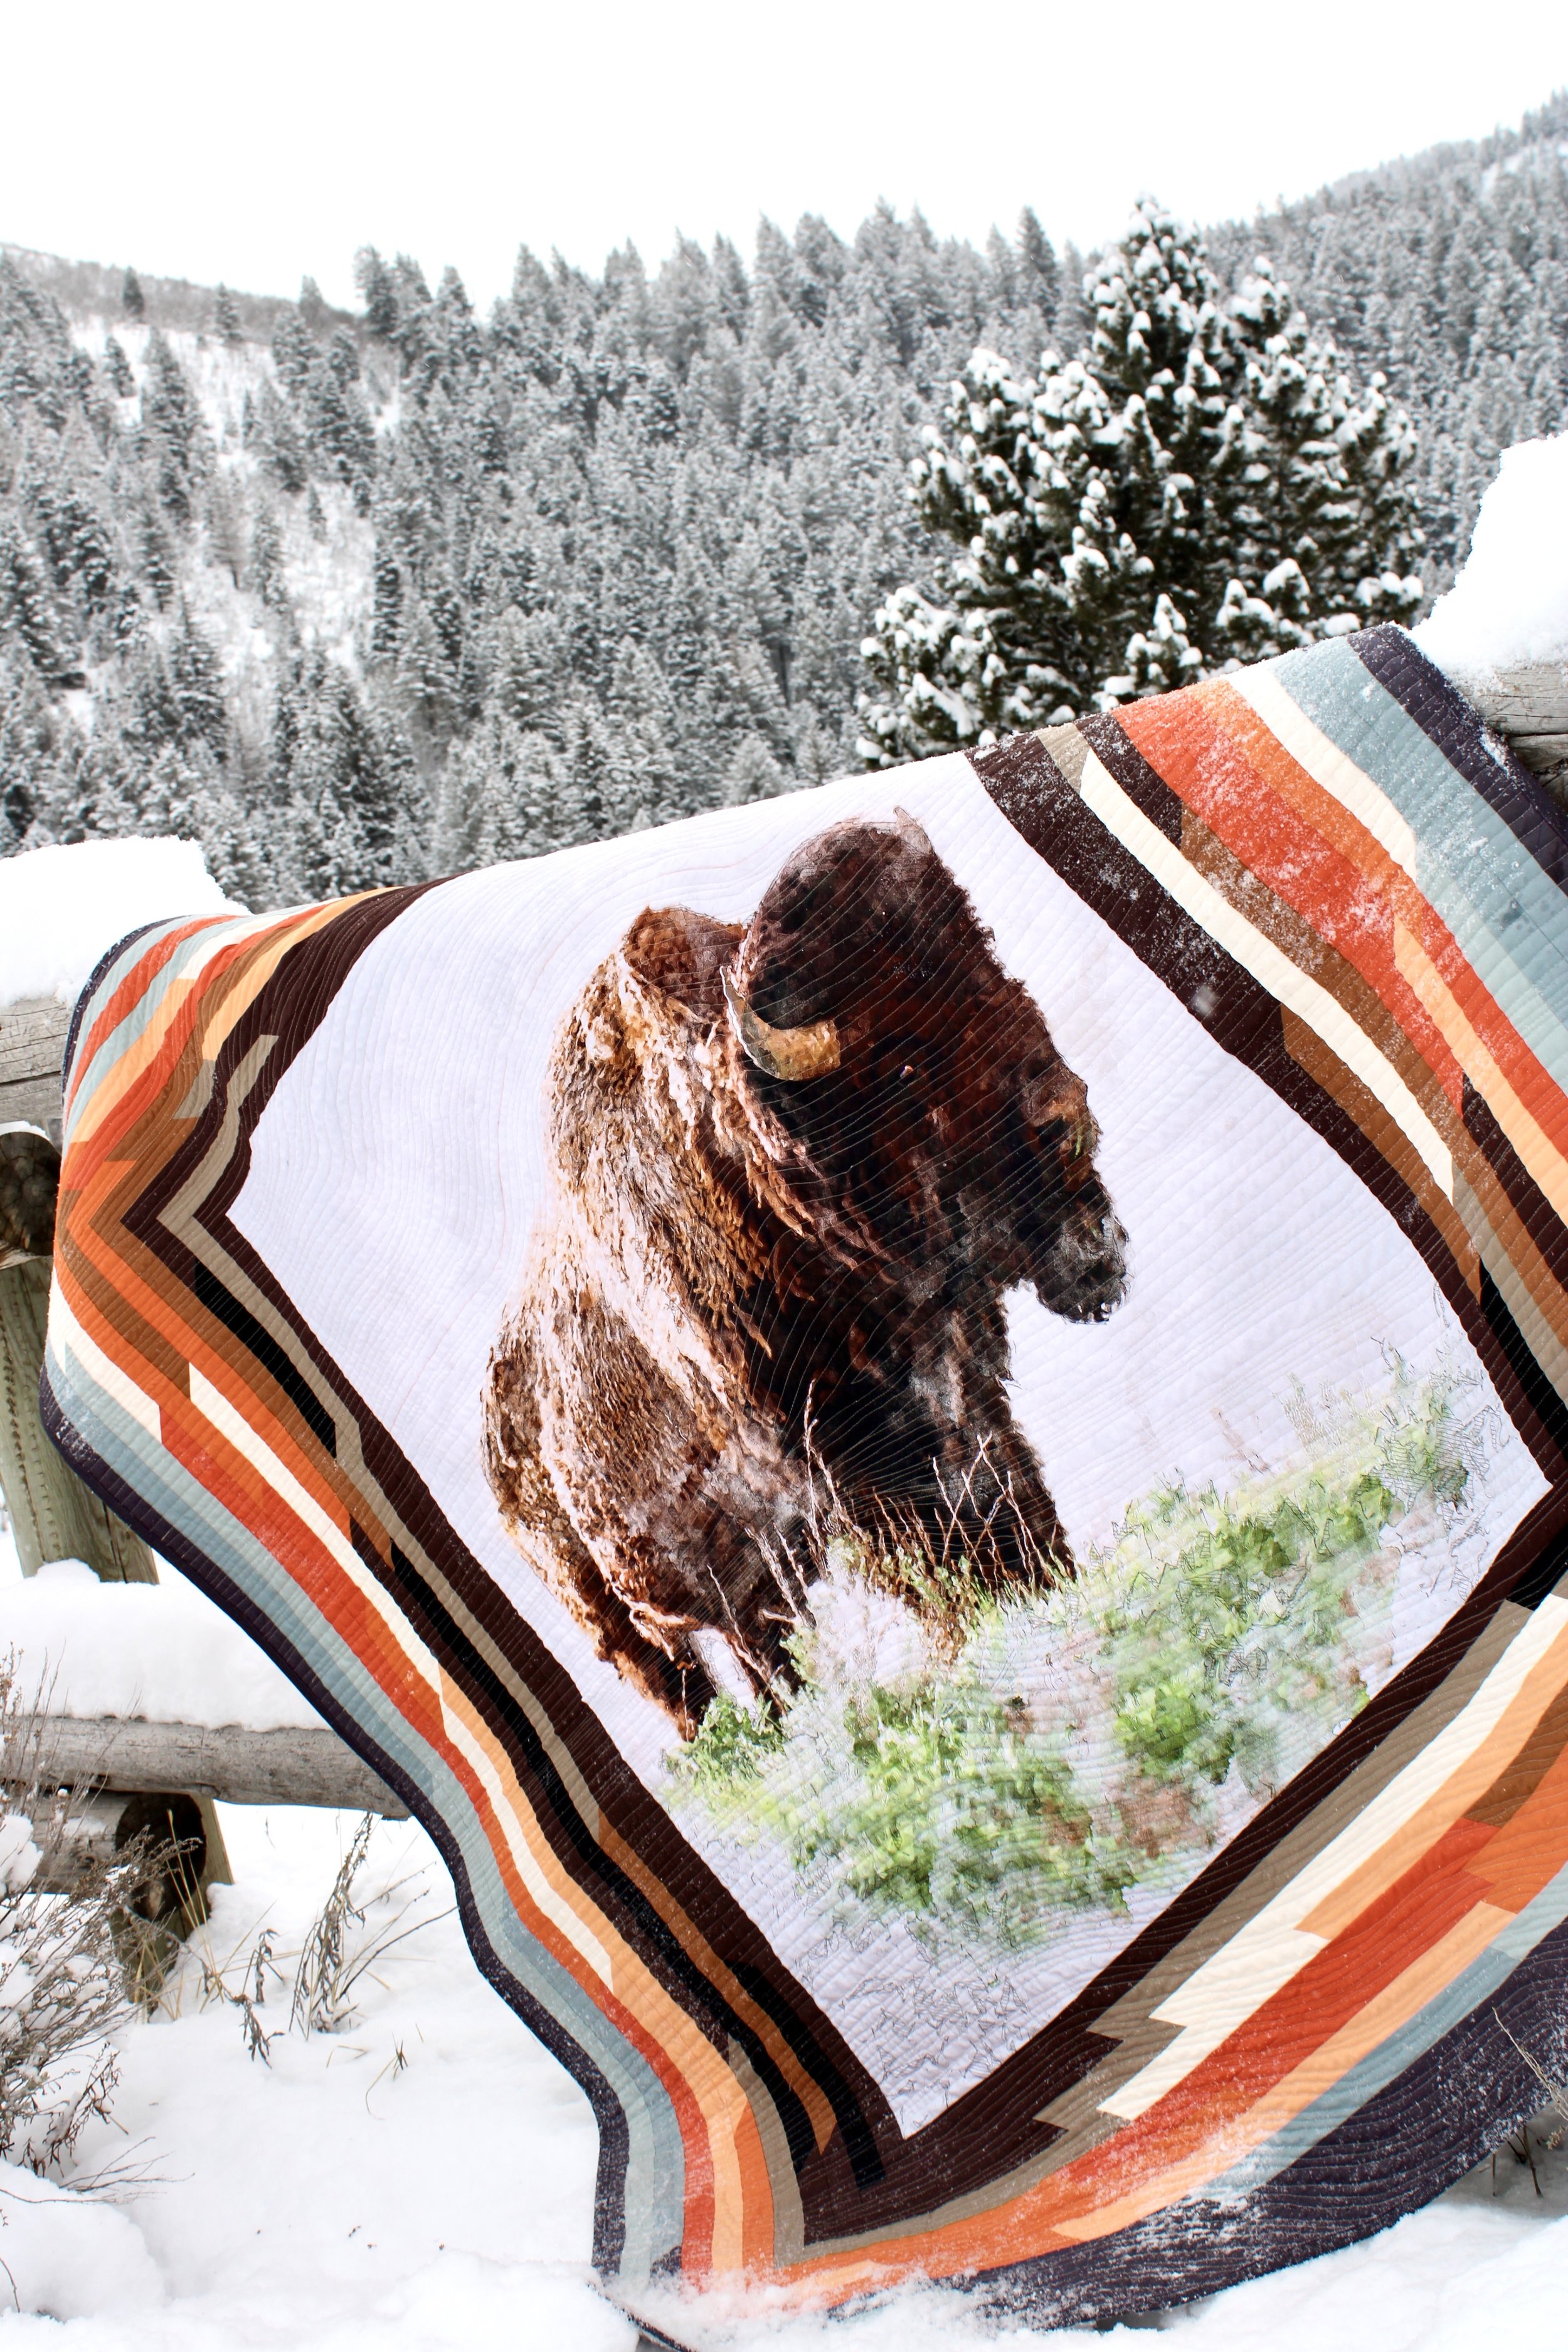
I knew I wanted to keep the border simple so as not to detract from the beautiful detailed artistry on the fabric panel.
This random strip border idea was born from the need for simplicity in both design and execution. I’m calling this a “Around the Corner” border because it’s as simple as sewing a big long strip around and around and around…until you feel like it’s done!

To make this quilt, you will need:
1 - 36” x WOF (width of fabric) fabric panel
a pile of 1-1/2” strips x WOF in Riley Blake Confetti Cottons. I used Confetti Cottons in: Brownie, Cinnamon, Pebble, Black, Autumn, Pumpkin, Marmalade, Putty, Dove, Storm, and Charcoal.
6 or 7 - 2-1/2” strips Charcoal fabric for binding
Quilt Batting
Fabric for Quilt Back

The first step is to trim the excess fabric from the panel.

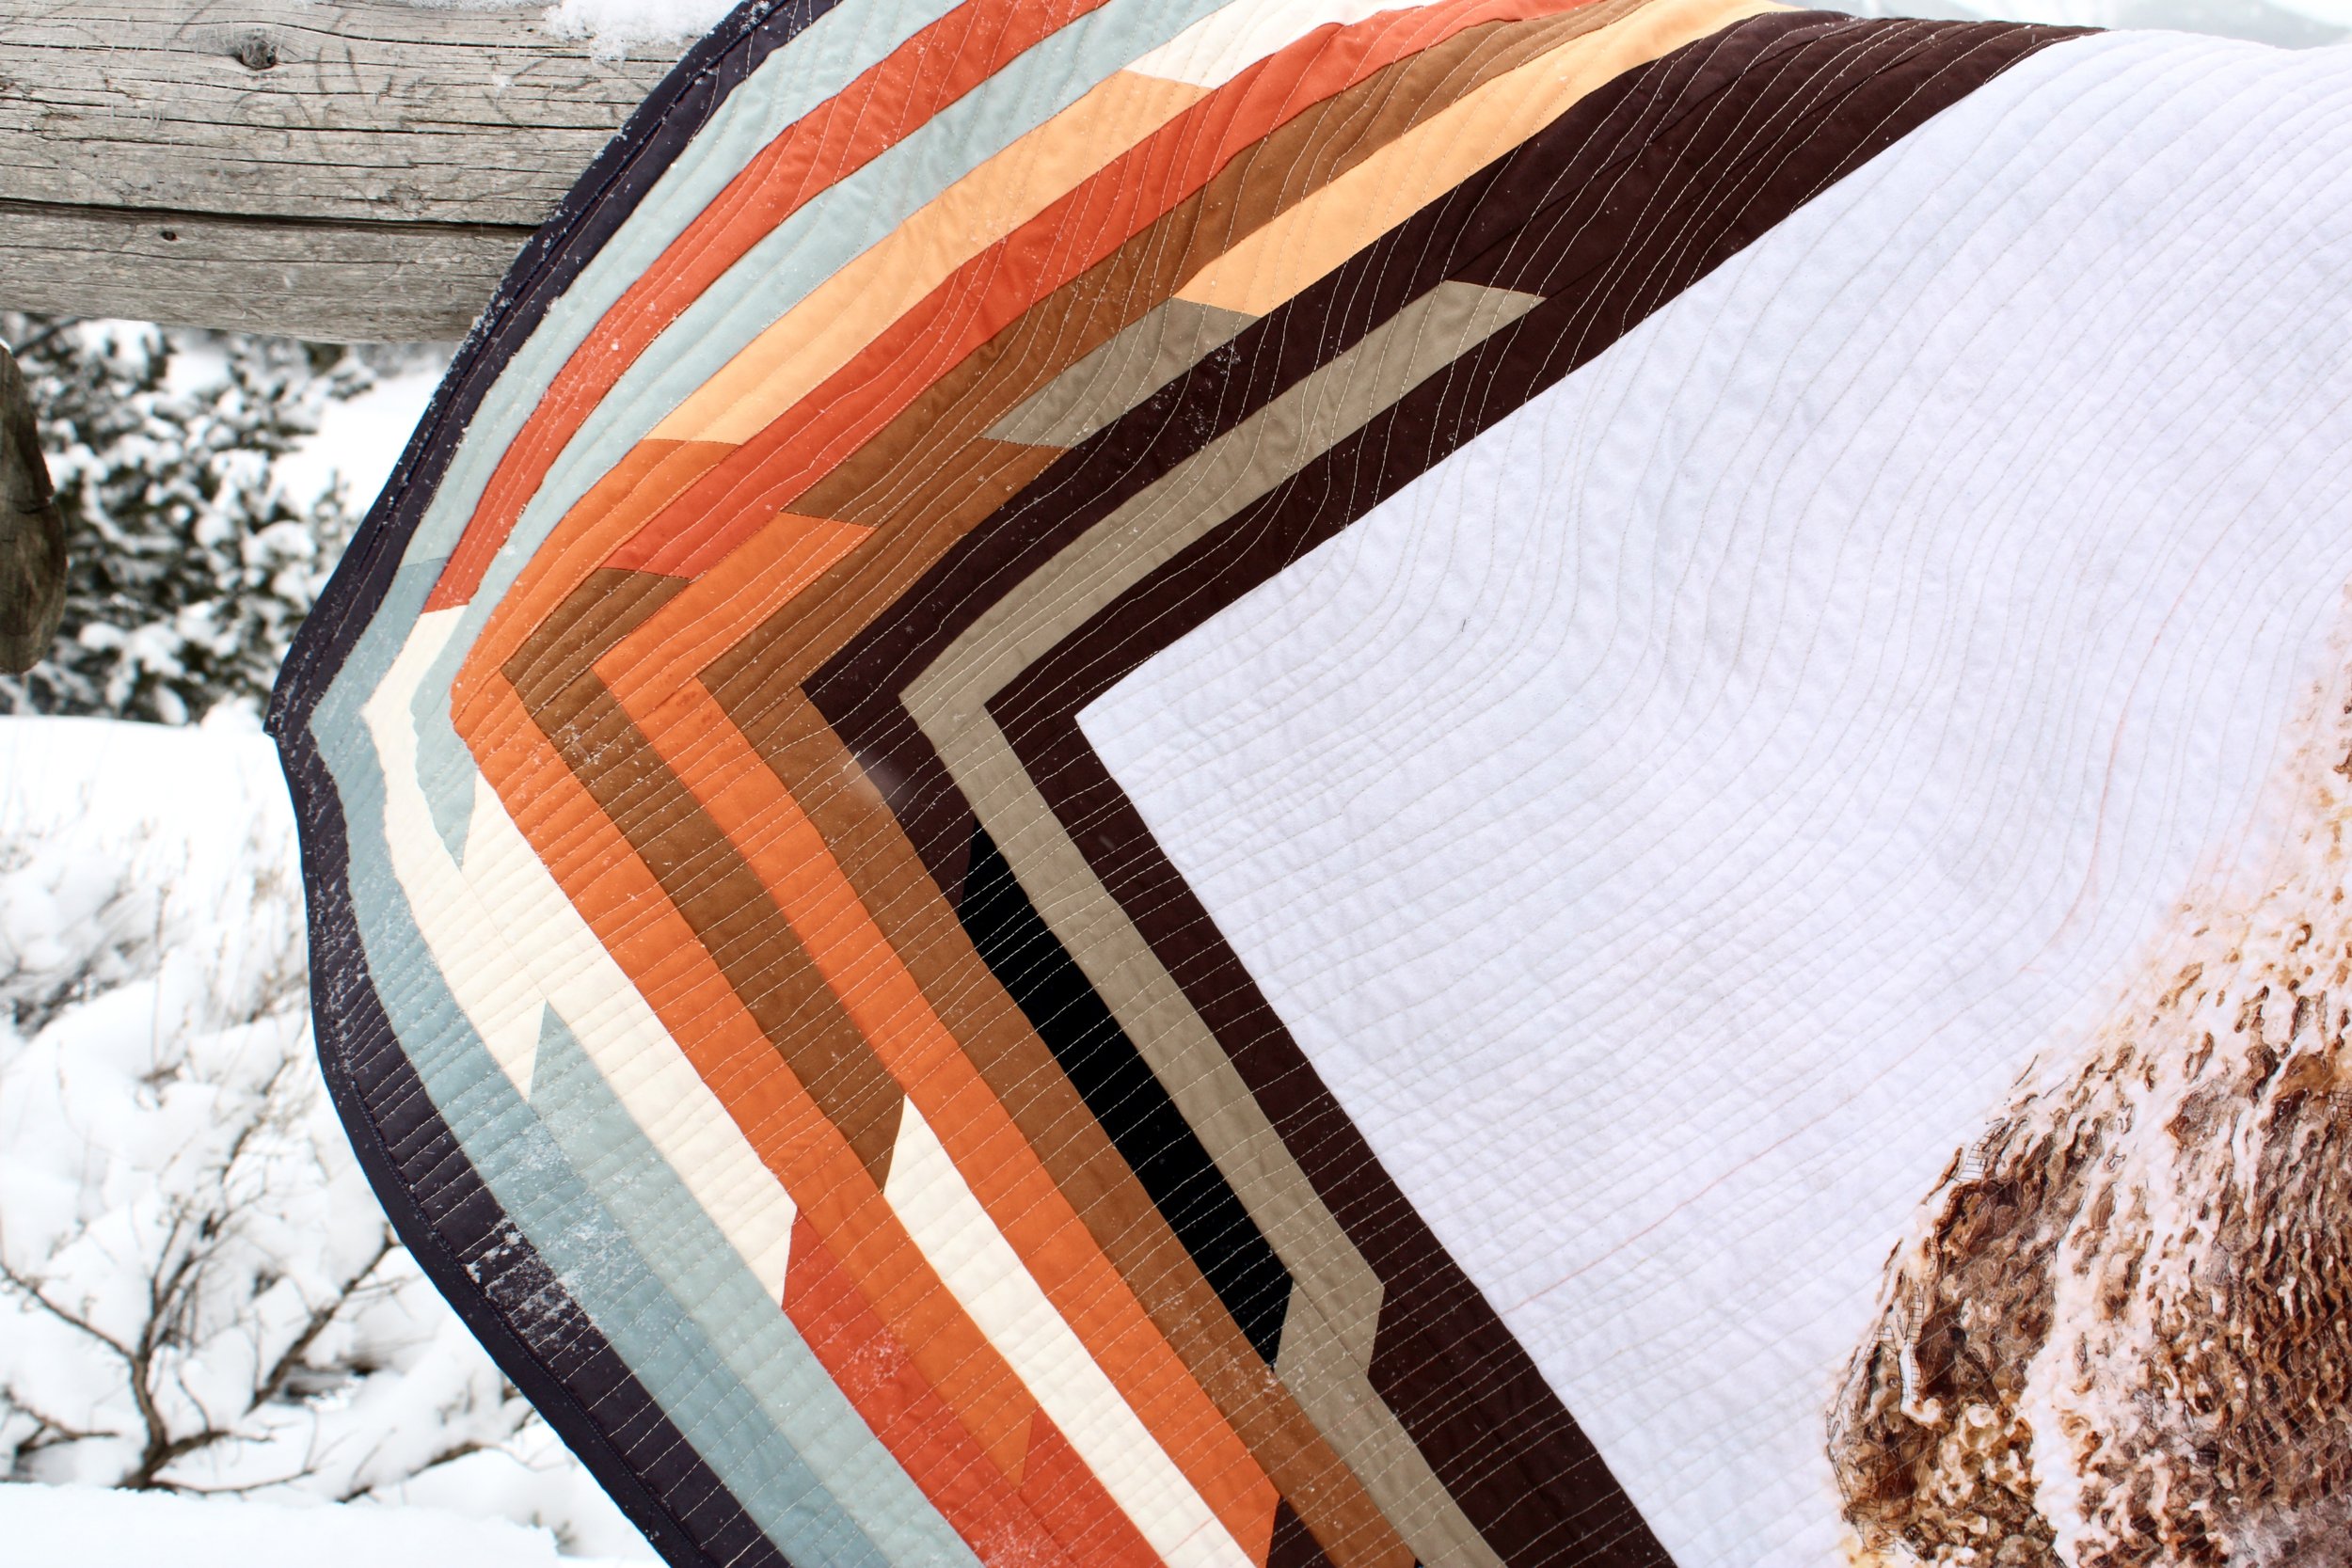
Next, cut a BIG pile of 1-1/2” strips of fabric in various solid colors of your choice. I cut 4-5 strips of each color. The only exception was that I cut 5 strips of Brownie for the first border around the panel + a few additional strips of Brownie. I also cut extra strips of Charcoal for the final outer border.
Set aside the strips for the inner and outer border. Sew the rest of the strips along the short end, using 45 degree angles. As you sew these strips together, arrange the colors in alternating fashion, but also so the darker brown gradually moves to lighter browns, then the various shades of orange, Putty, and finally the lighter blue/gray colors, finishing with the Charcoal.

Here, you can see I started by sewing a strip of the Brownie to each side of the panel. I then added a strip of brownie to the top and bottom of the fabric panel, pressing the seams toward the darker fabric.
Now, here’s the trick: After sewing the initial Brownie border, you can begin sewing the super long fabric strip you made, starting with the Brownie color. HOWEVER, instead of sewing a strip to each side, then another strip to the top and bottom, you want to sew a strip to one side, then to the bottom, then the other side, etc….so you are going around the quilt in one continuous line. This helps the colors look continuous as you “turn each corner.”
I found I could sew around the perimeter of the entire quilt one time before I needed to press the strips.
Keep going like this until the border is the size you want.
Here is a video showing the border sewing process.

You’ll notice the lines are a bit wavy in my quilt. After I had the quilt basted, I used fabric chalk to draw a line over the top outline of the bison. I started quilting there, and followed freeform along either side.

I did decided to create another curved line along the grass line, but an unintended consequence is that the stitches bottlenecked on one side. I still like the idea, but would have to come up with a work around for this issue next time around.

That’s all there is to it! I LOVED making this quilt border. And having lived in the Southwest almost my entire life, I really appreciate the subtle nod to southwest style I see in the angles of the strips and the fabric colors. It has a warm, dusky sunset feel to it.

For the quilt back, I uses this fabulous Brown Trees print — also from the Nature’s Window collection.
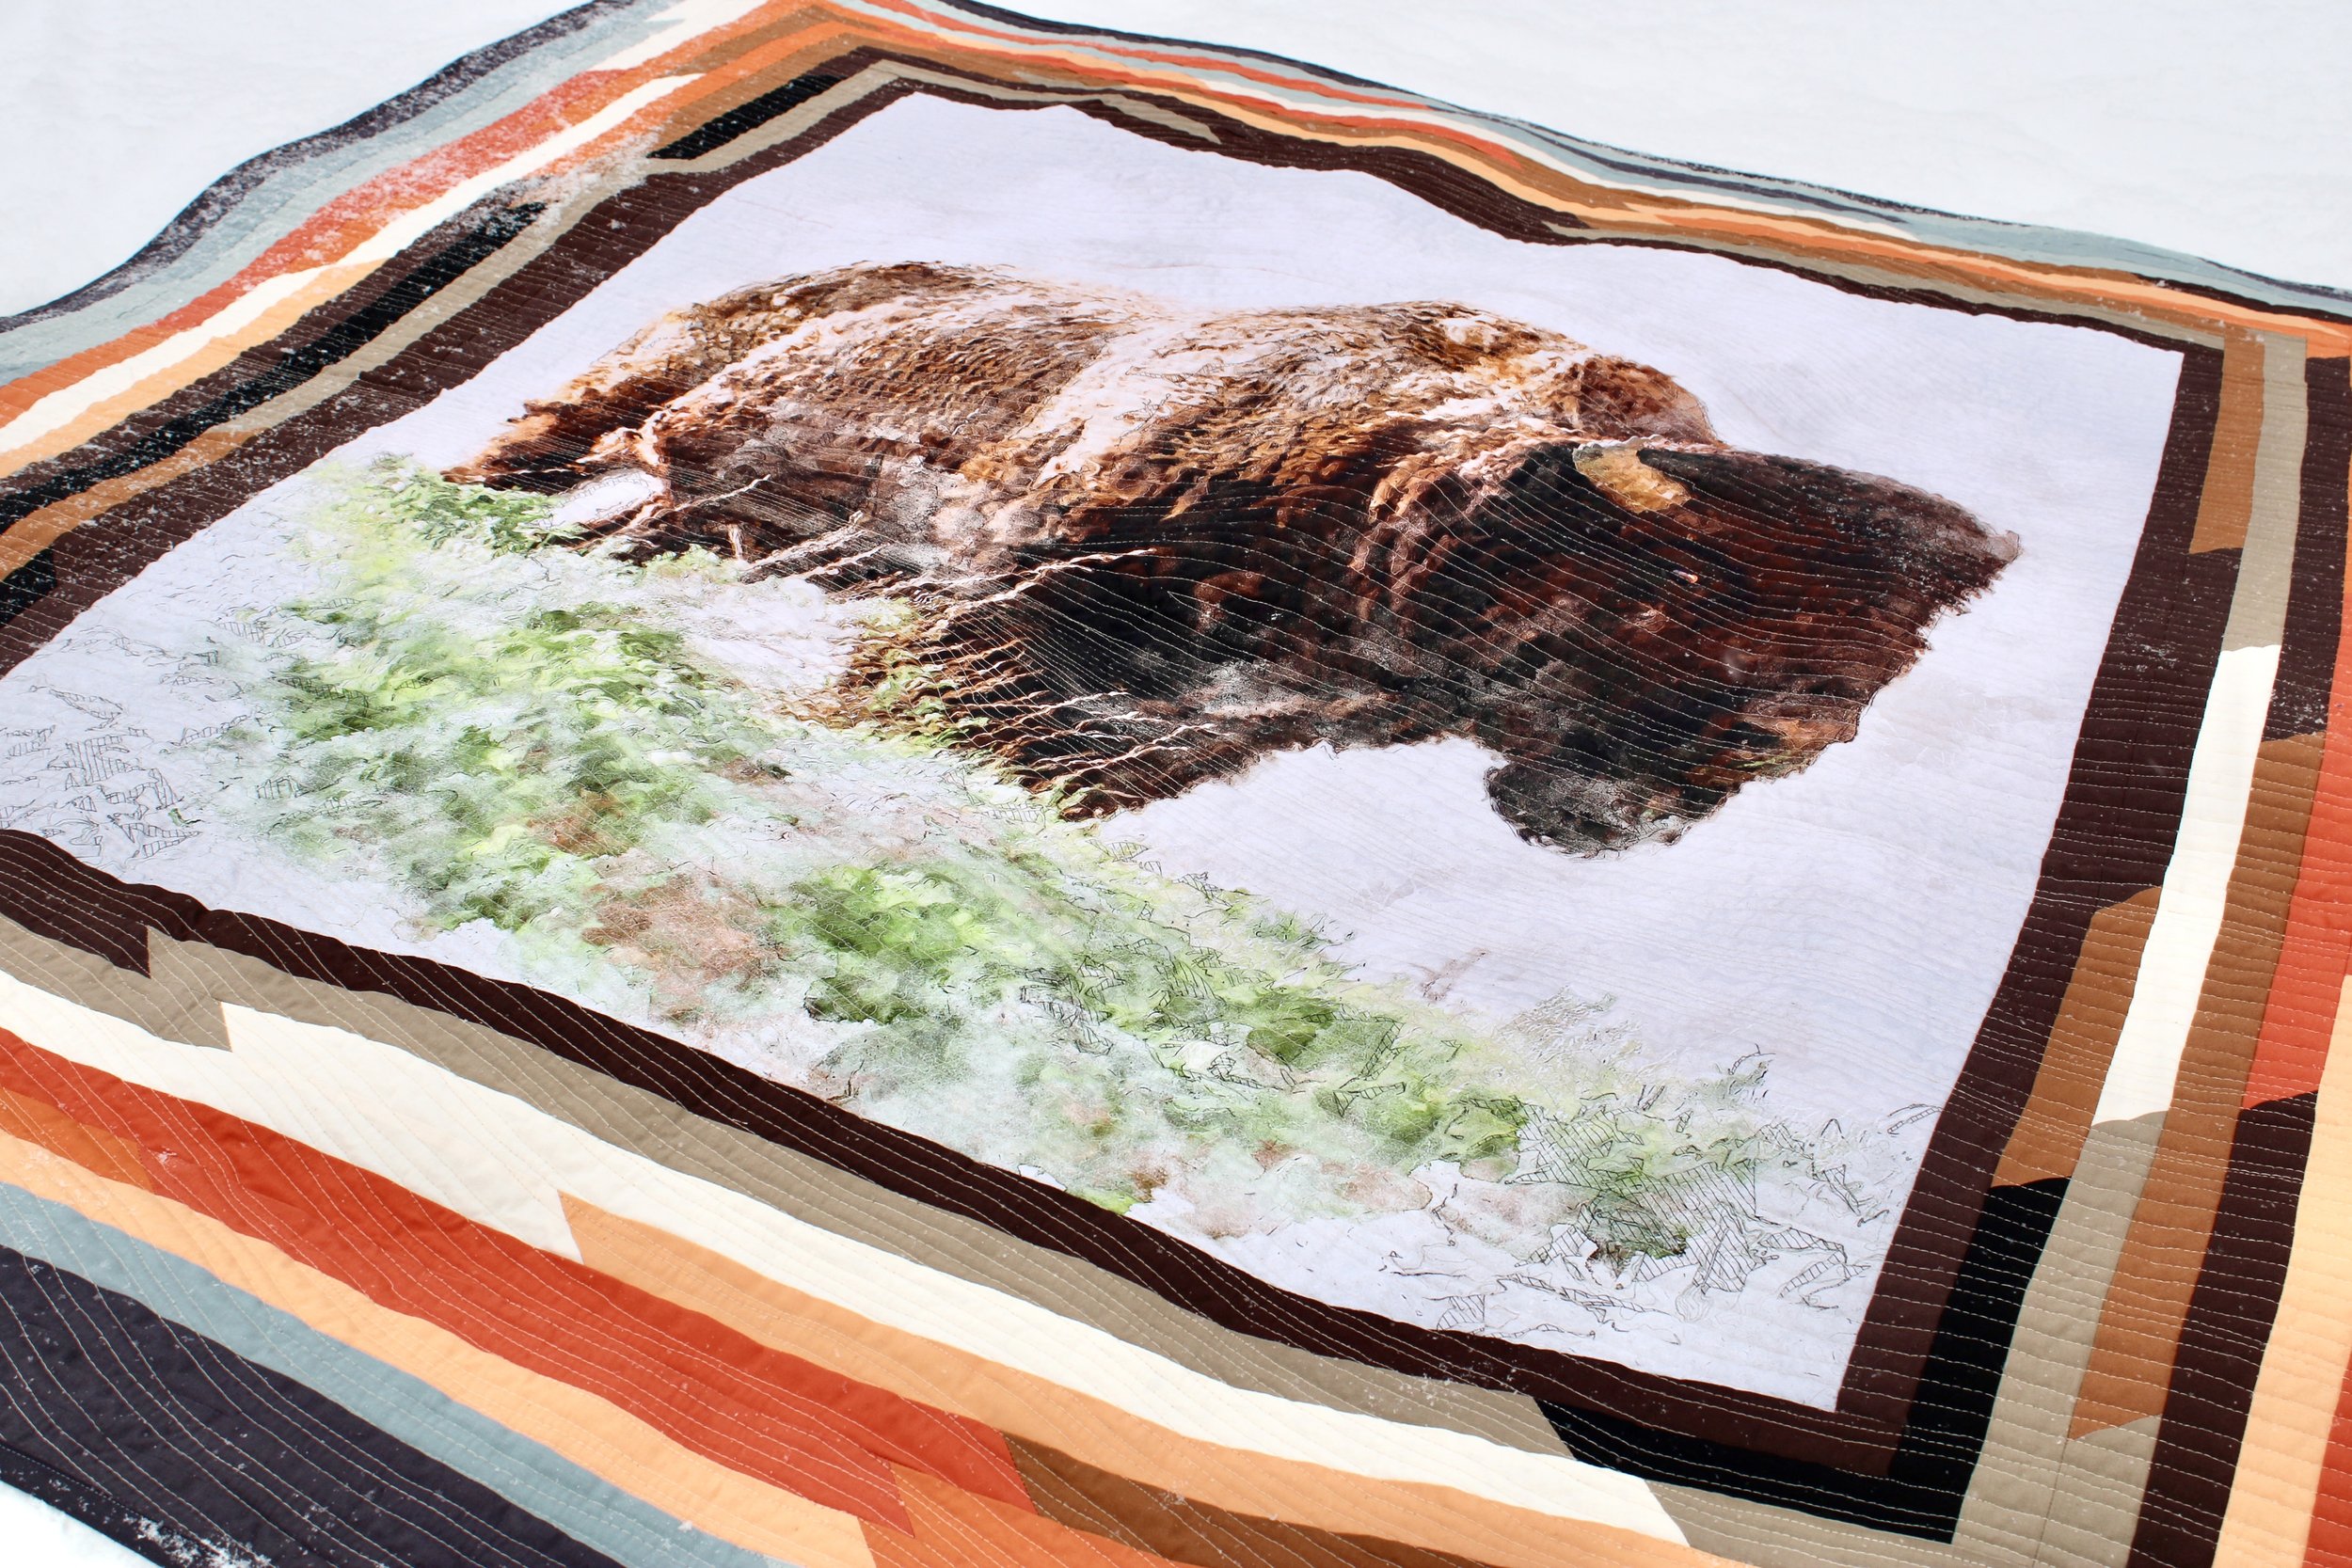
Here is another look at the quilting. Not “perfect”, but I don’t believe in perfect when it comes to creating. Just go with it, learn something new, and repeat the process again and again.

And here’s another look at the border. I didn’t make any effort to match up the angled seams as I added the border (everything was left to chance), but you can see in a few places the seams perfectly aligned. Fun!

The bison looks perfectly at home in the snow, don’t you think?

My dog was fascinated by the bison. He really didn’t want to move from this spot, lol!
I can’t wait to wash this quilt so it’s gets all crinkly and soft and ready for snuggles!

The Nature’s Window collection is coming soon to stores, and I have no doubt it will go fast! Pre-order yours to get your hands on one of these breathtaking panels. Riley Blake Designs Confetti Cottons are available at pretty much every local and online quilt shop!