Twinkle Boat Baby/Toddler Quilt
I took a break from quilting over the holidays, but I’m back at it with my first quilt of 2023 — meet Twinkle Boat!
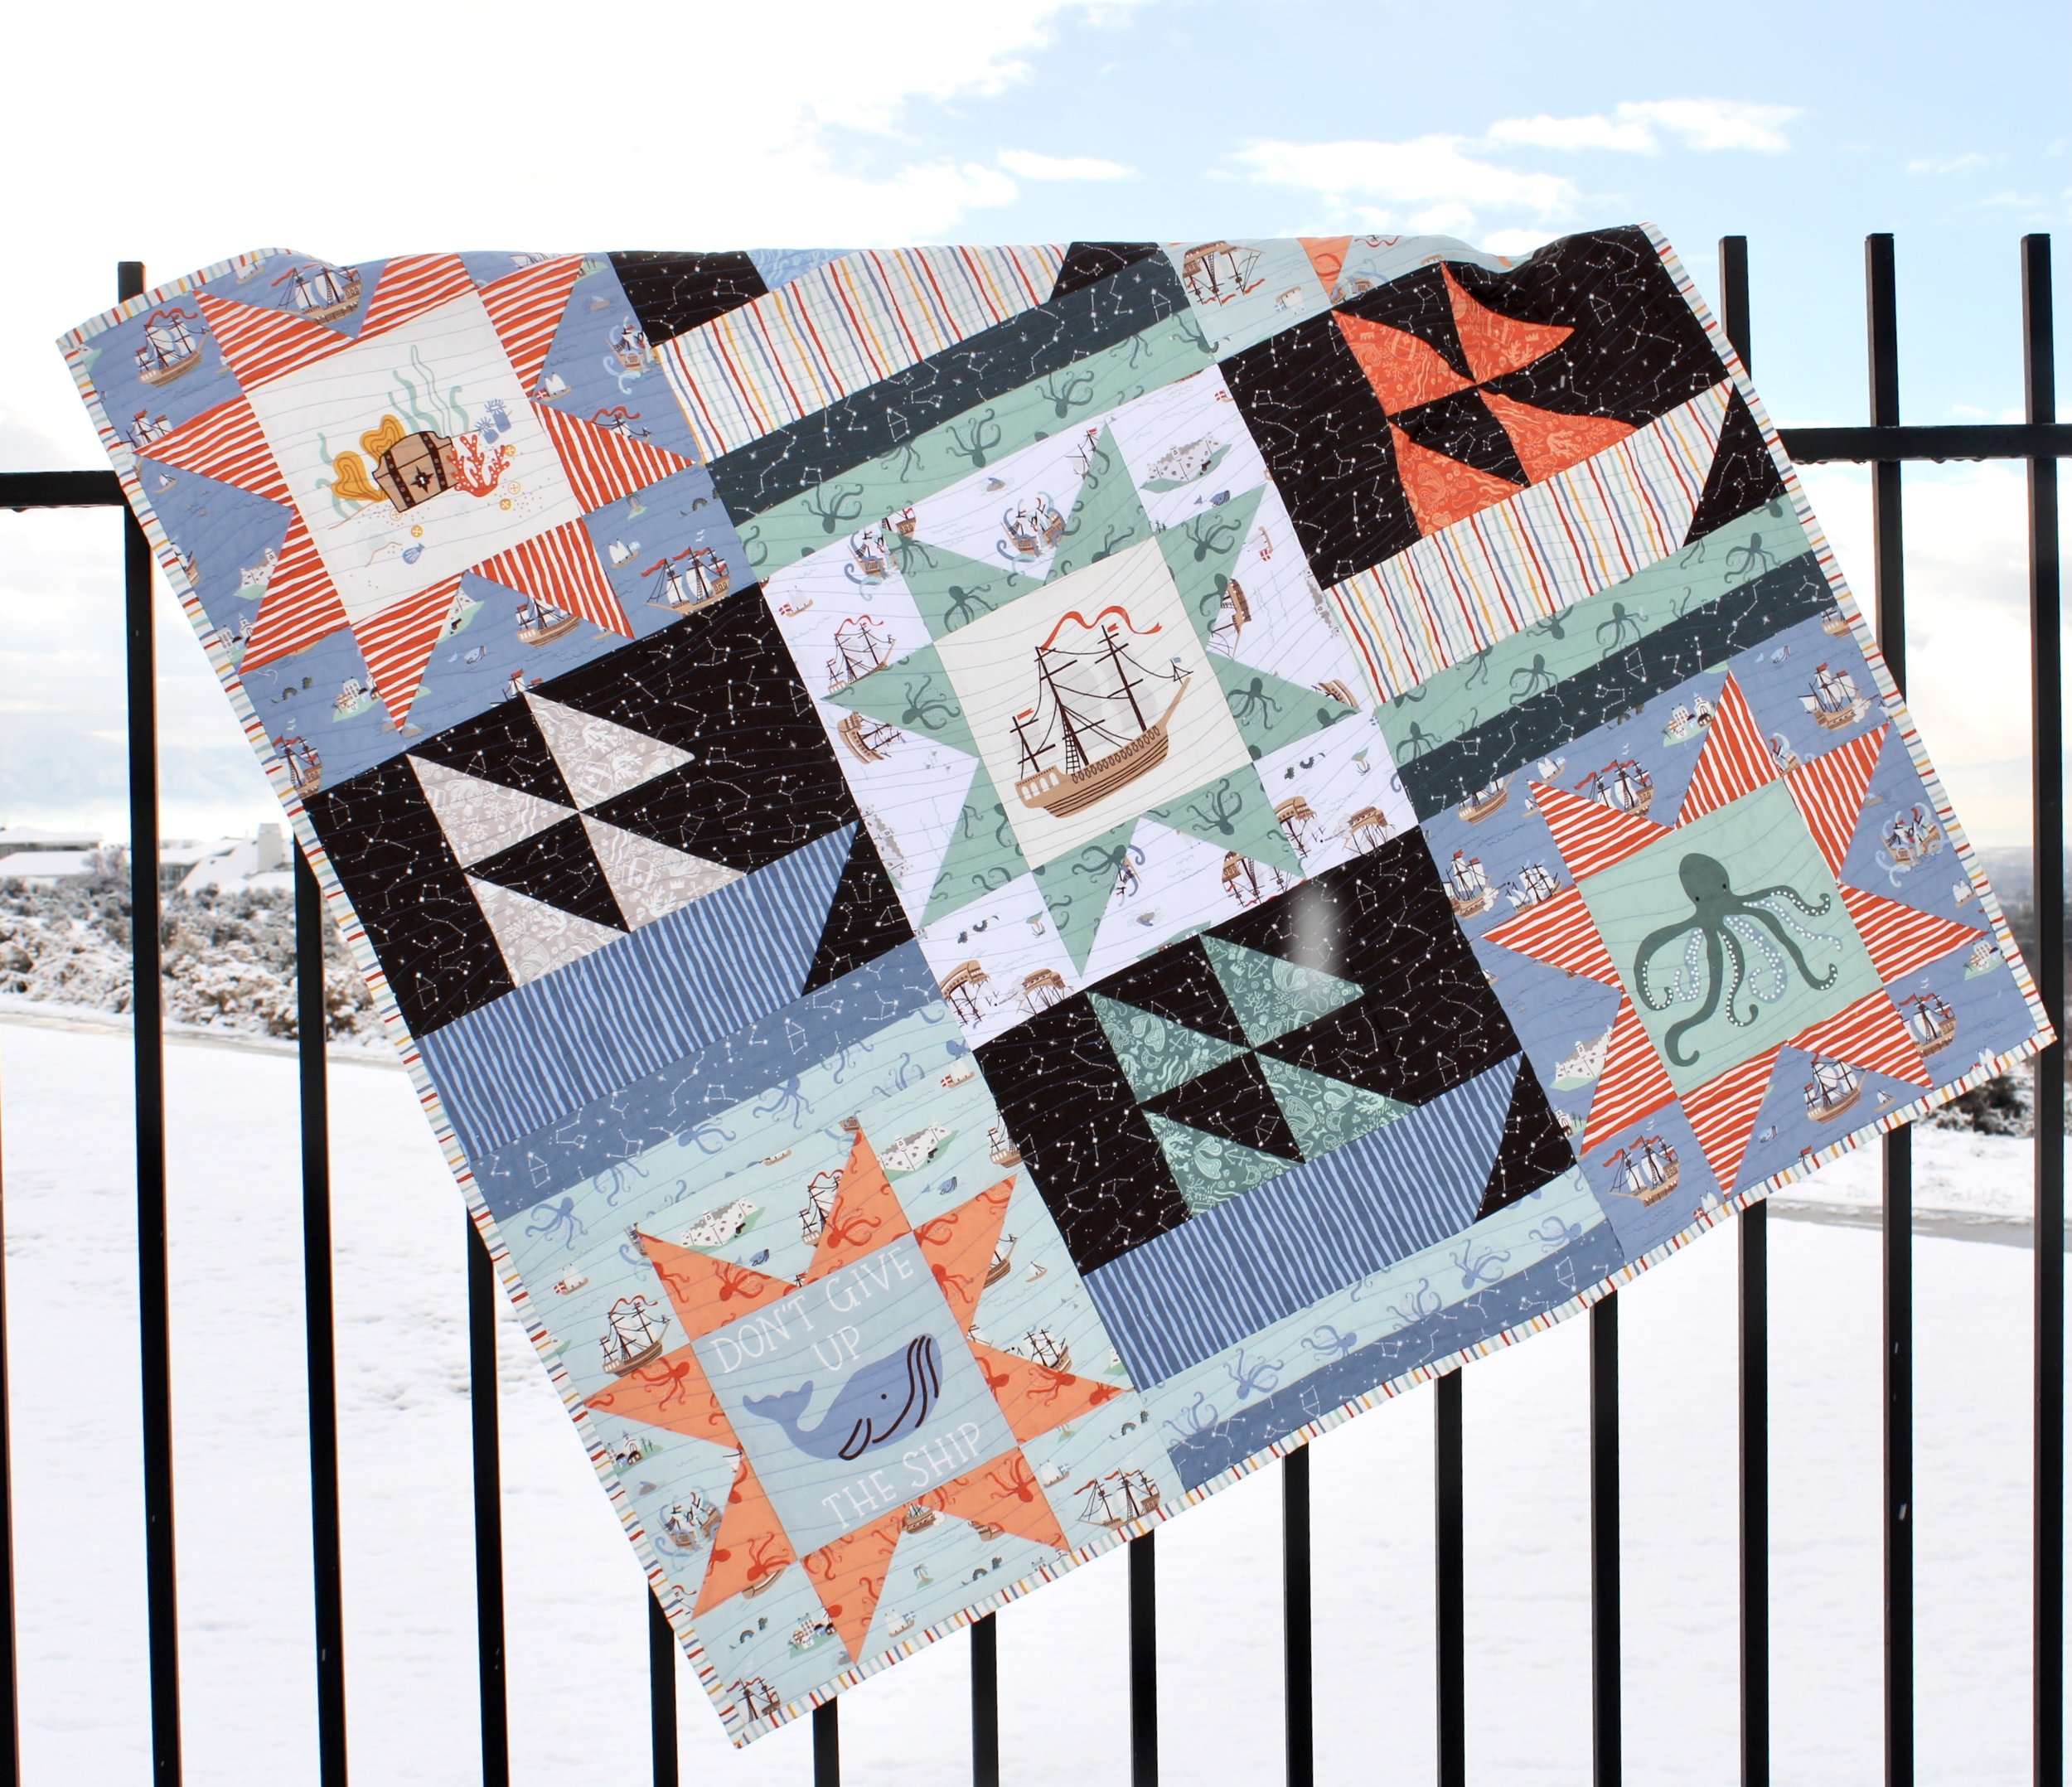
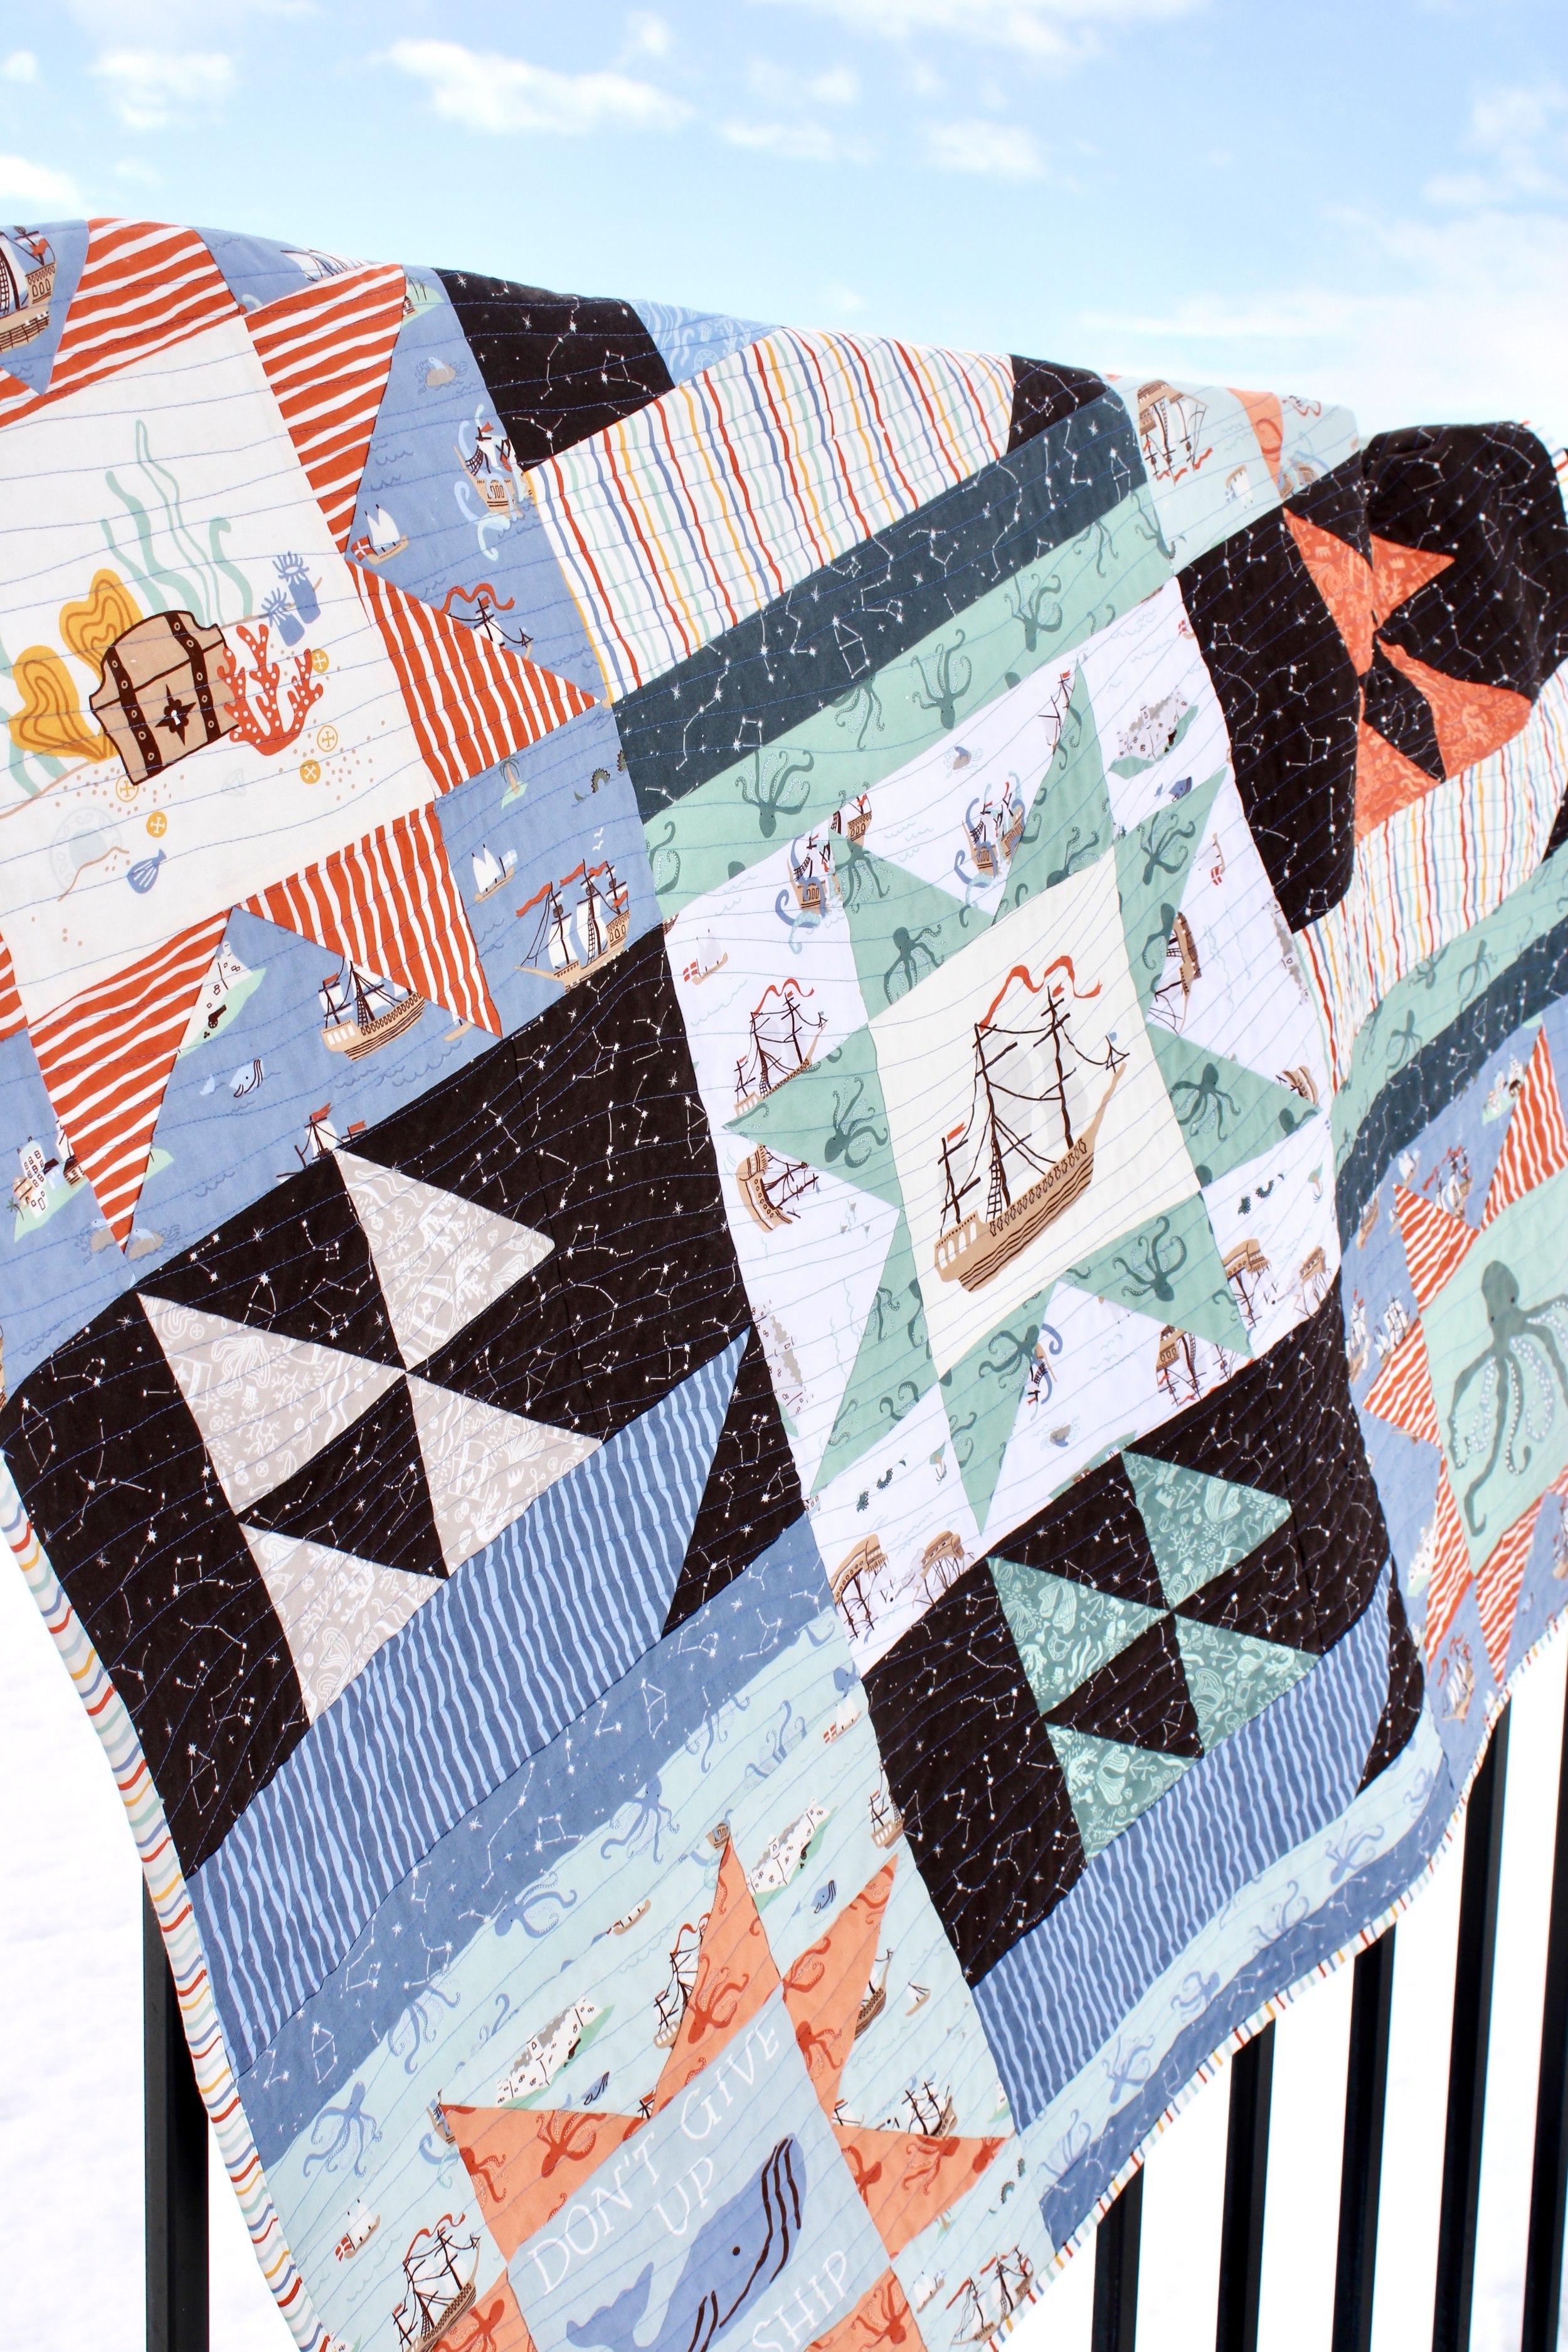
Twinkle Boat measures approximately 47” square, making it a perfect toddler quilt or generous sized baby quilt.
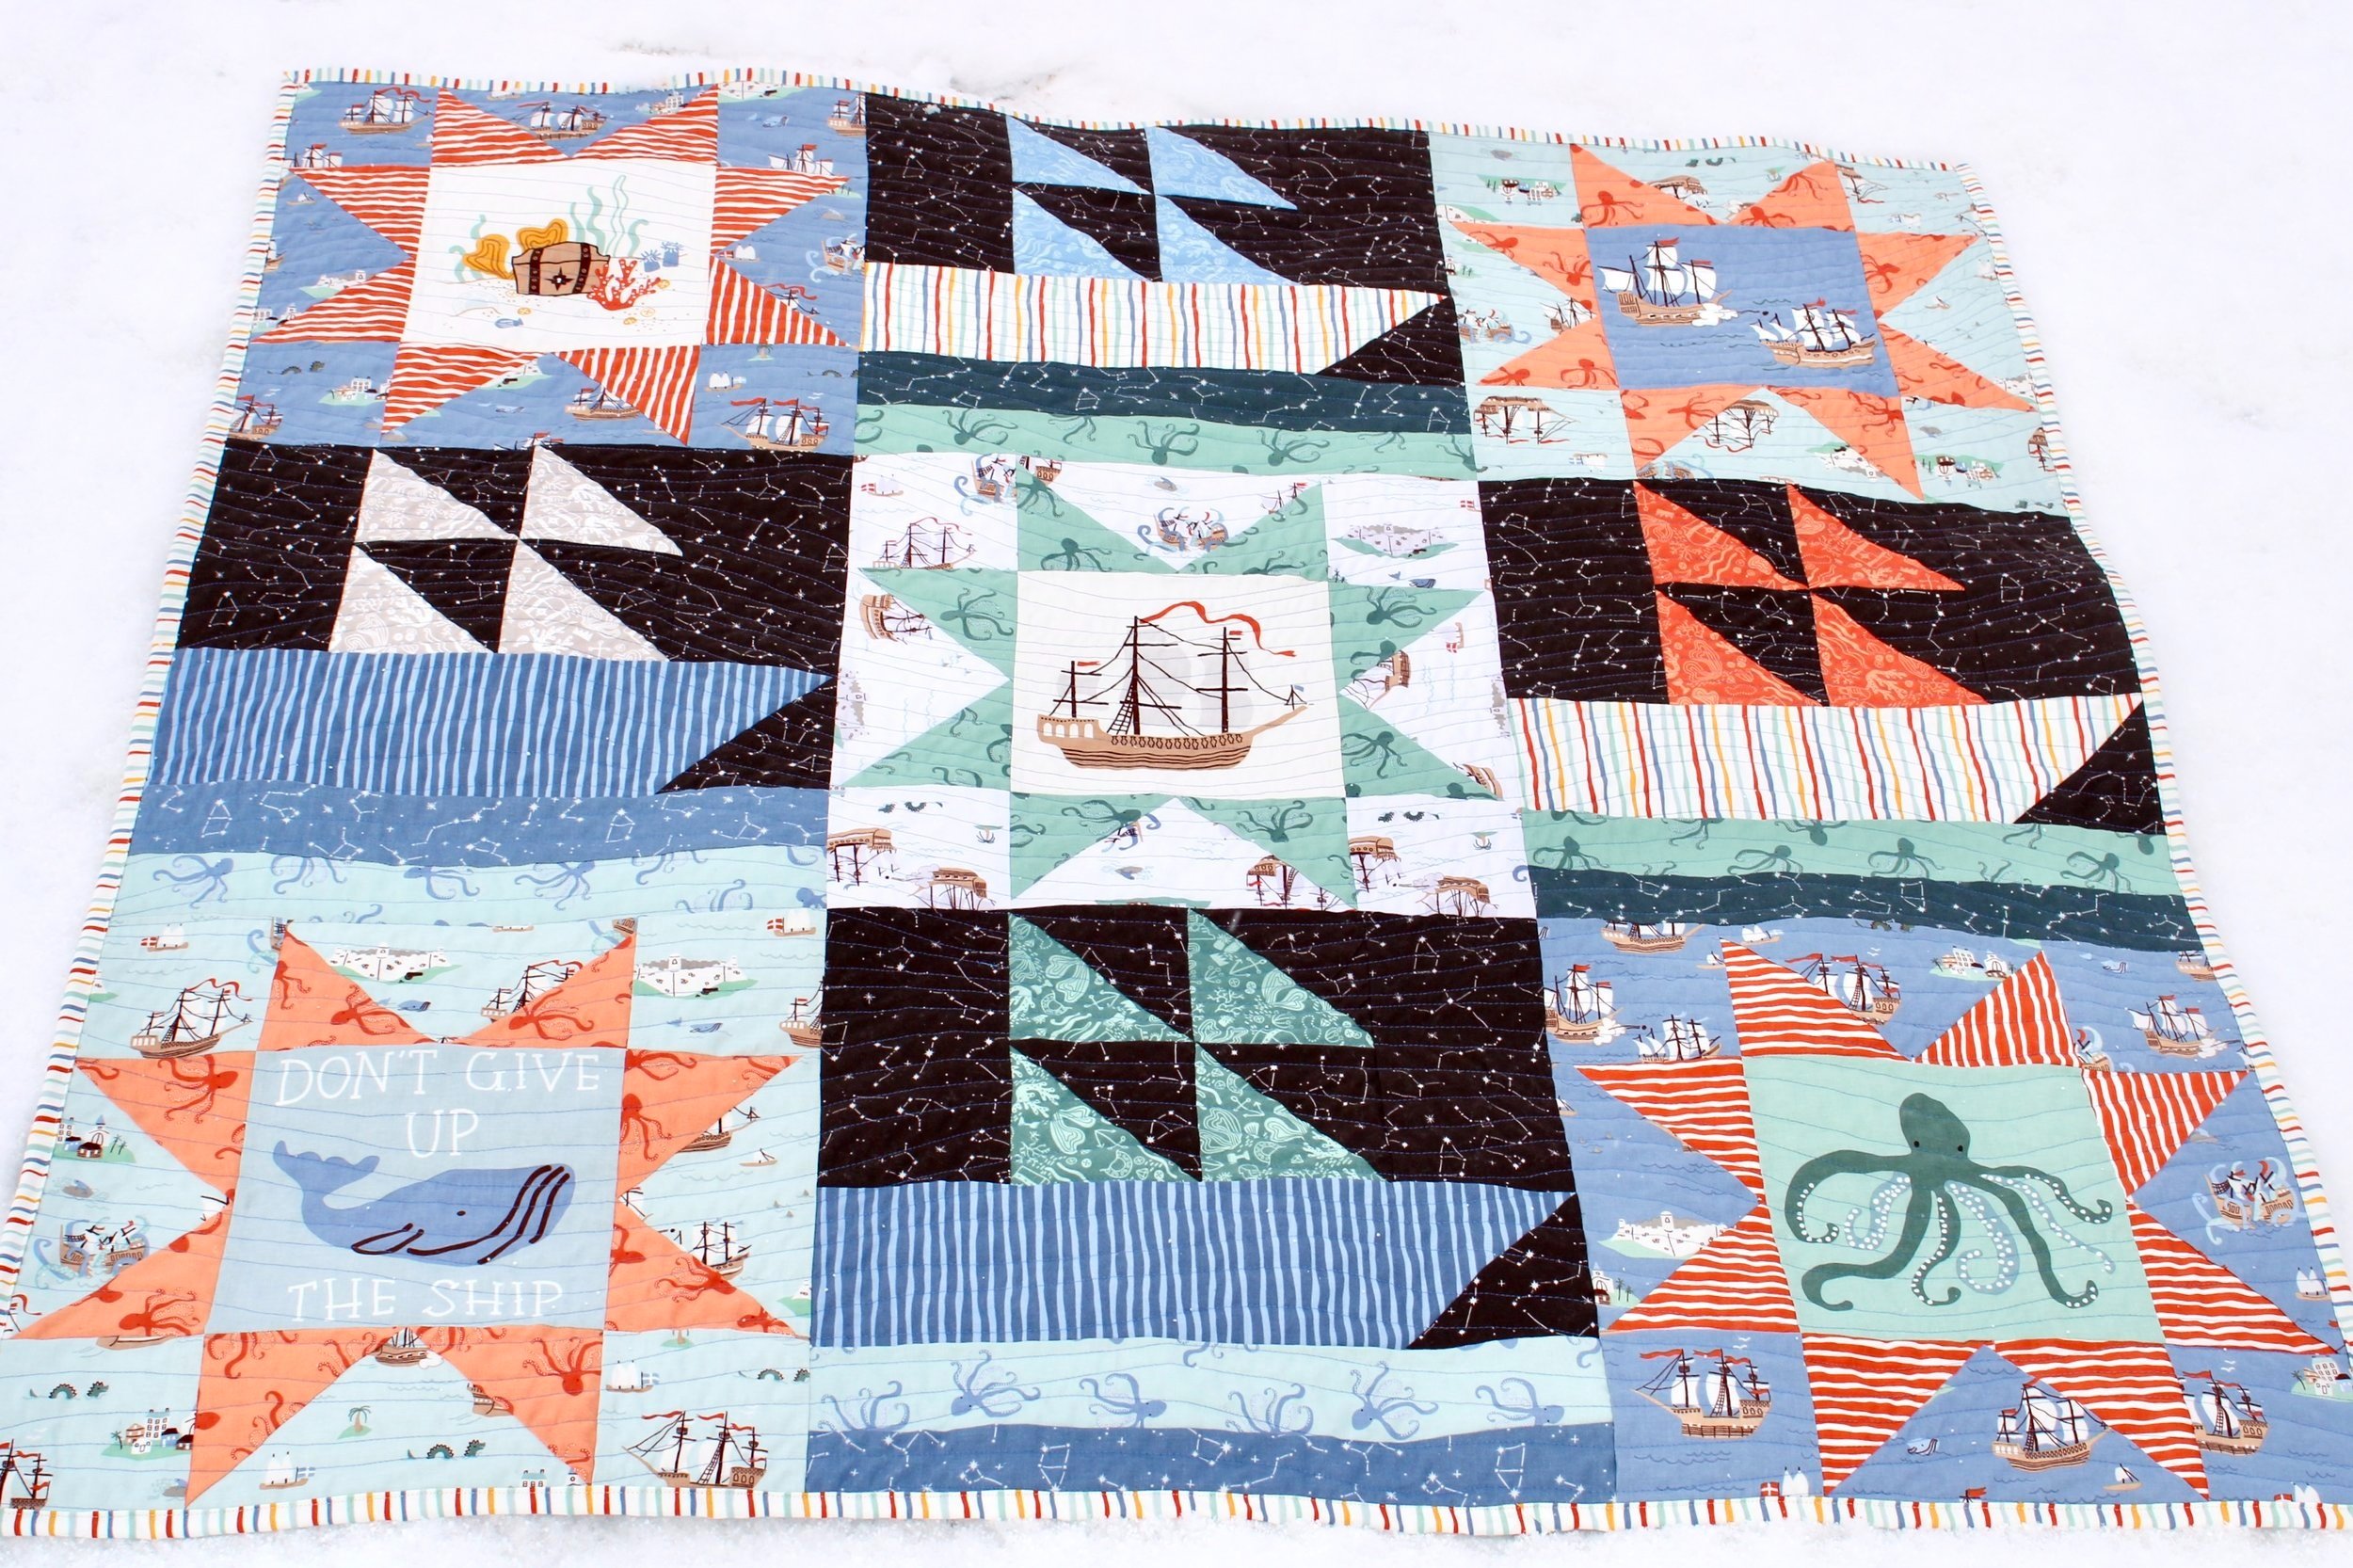
The quilt is made up of two alternating blocks, so construction is fairly simple.
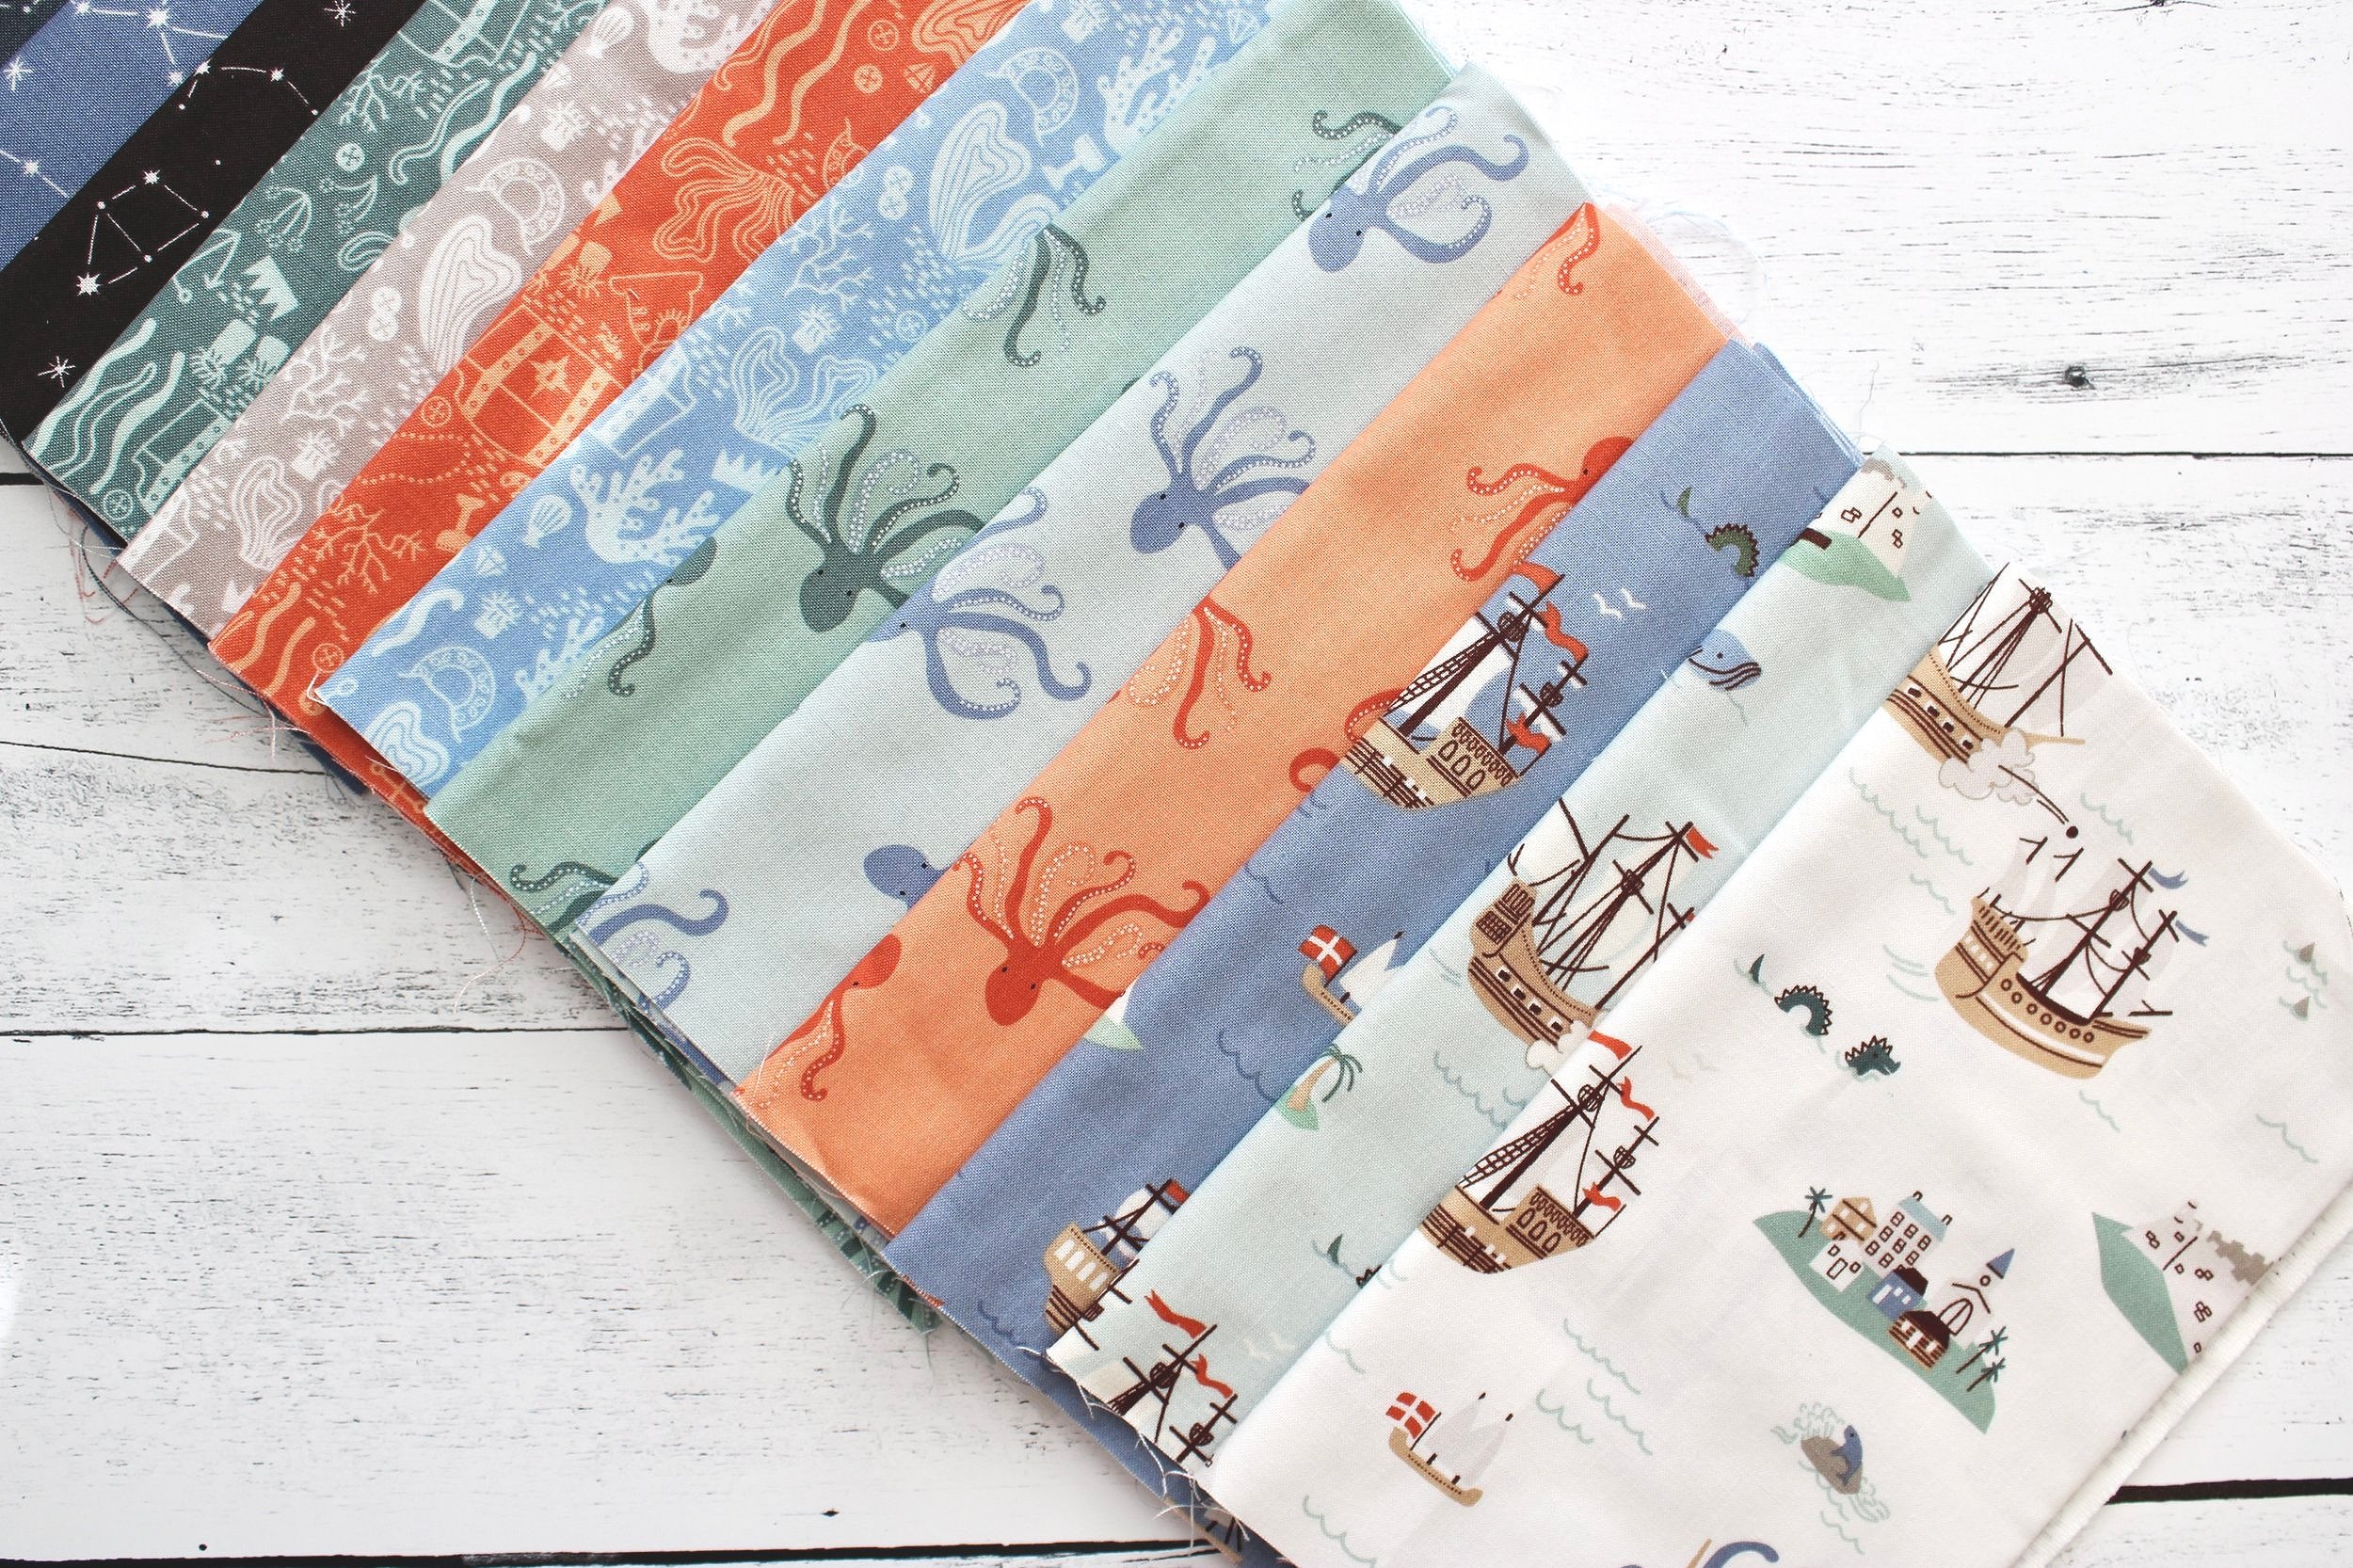
I used fabric from the Hoist the Sails collection designed by the lovely and talented Rachel Erickson of Citrus and Mint Designs for Riley Blake Designs. There is a definitely pirate theme to this fabric line, however, I opted to focus more on the nautical aspect and leave the pirates out. Here are the fabrics I selected. I’m in LOVE with the tonal Octopi print! It’s so hard to choose because they are all so perfect, but it just might be my favorite.

I also incorporated five squares from the Hoist the Sails fabric panel. They are the perfect center to my sawtooth stars. I had squares left over as well as the super cool world map. I set those aside for a future project.
To make this quilt, you will need:
1/3 yard each Hoist the Sails Main in Stone, Mist, and Off White
1/4 yard each Hoist the Sails Stripe in Orange and Denim
1/2 yard Hoist the Sails Stripe in Multi (includes yardage for binding)
1/2 yard Hoist the Sails Constellations in Black
1/8 yard Hoist the Sails Constellations in Chive and Denim
1/4 yard each Hoist the Sails Buried Treasure in Orange, Teal, Gray, and Sky
1/4 yard each Hoist the Sails Octopi in Marmalade, Mist, and Mint
1 - Hoist the Sails fabric panel
fabric for quilt back
batting
Cut:
five squares cut from the Hoist the Sails fabric panel. Cut each square to measure 8” square.
2 - 9 1/2” x 9 1/2” Hoist the Sails Main Stone
8 - 4 1/2” x 4 1/2” squares Hoist the Sails Main Stone
2 - 9 1/2” x 9 1/2” Hoist the Sails Main Mist
8 - 4 1/2” x 4 1/2” Hoist the Sails Main Mist
1 - 9 1/2” x 9 1/2” Hoist the Sails Main Off White
4 - 4 1/2” x 4 1/2” Hoist the Sails Main Off White
8 - 5 1/4” x 5 1/4” Hoist the Sails Stripe Orange
8 - 5 1/4” x 5 1/4” Hoist the Sails Octopi Marmalade
4 - 5 1/4” x 5 1/4” Hoist the Sails Octopi Mint
2 - 2 1/2” x 16” strips Hoist the Sails Octopi Mint and Mist
2 - 2 1/2” x 16” strips Hoist the Sails Constellations Denim and Chive
2 - 4 1/2” x 16 1/4” strips Hoist the Sails Stripe Multi
2 - 4 1/2” x 16 1/4” strips Hoist the Sails Stripe Denim
4 - 4 1/2” x 4 1/2” Hoist the Sails Constellations Black
8 - 4 1/2” x 8 1/4” Hoist the Sails Constellations Black
4 - 7 1/2” x 7 1/2” Hoist the Sails Constellations Black
1 each - 7 1/2” x 7 1/2” Hoist the Sails Buried Treasure Orange, Gray, Teal, Denim
Sawtooth Star Block:
Begin by making all of the Flying Geese Blocks. You will need the Hoist the Sails Main prints along with the 5 1/4” squares of the Orange Stripe and Marmalade Octopi. Follow the instructions illustrated below. The Hoist the Sails Main prints are represented by the Off White color and the smaller 5 1/4” squares are represented by the Pink color. Repeat until you have four Flying Geese units for each of your five Sawtooth Star quilt blocks. **NOTE: I paired the Orange Stripe squares with the Stone Main print, the Marmalade Octopi squares with the Mist Main print, and the Mint Octopi squares with the Off White Main Print. You can use these pairings or rearrange them however you like.

Start with four small squares and one large square. Place the two small squares on the large square and draw a diagonal line across them. Sew a scant quarter inch seam on each side of the line, then cut along the line.

Press both pieces open, then for each piece, place a small square in the corner and draw a diagonal line. Sew a scant quarter inch seam on each side of the lines, then cut along the lines. Press open for 4 flying geese blocks.

Press. Trim each block to measure 4 1/2” x 8”.
Now assemble the Sawtooth Star Block. Begin by assembling each row, pressing seams toward the outer squares for the top and bottom row, and pressing seams toward the center square for the middle row.
Sew the three rows together to create the star block.
**Remember your center blocks are the 8” squares you cut from the fabric panel.

Press seams open. Trim block to 16” square.
Now it’s time to assemble the boat blocks. Begin by sewing the water strips. Sew the blue Octopi and Constellations prints together along the long edge. Press toward the darker fabric. Repeat for the green Constellations and Octopi prints.

For the boat base, take your four 4 1/2” square Black Constellations squares and draw a diagonal line from one corner to another on the back of each square. Now place the square at the end of the striped boat strip so the diagonal line is aligned the top outer corner of the boat strips. Stitch along the diagonal line. Trim off excess fabric, leaving 1/4” seam allowance.

Now attach the water strips to the boat base.
Next let’s assemble the “sails”.

Arrange a 7 1/2” Black Constellations square and a 7 1/2” Gray Buried Treasure square so they are stacked on top of each other, right sides facing. Stitch around the perimeter, using a 1/4” seam allowance.

Now cut across each of the diagonals. You will now have four Half Square Triangle units. Press each seam toward the darker fabric. Trim to 4 1/2” square. Repeat using the Teal, Orange and Denim Buried Treasure prints.

Next, sew two Half Square Triangle units together so the Constellations print is facing the top right corner, and the Buried Treasure print is in the bottom left corner. Press the seam to the right. The Buried Treasure fabric is the “sail.” Sew the next two units together the same way. Press the seam to the left.
Sew the two rows together, butting the seams up against each other to reduce bulk. Press. Trim to 8 1/4” square.

Sew a 4 1/2” x 8 1/4” rectangle to each side, again making sure the Constellations print is always at the top right corner. Press toward outside units.

With your Sail unit complete and the Boat base unit complete, it is now time to join the two. Sew the two units together along the long edge. Press seam open. Trim block to 16” square.
Repeat for all four boat blocks.
After all of the star and boat blocks are complete, arrange them, alternating blocks. Row 1: Star + Boat + Star. Row 2: Boat + Star + Boat. Row 3: Star + Boat + Star.
Sew the rows together, then press seams open.

Make your quilt sandwich (quilt back + batting + quilt top). Baste using your preferred method of basting. Quilt either using your domestic machine, or sending it off to have it professionally quilted. Bind.
And you’re done!
If you are a visual learner like I am, you can watch this short video where I demonstrate all of the steps. There is no talking in this video (except at the very beginning) - it is a simple demo to assist with each of the steps written out above.

I quilted my quilt with a simple wave design to go along with the nautical theme. This was done free motion on my home machine, so it’s a bit wonky, but I love it.

The quilt back is Riley Blake Designs Dapple Dot basic in Denim. It’s almost like a Swiss Dot, but a little more freeform and modern looking.

The binding is Hoist the Sails Multi Stripe. Soooo cute!
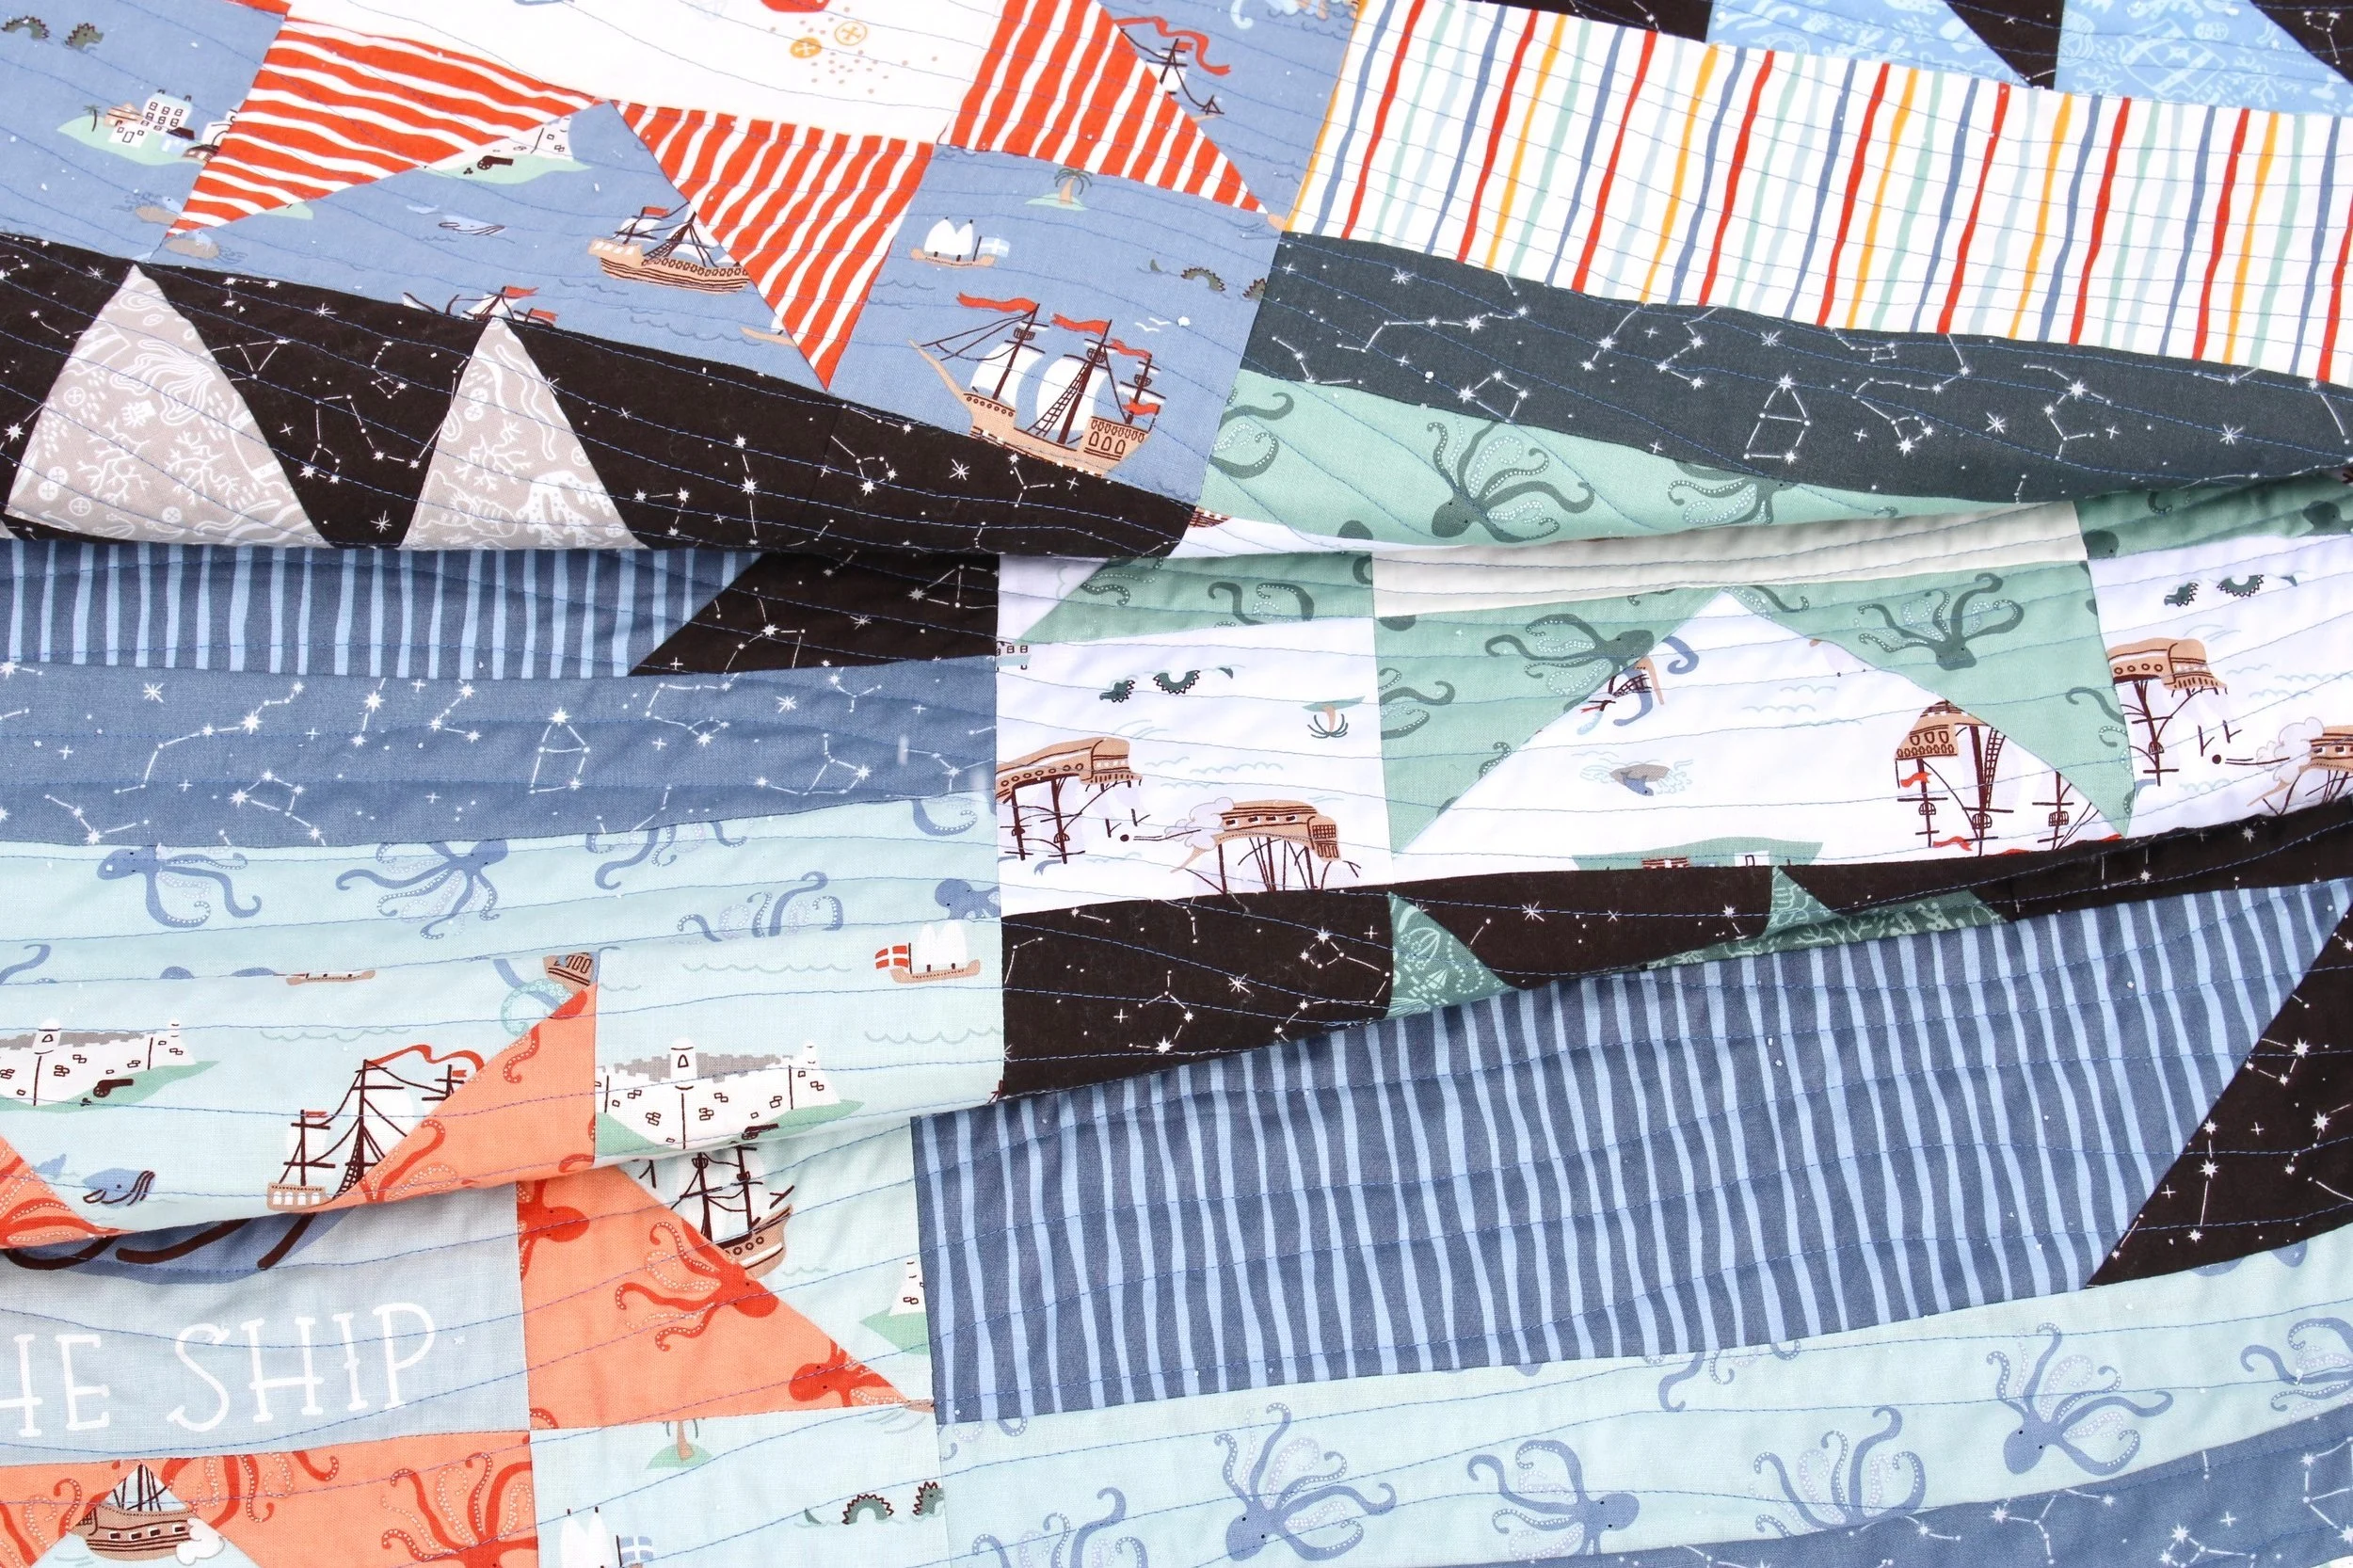
Here’s a closer look at some of the fun prints in this fabric line. I’ve always admired the artwork of Citrus & Mint Designs, and this fabric line is no exception. Those little boats are fabulous! And I seriously LOVE the Constellation and Octopi prints. And the Stripes. And those squares cut from the fabric panel….I love it all!

This is one of those quilts I am super excited to gift because I know it will spark the imagination of the little one who receives it. Seriously so sweet!

Thank you for stopping by! Feel free to reach out with any questions or comments, and be sure to subscribe to my YouTube Channel and follow me on Instagram for more creative content and project inspiration. Have a blessed day!