Four at a Time Flying Geese Blocks
The Flying Geese block is one of the most popular and versatile blocks around, which is why quilters love it and fall back on it time and time again. This block is used to create larger stars, or can be used alone to create fun geometric formations. I recently used these flying geese blocks to create a border for my MFA Quilt Along Quilt and I LOVE how it turned out!

Today I’ll walk you through the 4 at a time flying geese block method (also called the No Waste Method), which is also called the “No Waste” flying geese method, because this method uses all of the fabric (except for the bits of unusable trimming at the very end).
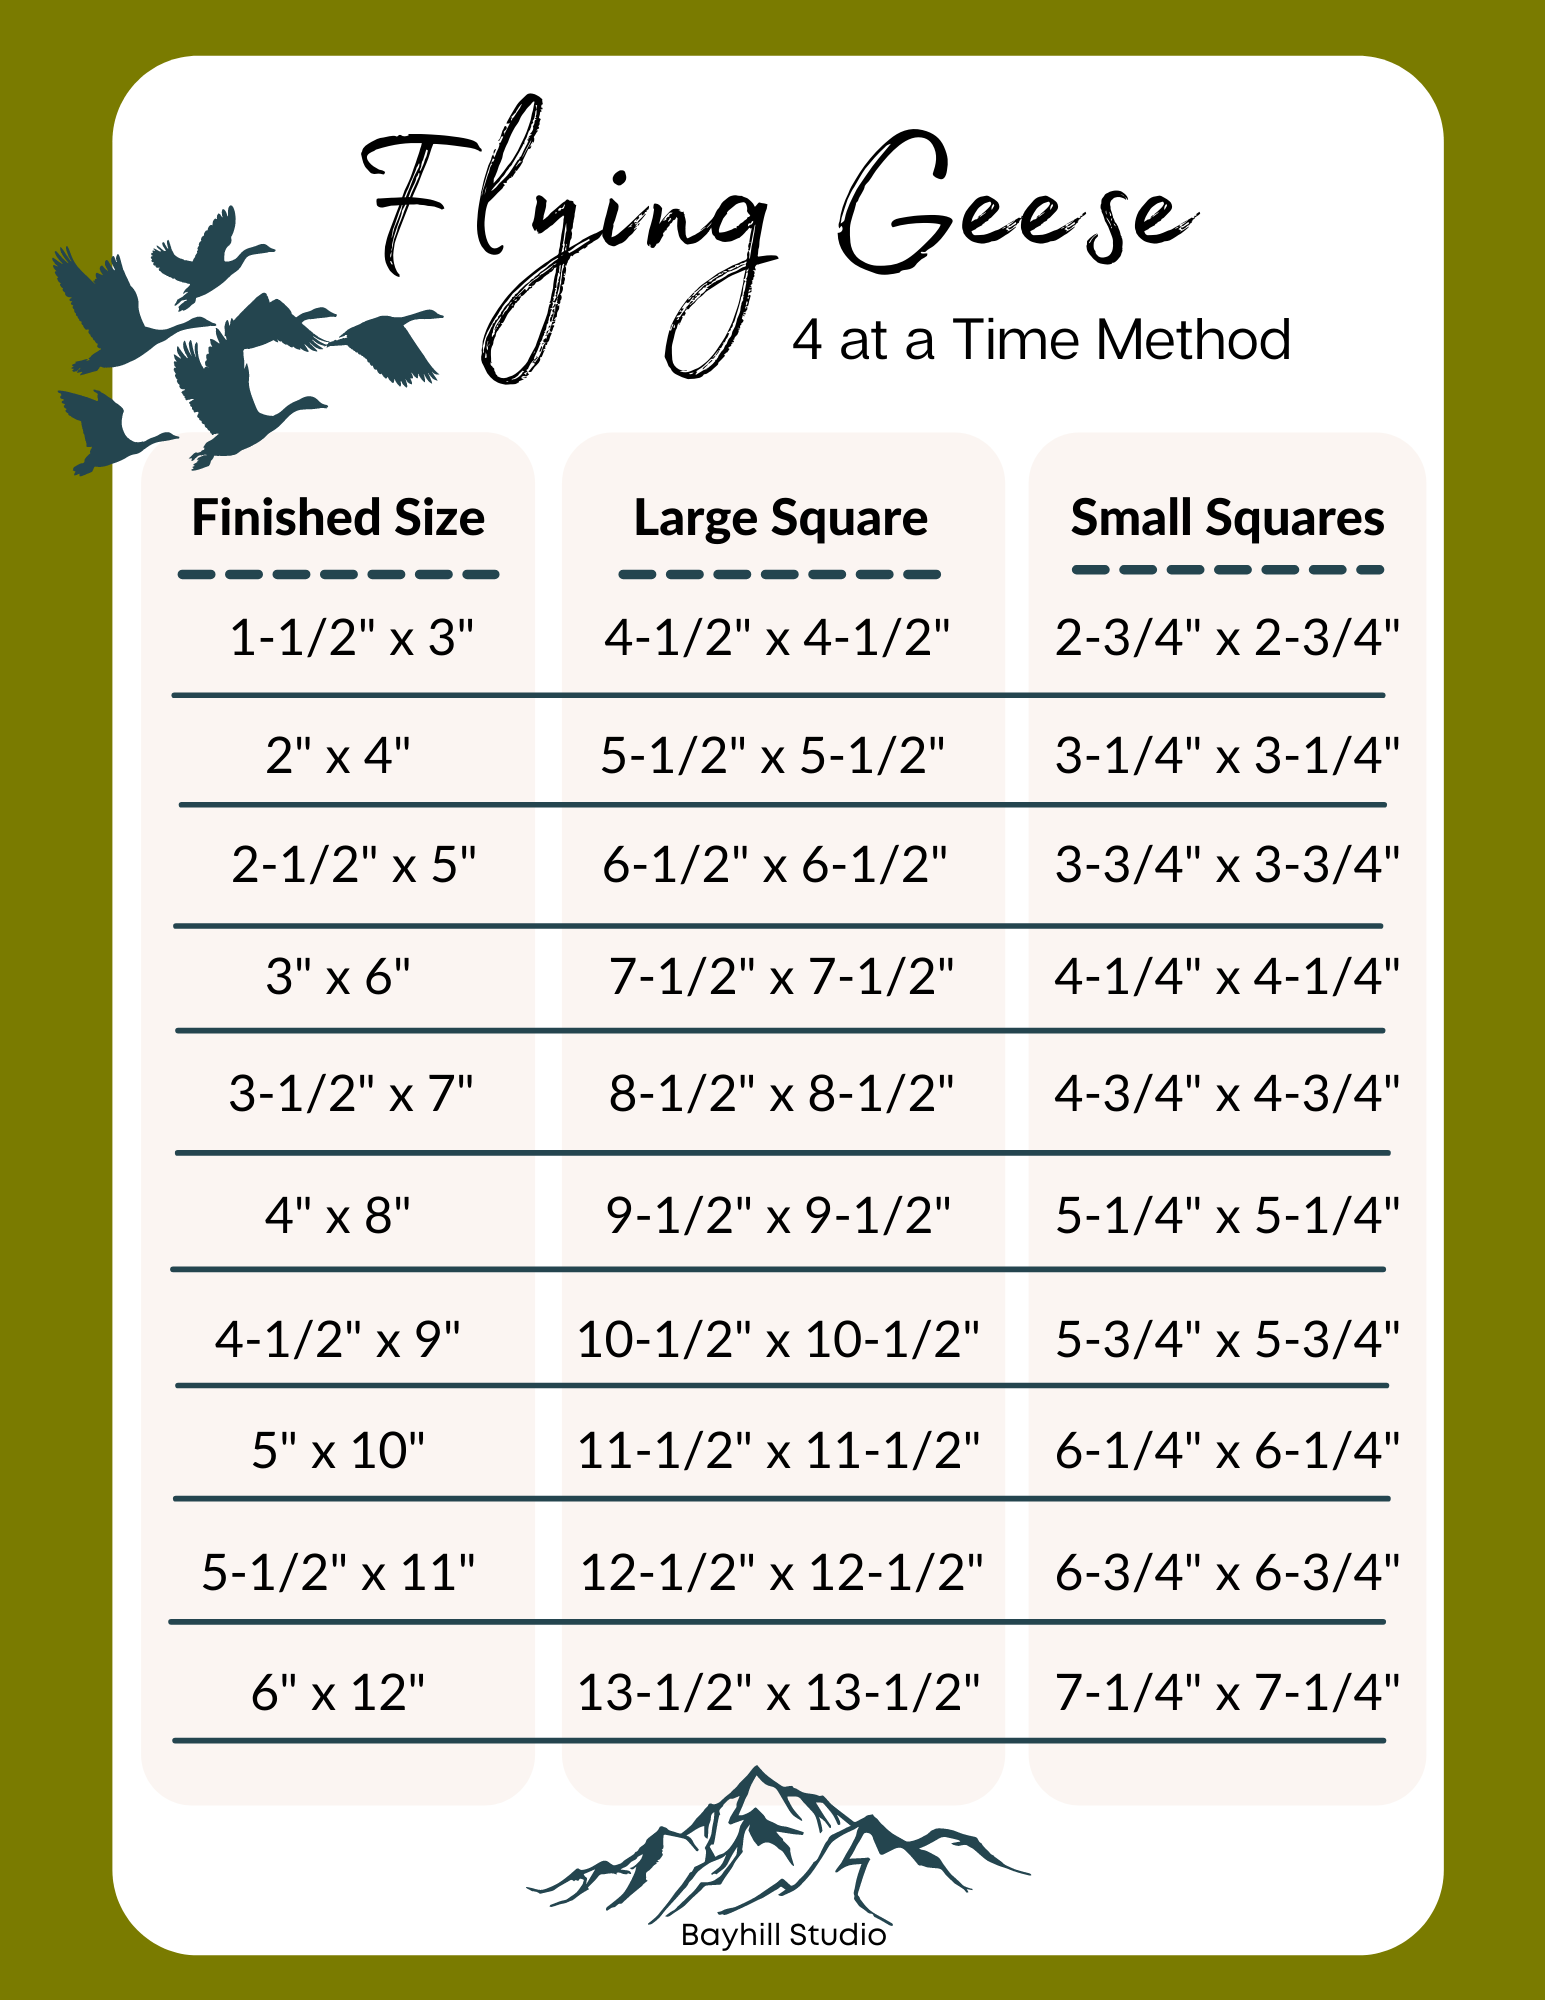
Flying geese are a rectangle typically consisting of a 2:1 ratio. The finished size is the size the block will be after it has been sewn into your quilt. Using a 1/4” seam allowance, you will lose 1/2” of the width and the height of the block. Because of this, you always want to trim your block 1/2” larger than the finished size.
One of the frustrating things about making flying geese is that they can get a little wonky in the sewing process. This chart provides generous sizing so that even if the block is a little wonky here and there, you have ample room to trim so your rectangles will all end up nice and uniform.
This FREE downloadable chart provides cutting guides for the most commonly used sizes of flying geese. Click on the button below to download and print this handy chart.
Take a look at this video where I demonstrate how to make this quilt block. I have also included written step-by-step instructions below. The first thing you will need to do is determine which finished block size you are wanting to create. Once you have selected the finished block size on the chart, follow along the chart to the middle and right column to see the measurements for the large and small squares. Once you have your squares cut, you can begin assembling your block.
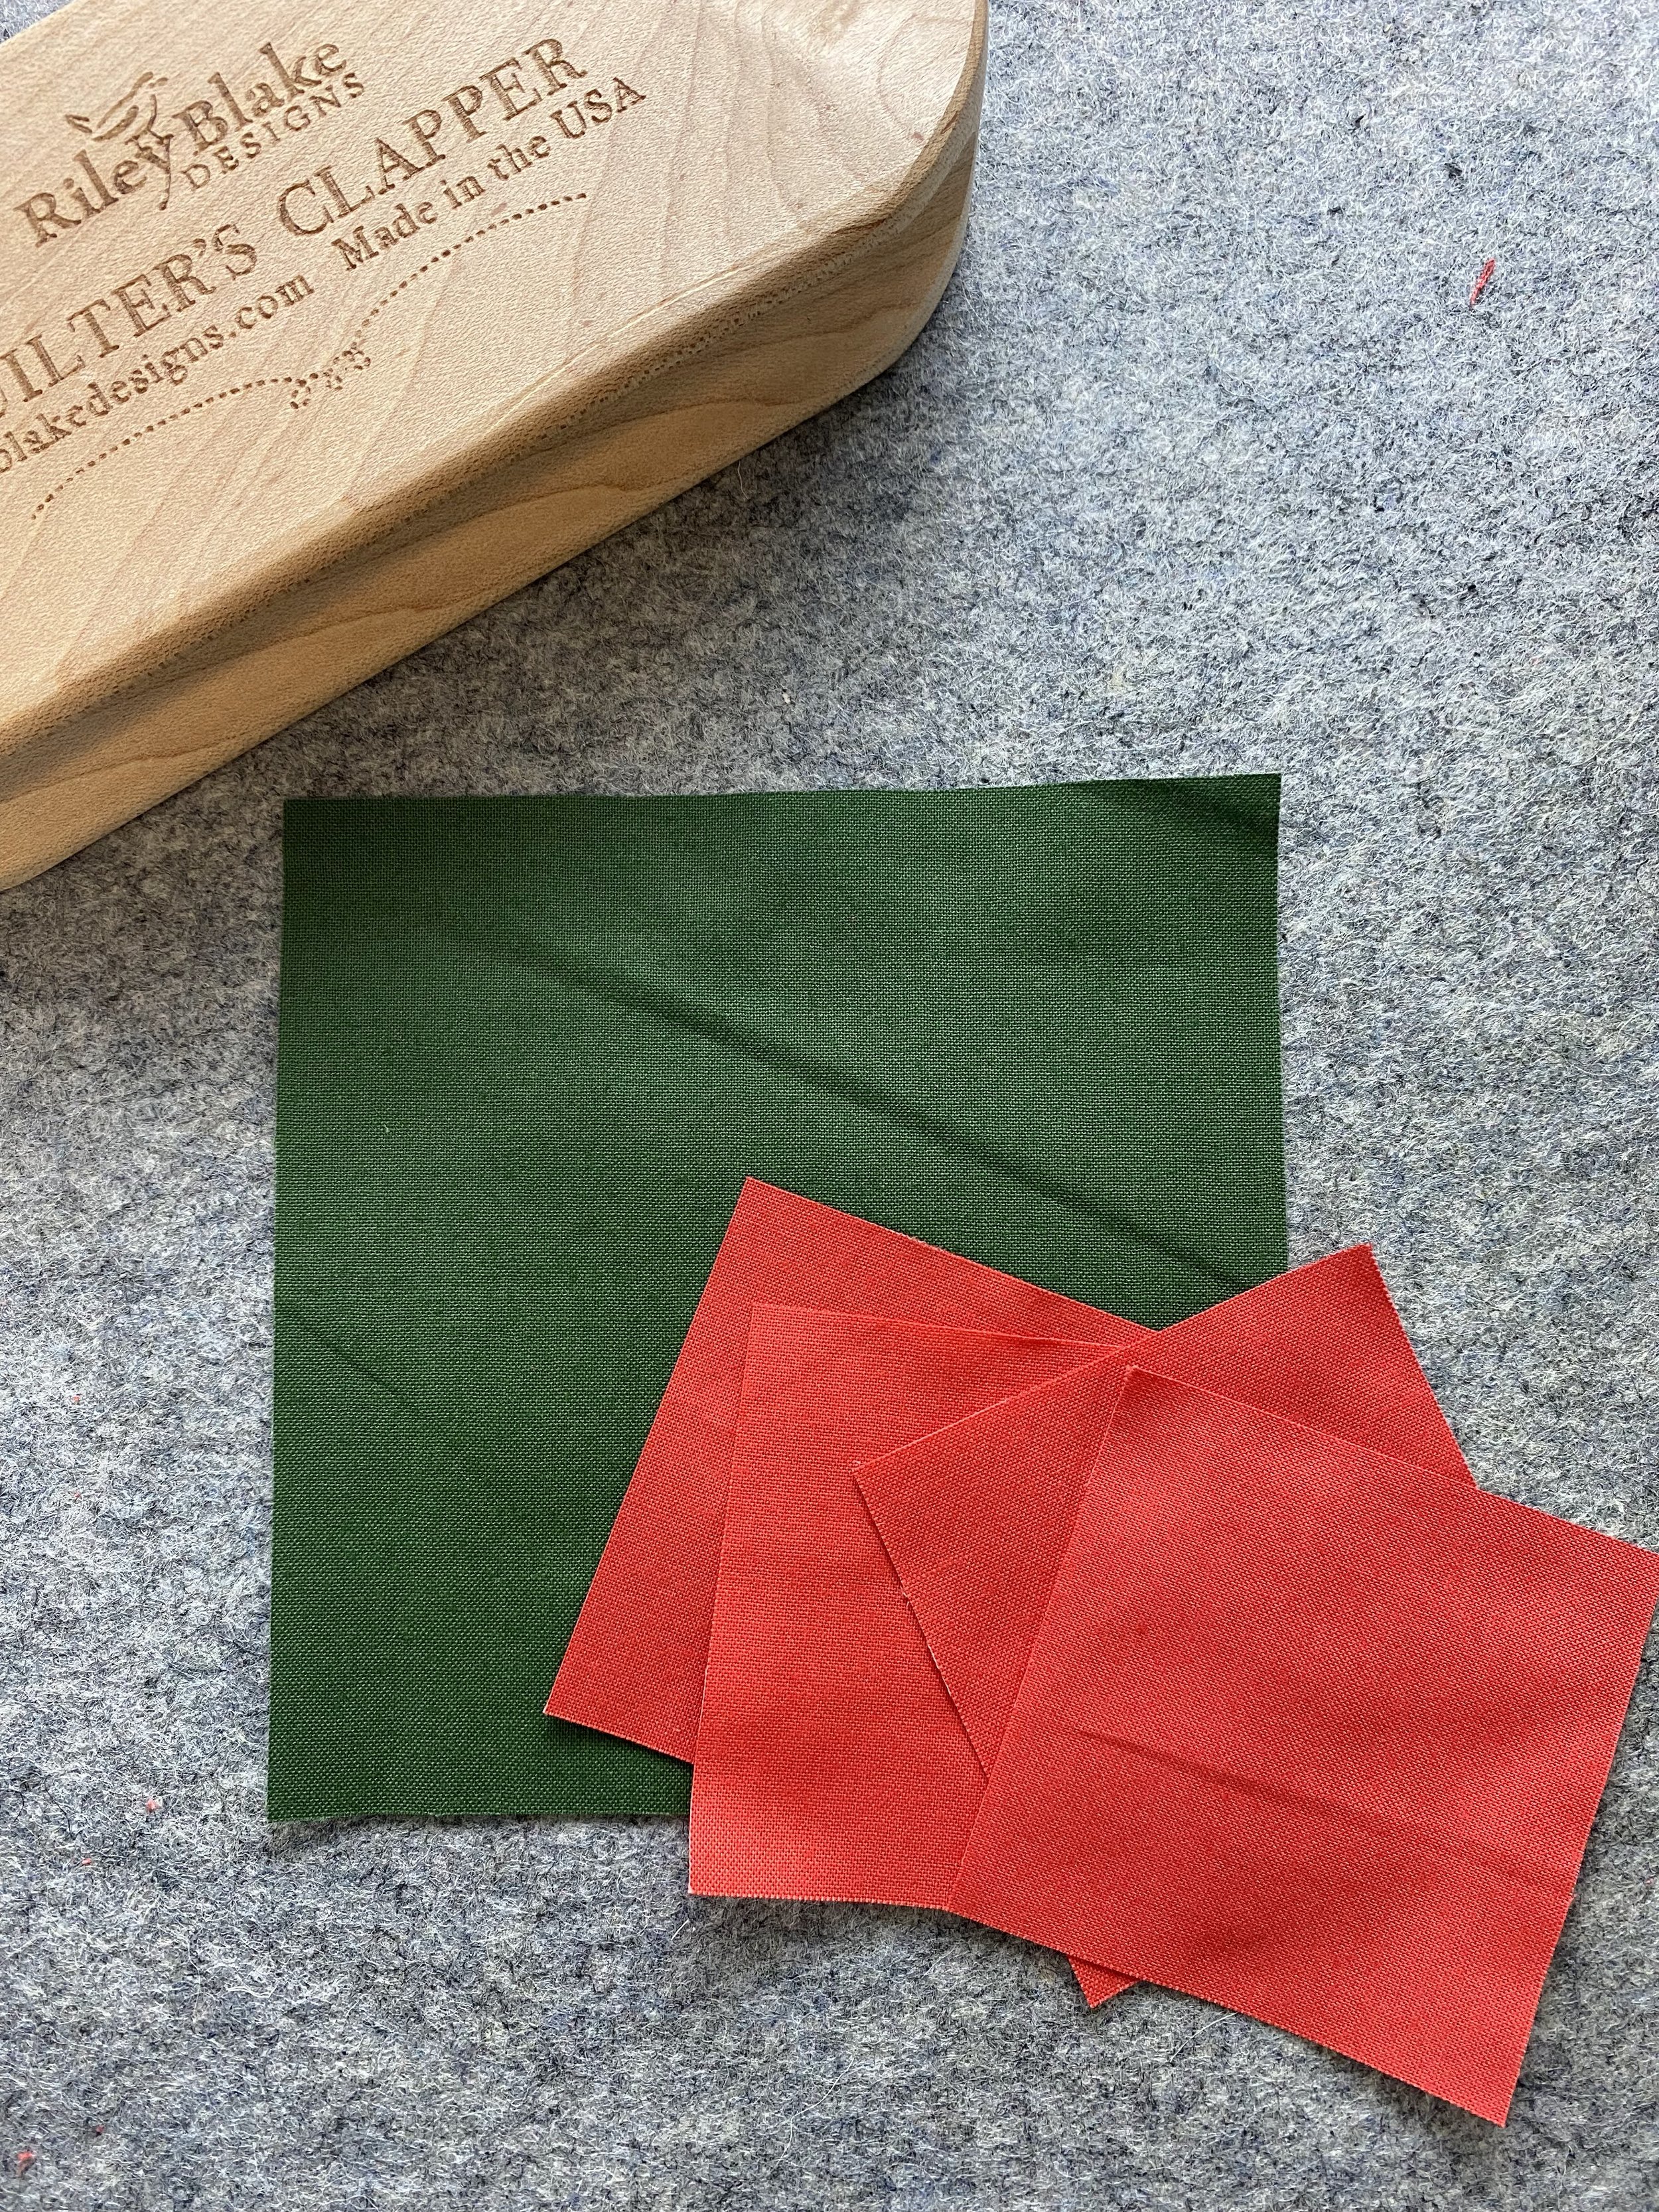
You Will Need:
1 large square (see chart above for measurements)
4 small squares (see chart above)
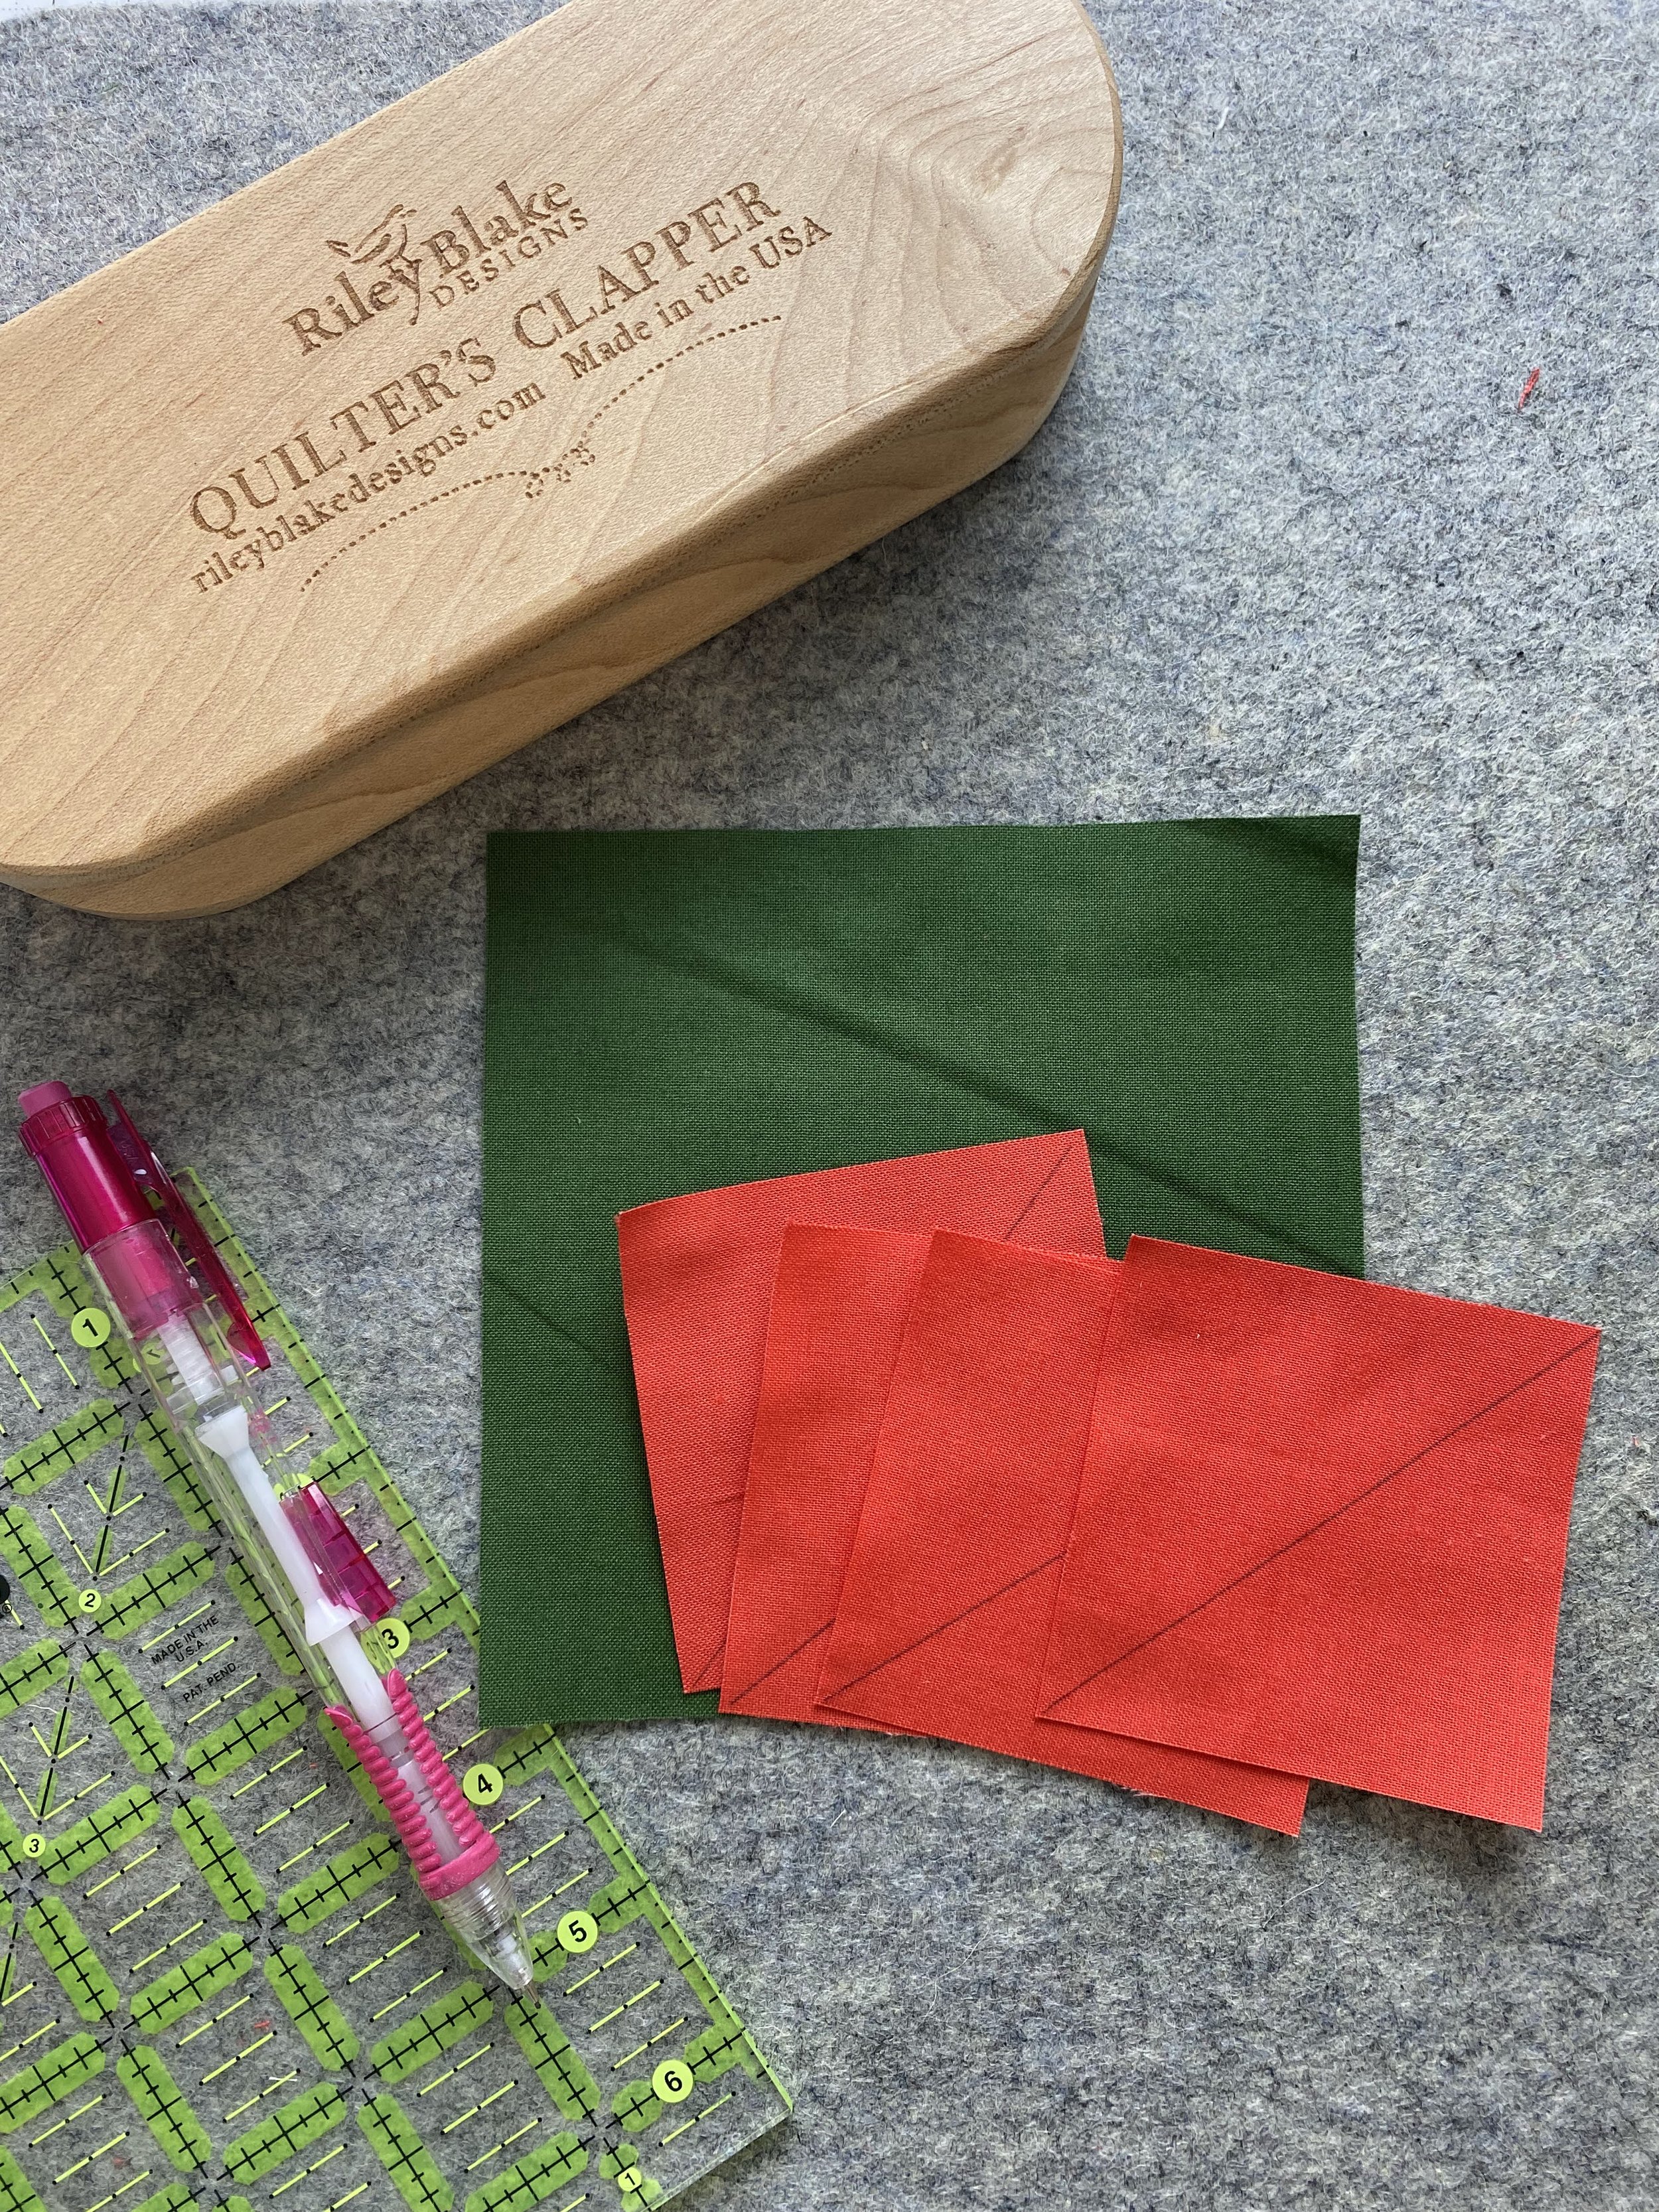
Step 1
Draw a diagonal line on each of the small squares.

Step 2
Arrange two of the small squares so they nest in opposite corners of the large square, with the diagonal lines aligned (see image).

Step 3
Stitch a scant 1/4” to each side of the drawn diagonal lines.
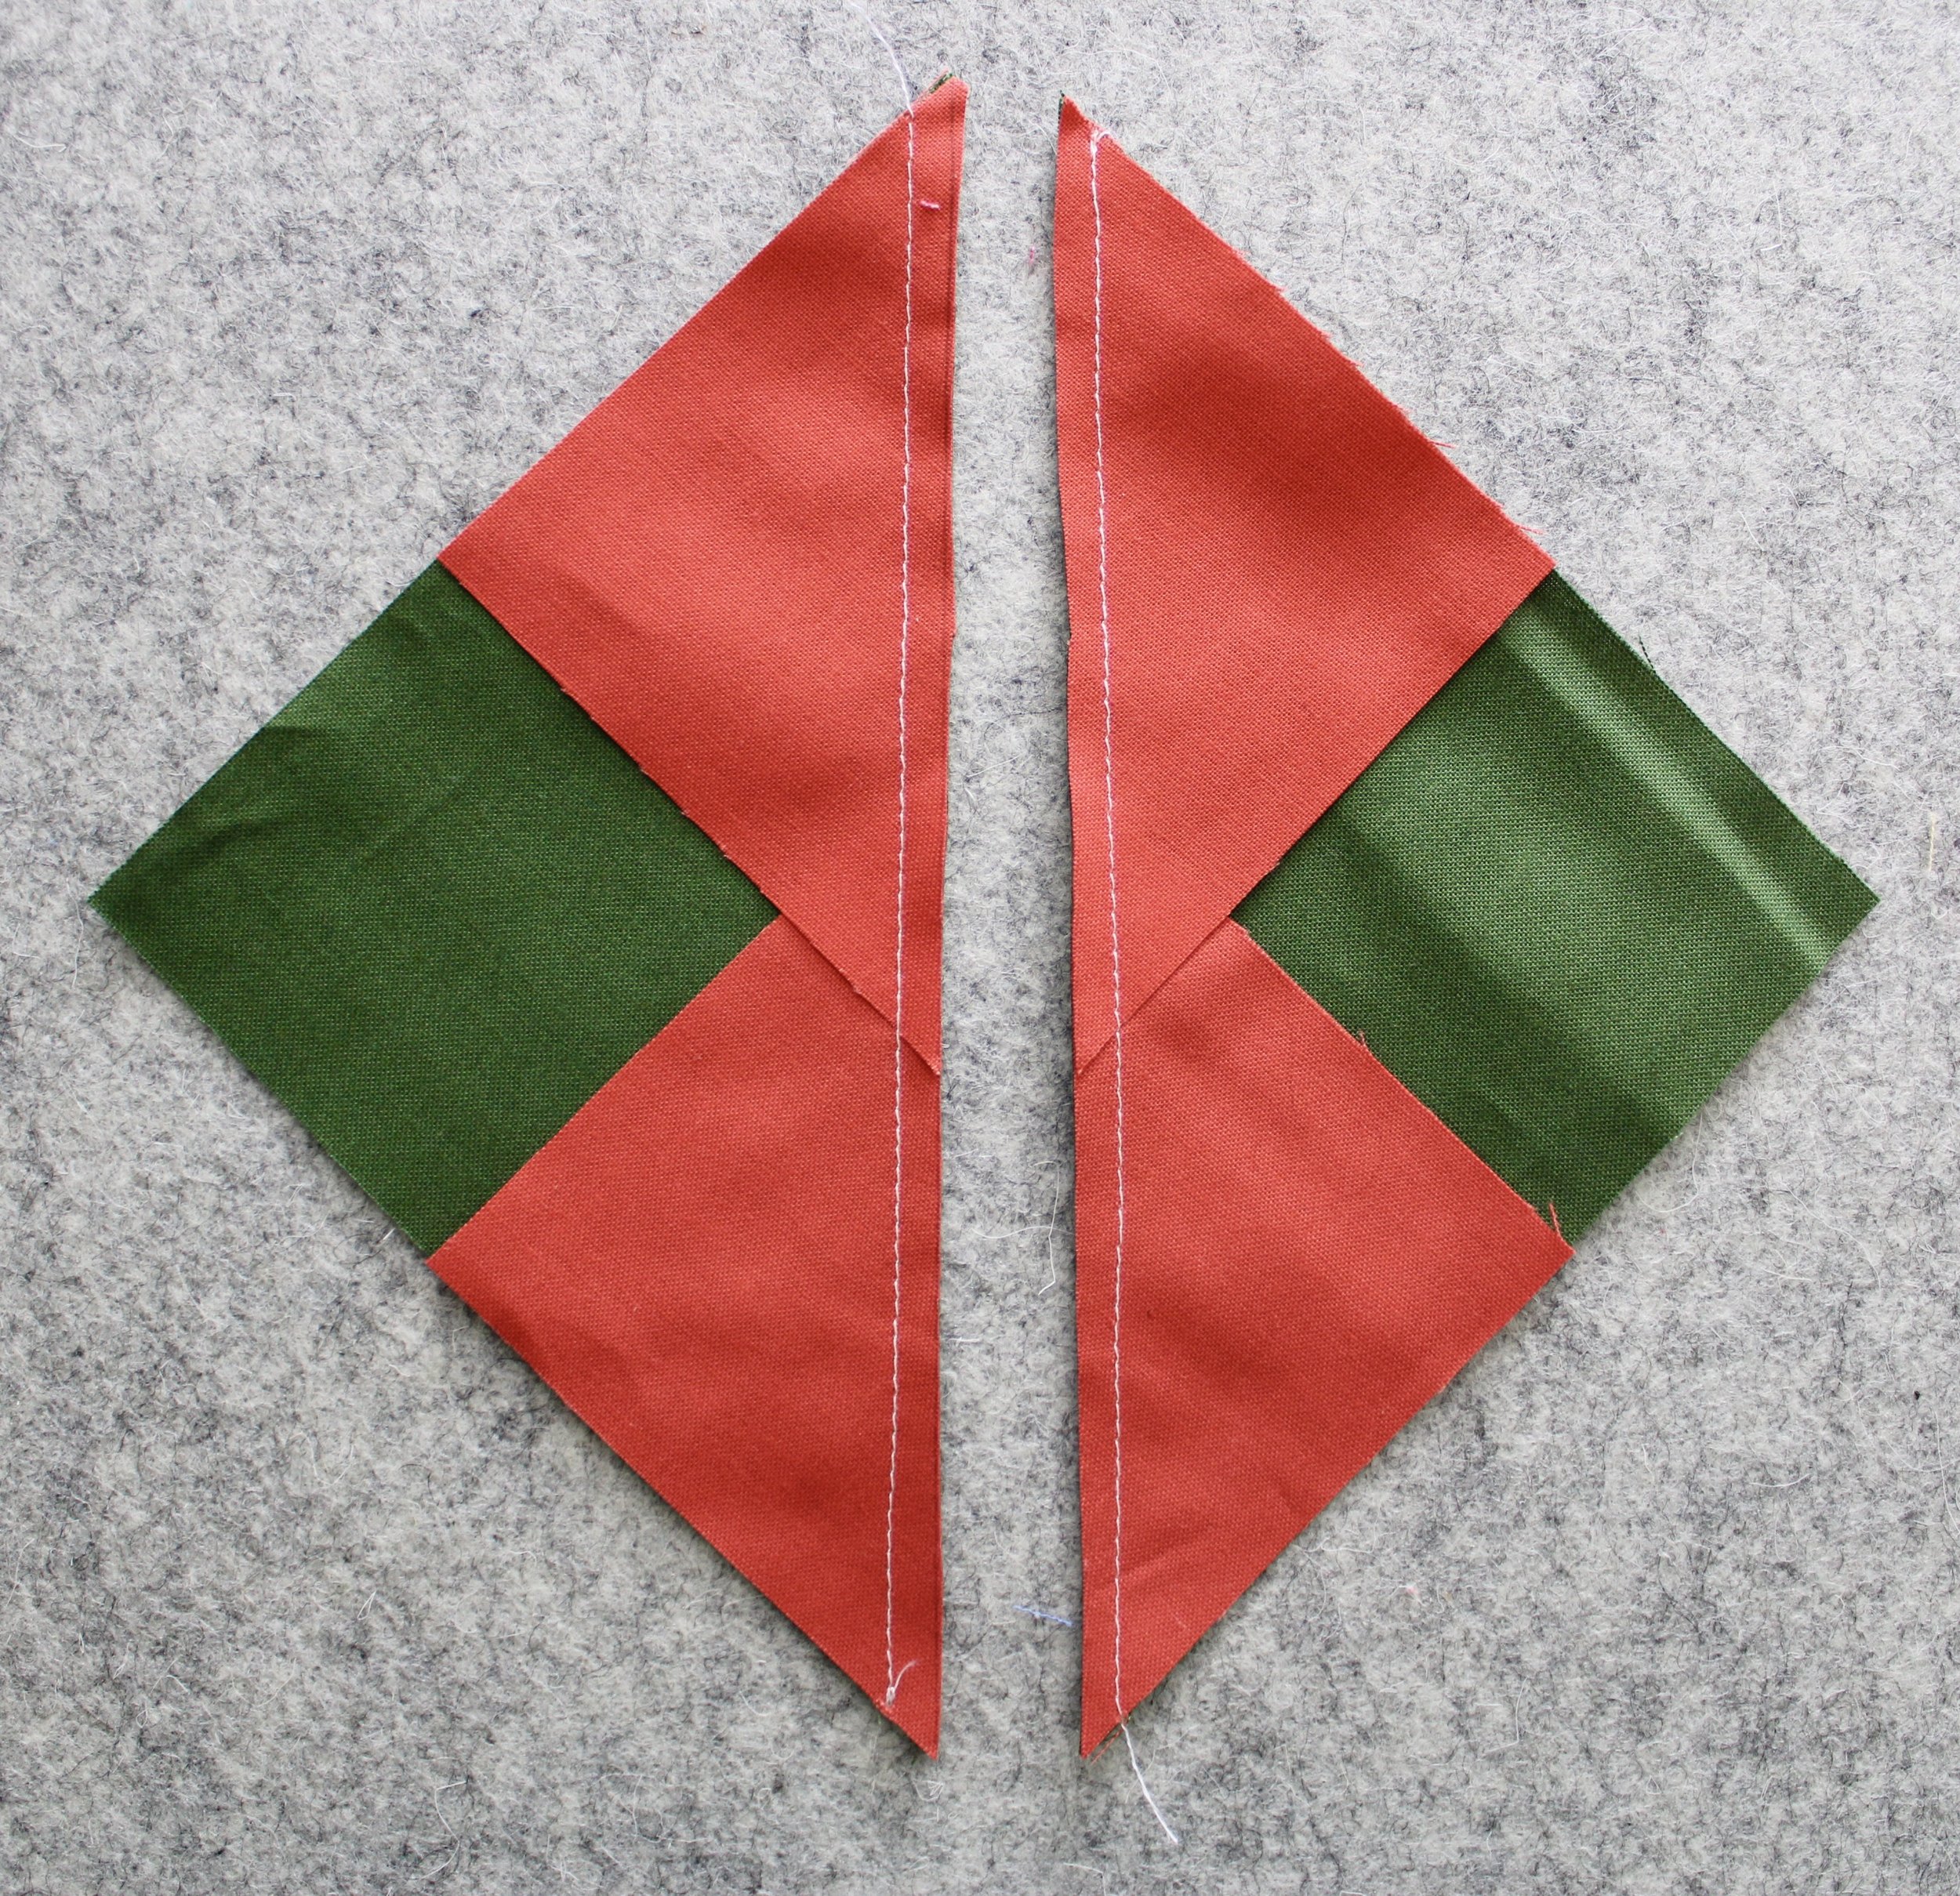
Step 4
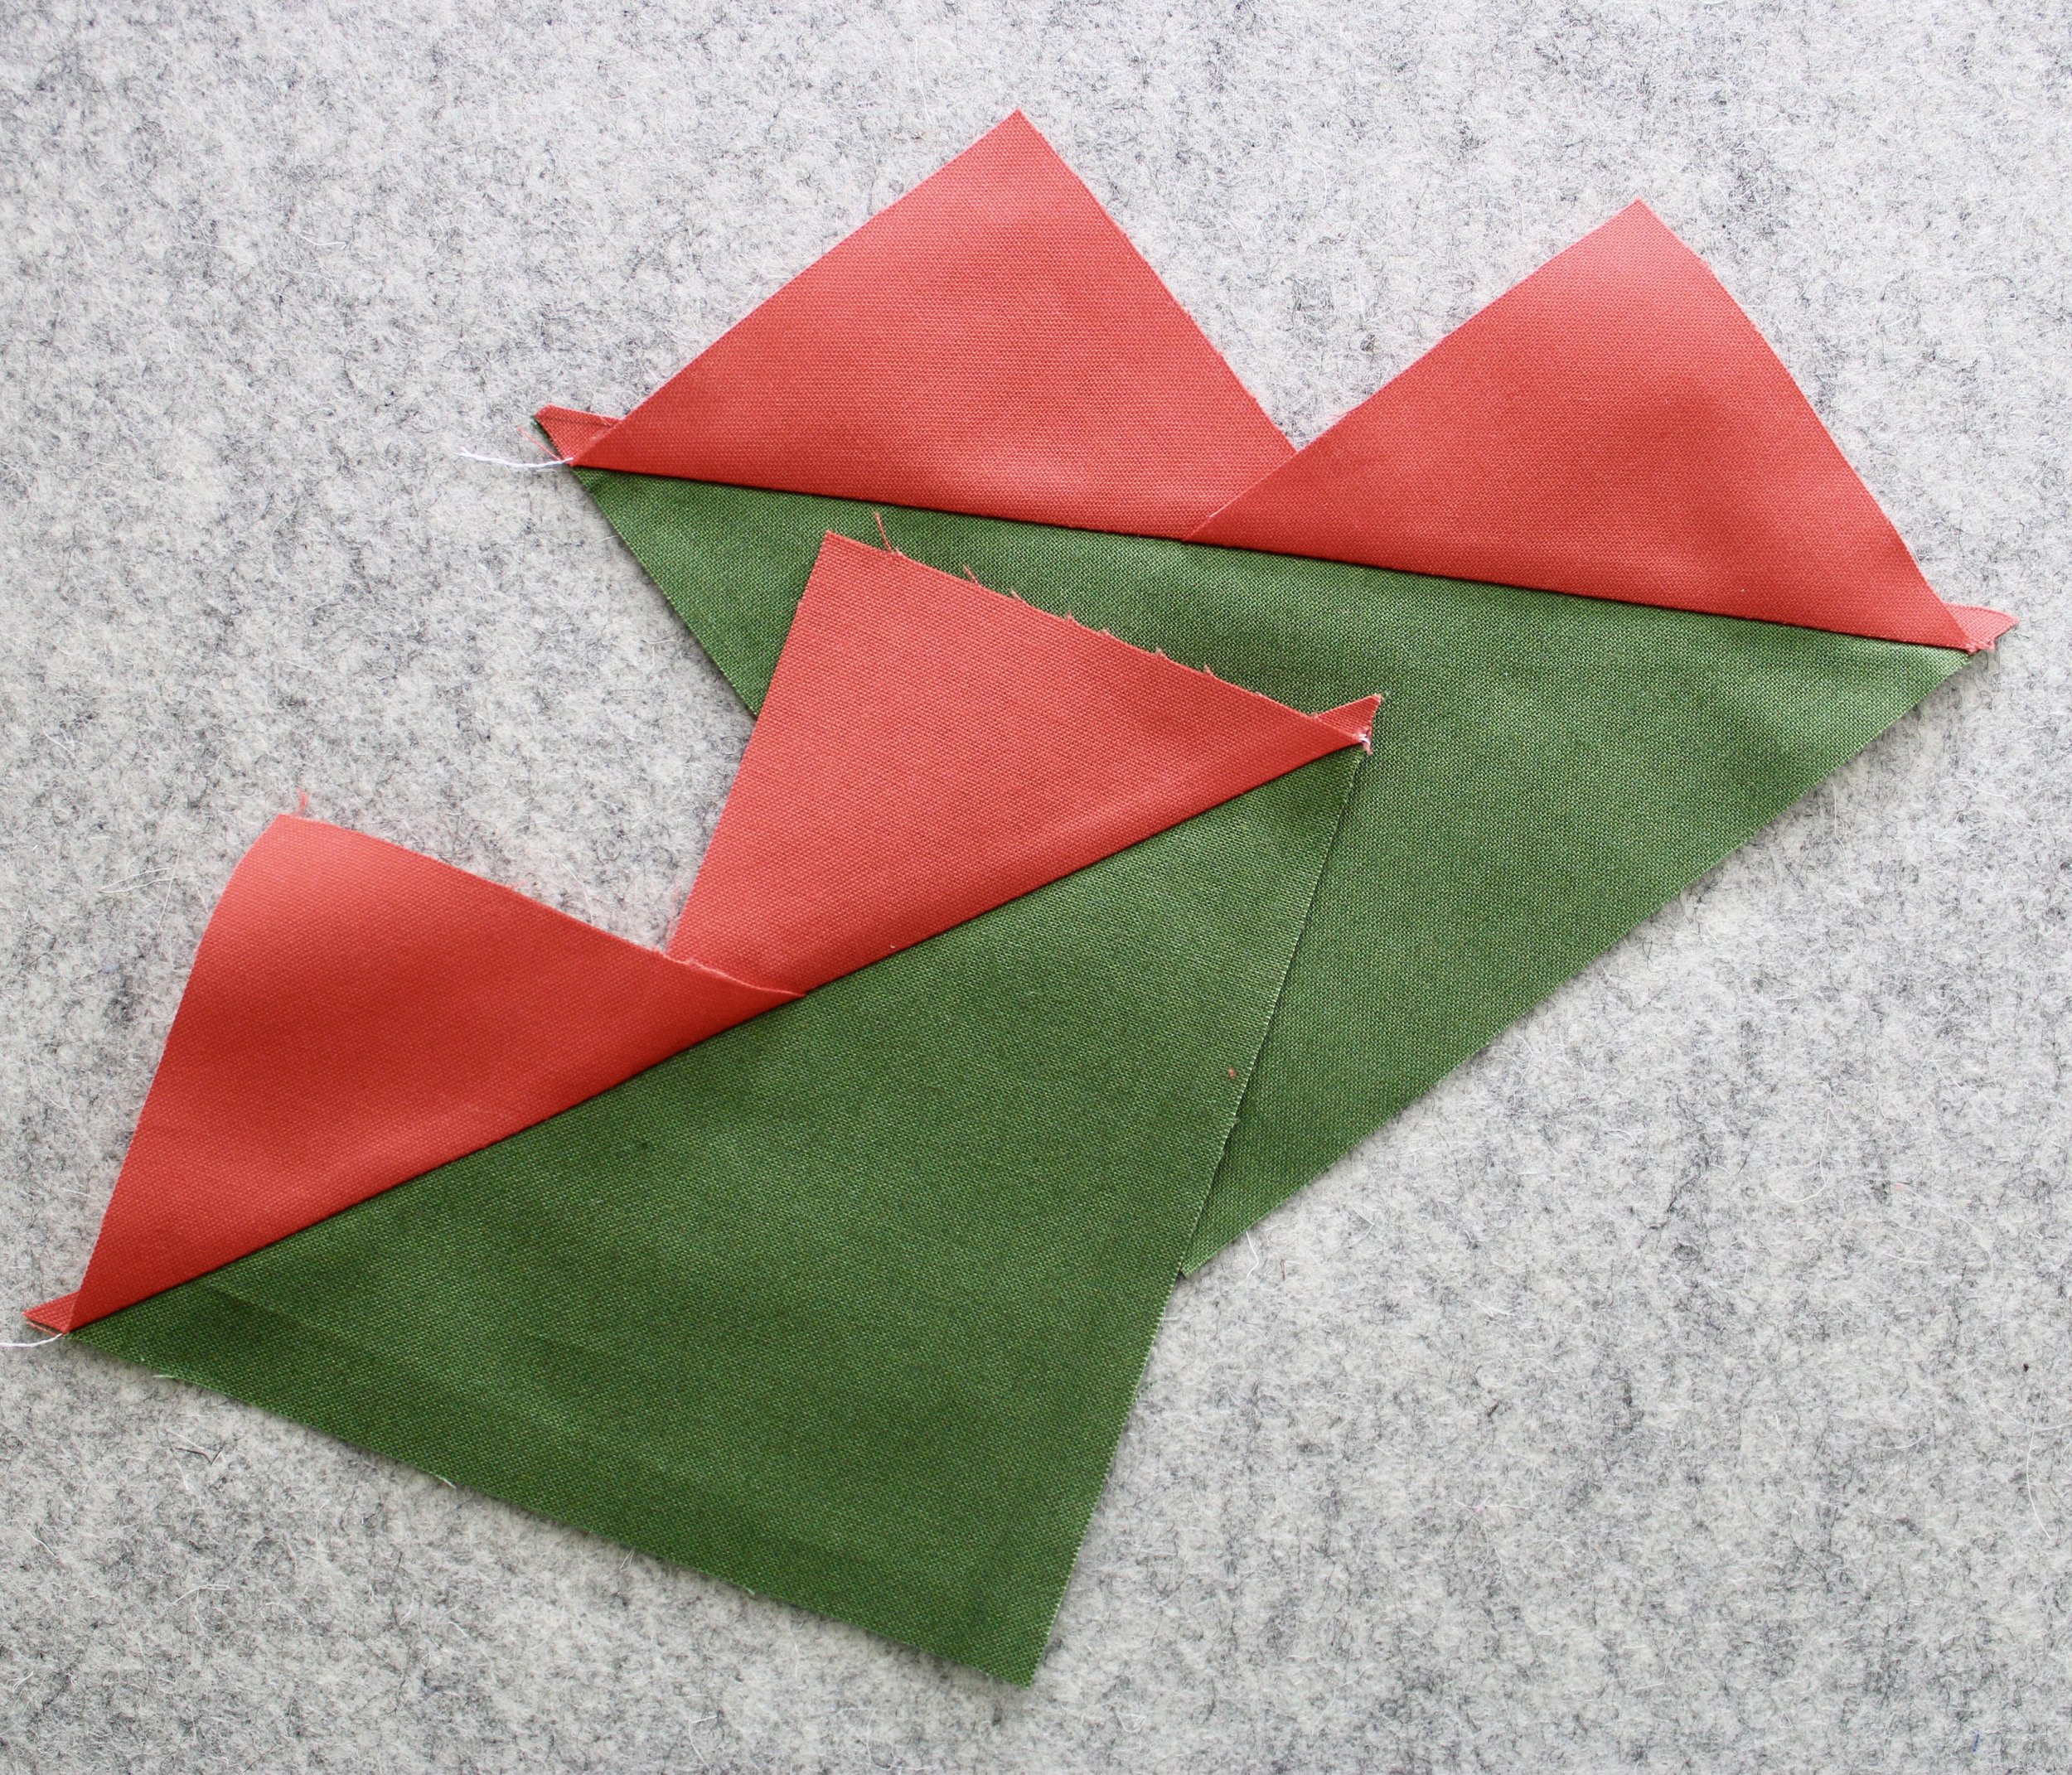
Cut along the drawn lines. You now have two halves cut from the larger square.
Step 5
Press open both halves.

Step 6
Take one of your halves and place a small square in the free corner so the drawn line is arranged from corner to seam as shown in the photo.

Step 7
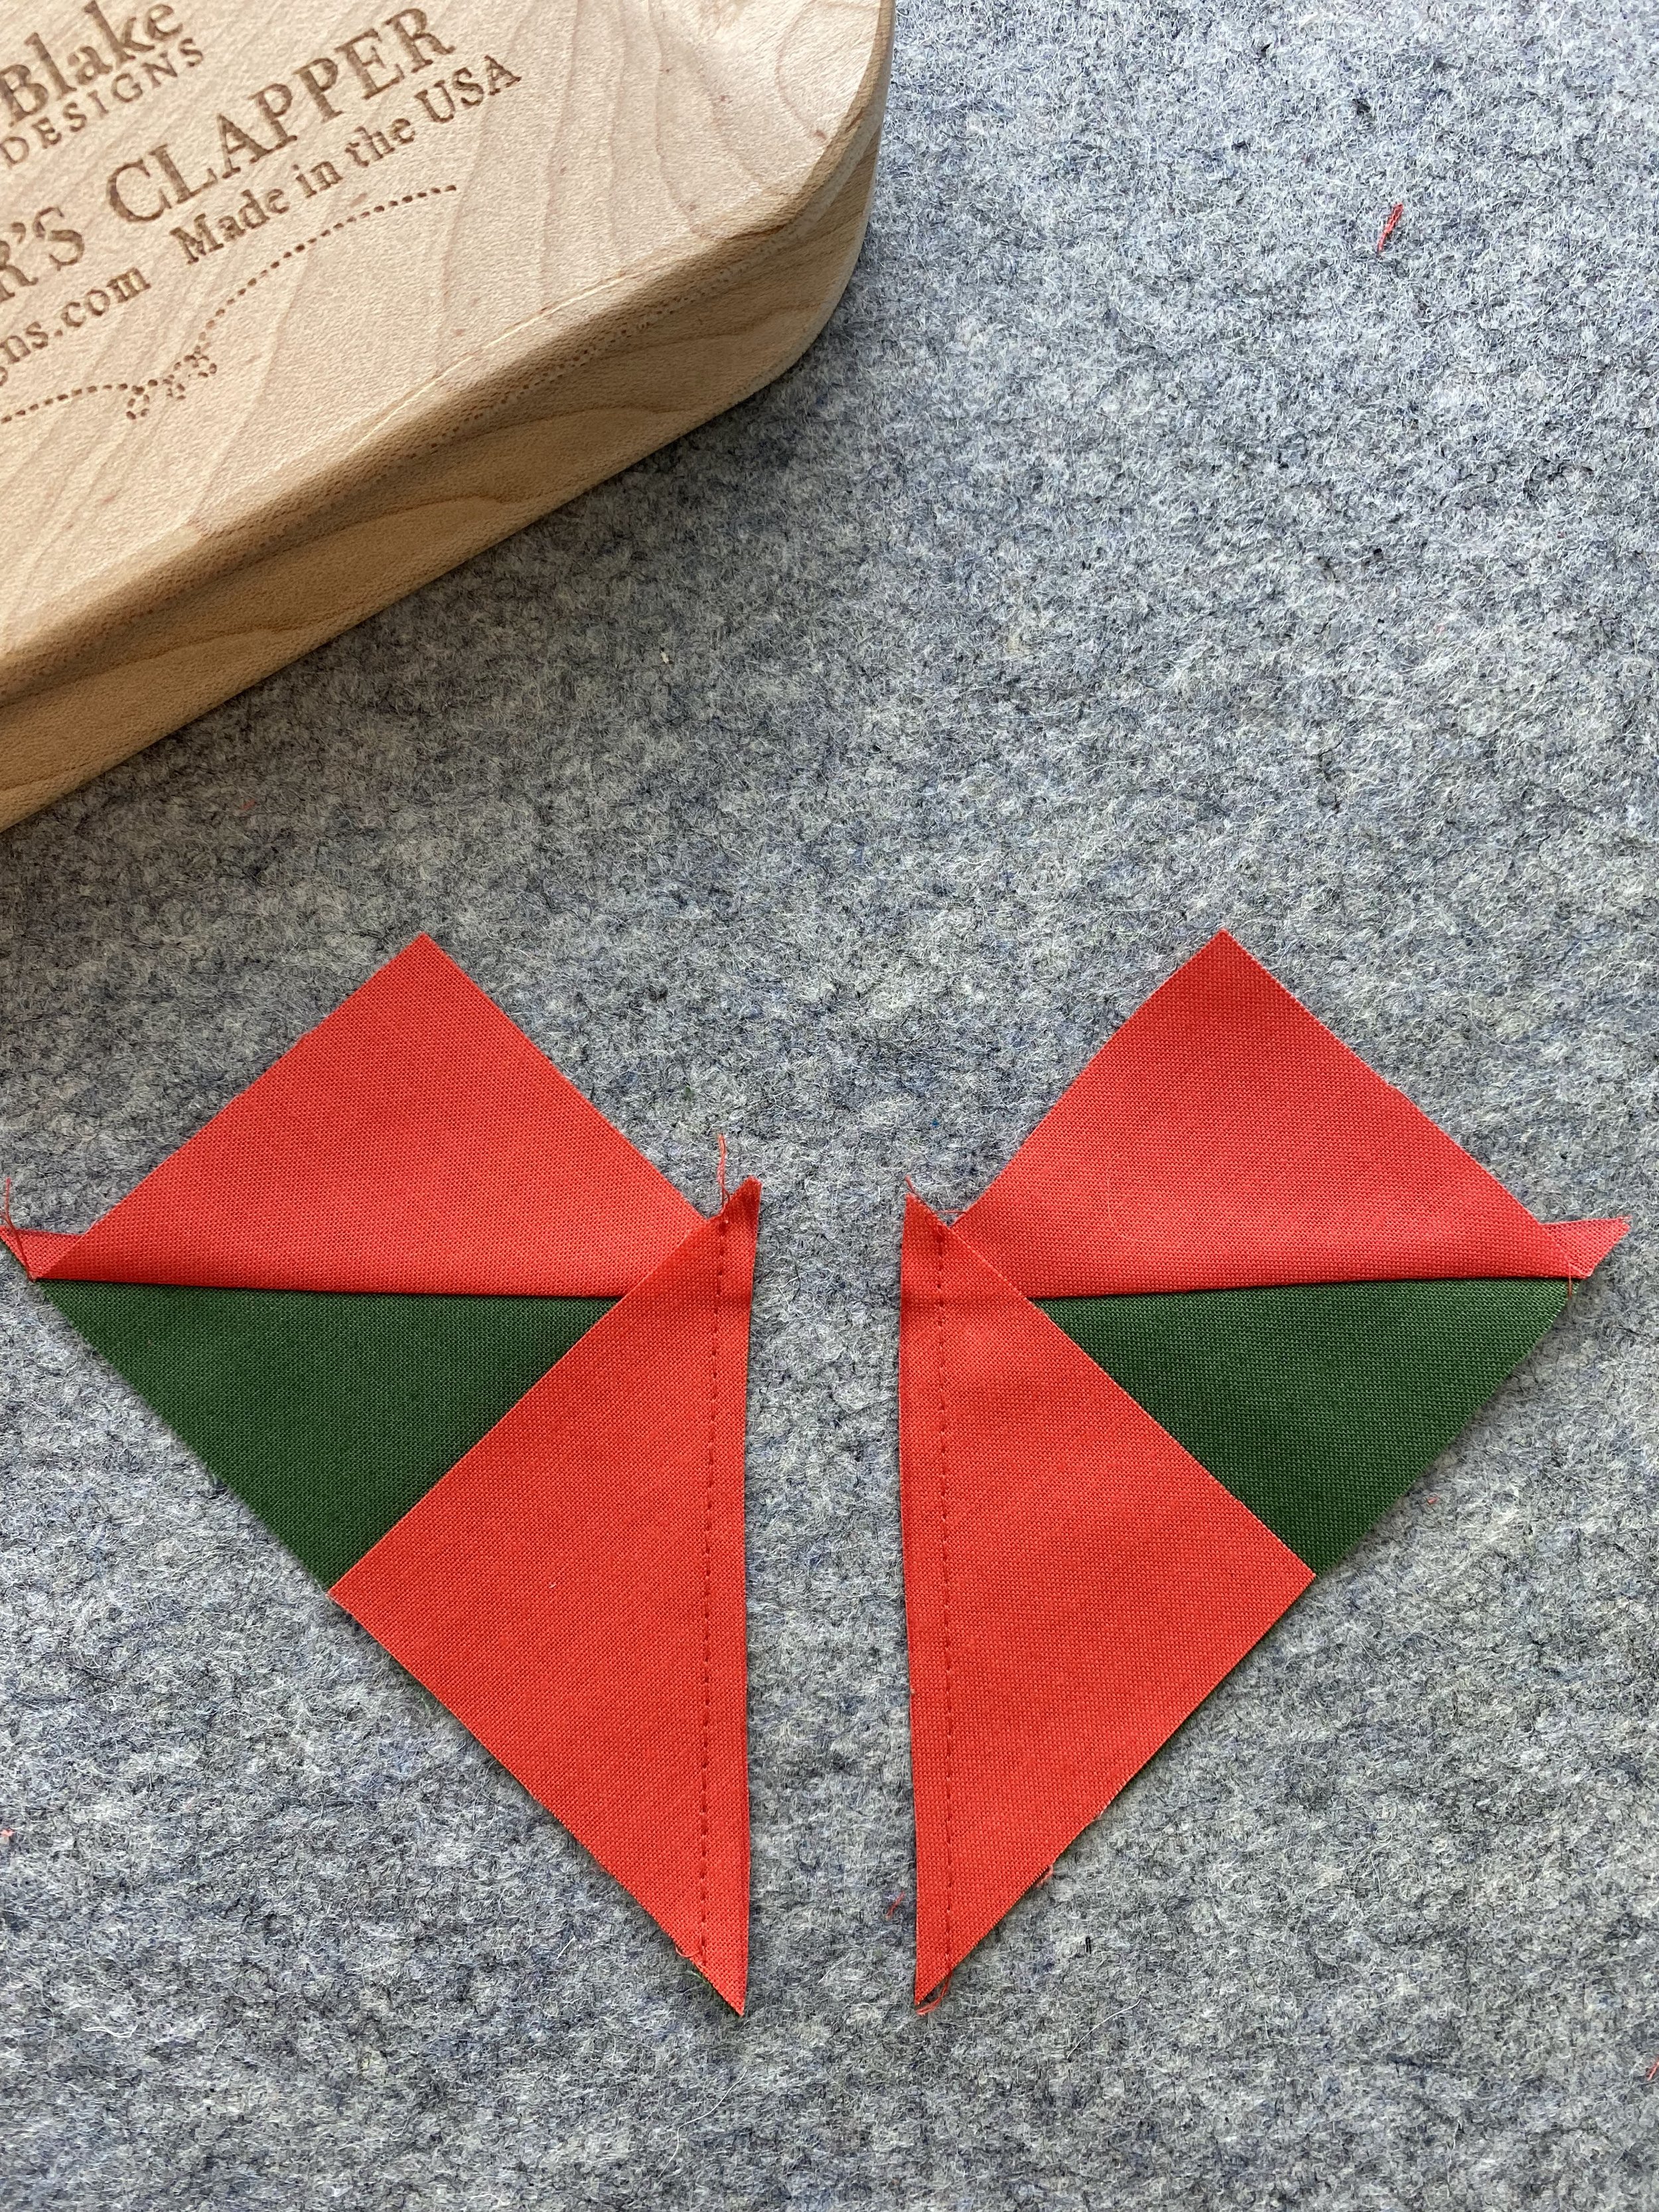
Stitch a scant 1/4” on each side of the drawn line.
Step 8
Cut along the drawn line. Press open.
Step 9
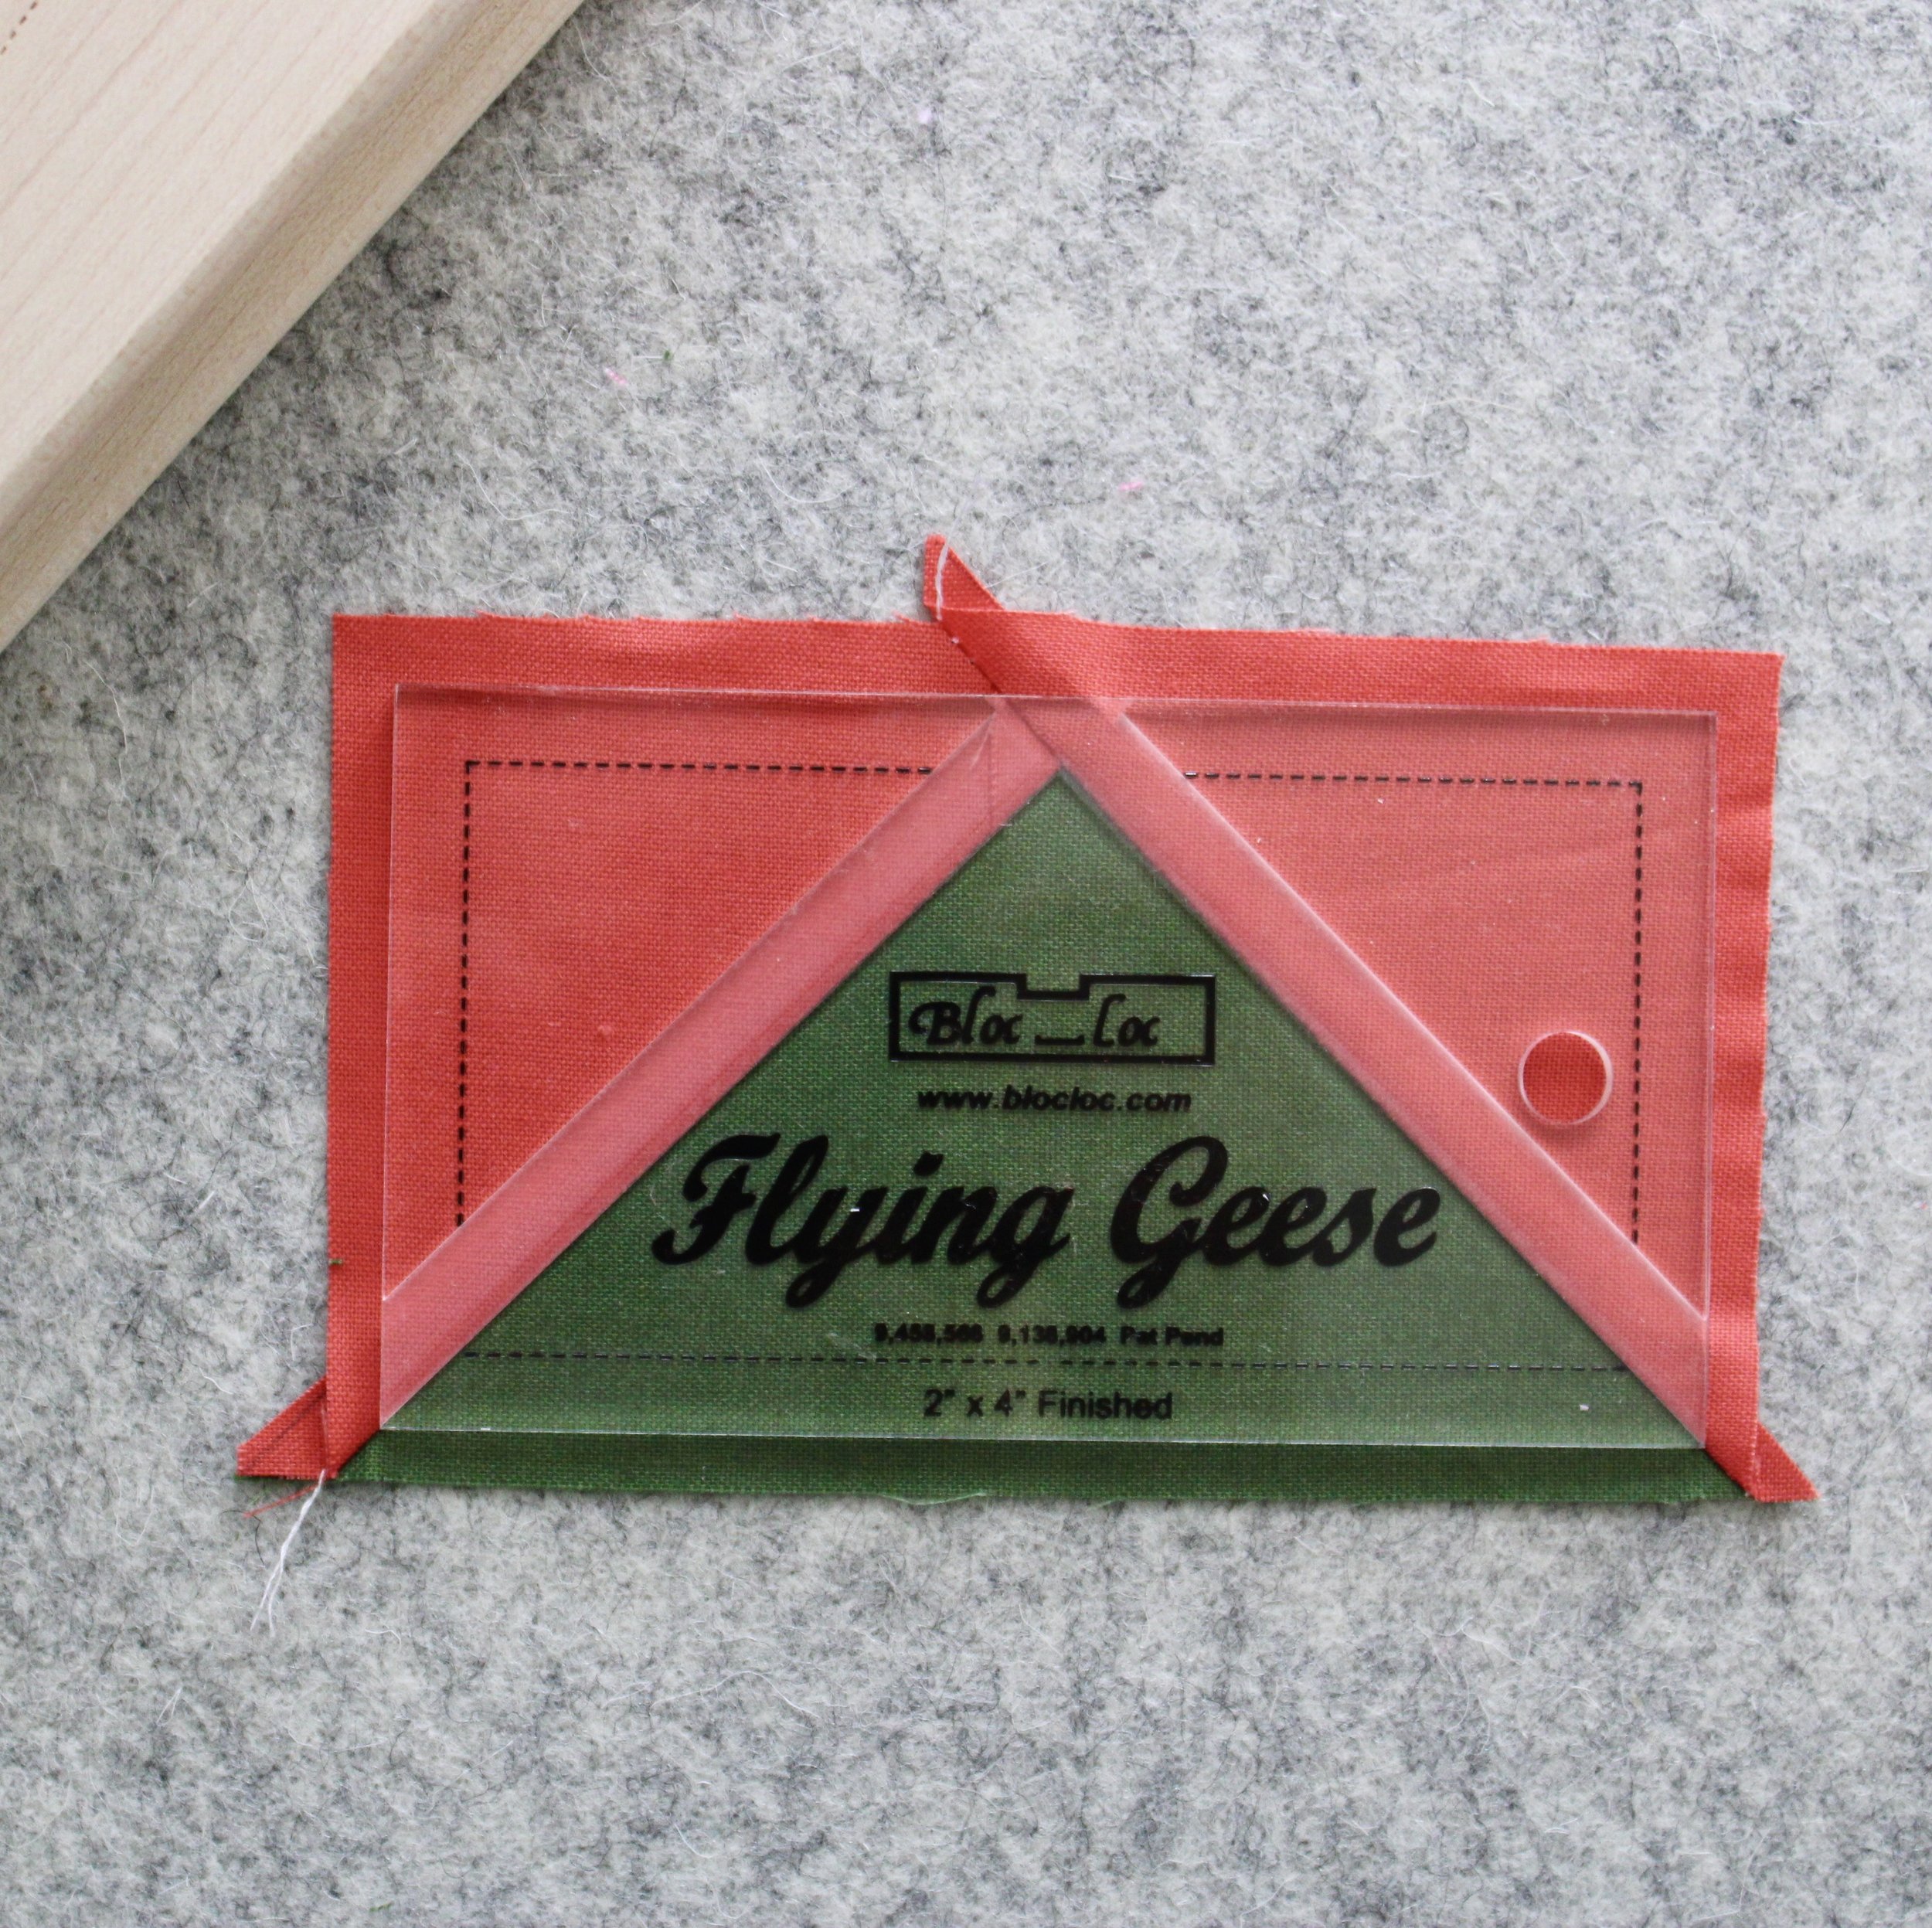
Trim rectangles 1/2” larger than the finished size indicated on the chart above. For example, for my 2” x 4” blocks, I trimmed the block to 2-1/2” x 4-1/2”.
If you are making a LOT of flying geese, I recommend investing in this bloc loc ruler. The only drawback of this ruler is that you are limited in available sizes. You can see this specific ruler can only be used to make 2” x 4” (finished) flying geese. Makes trimming a breeze!
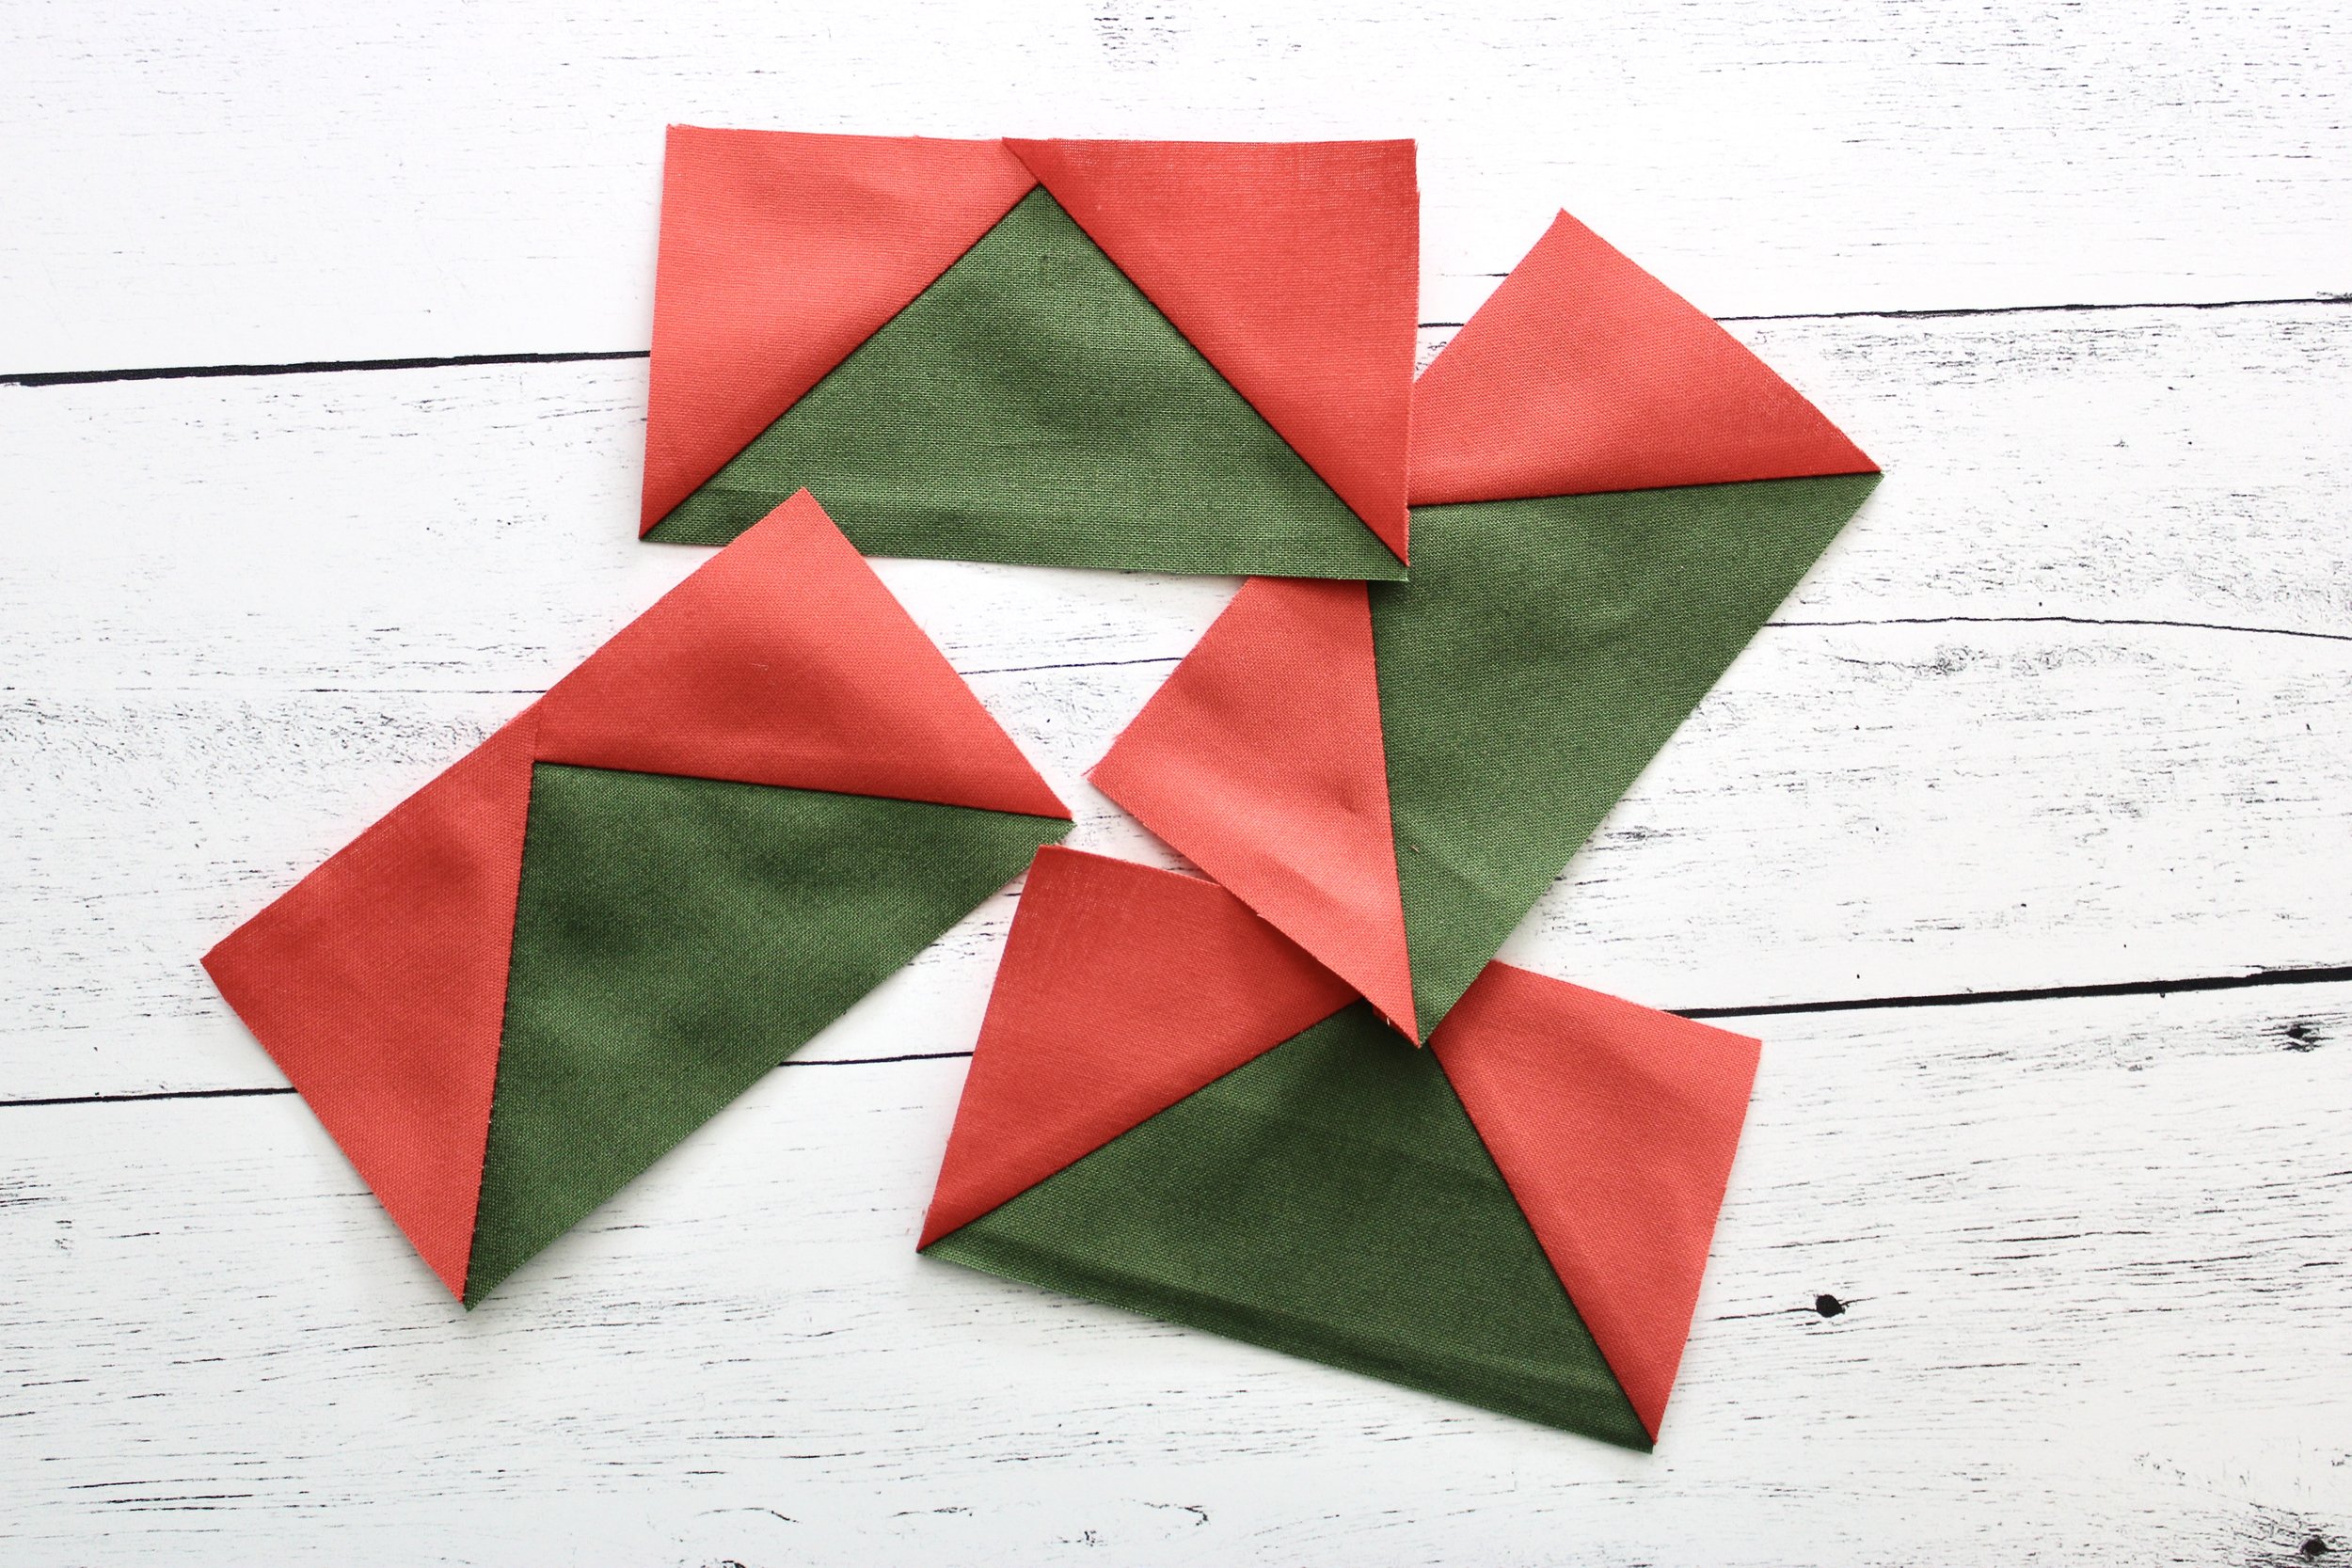
That’s all there is to it! No waste flying geese - four at a time!
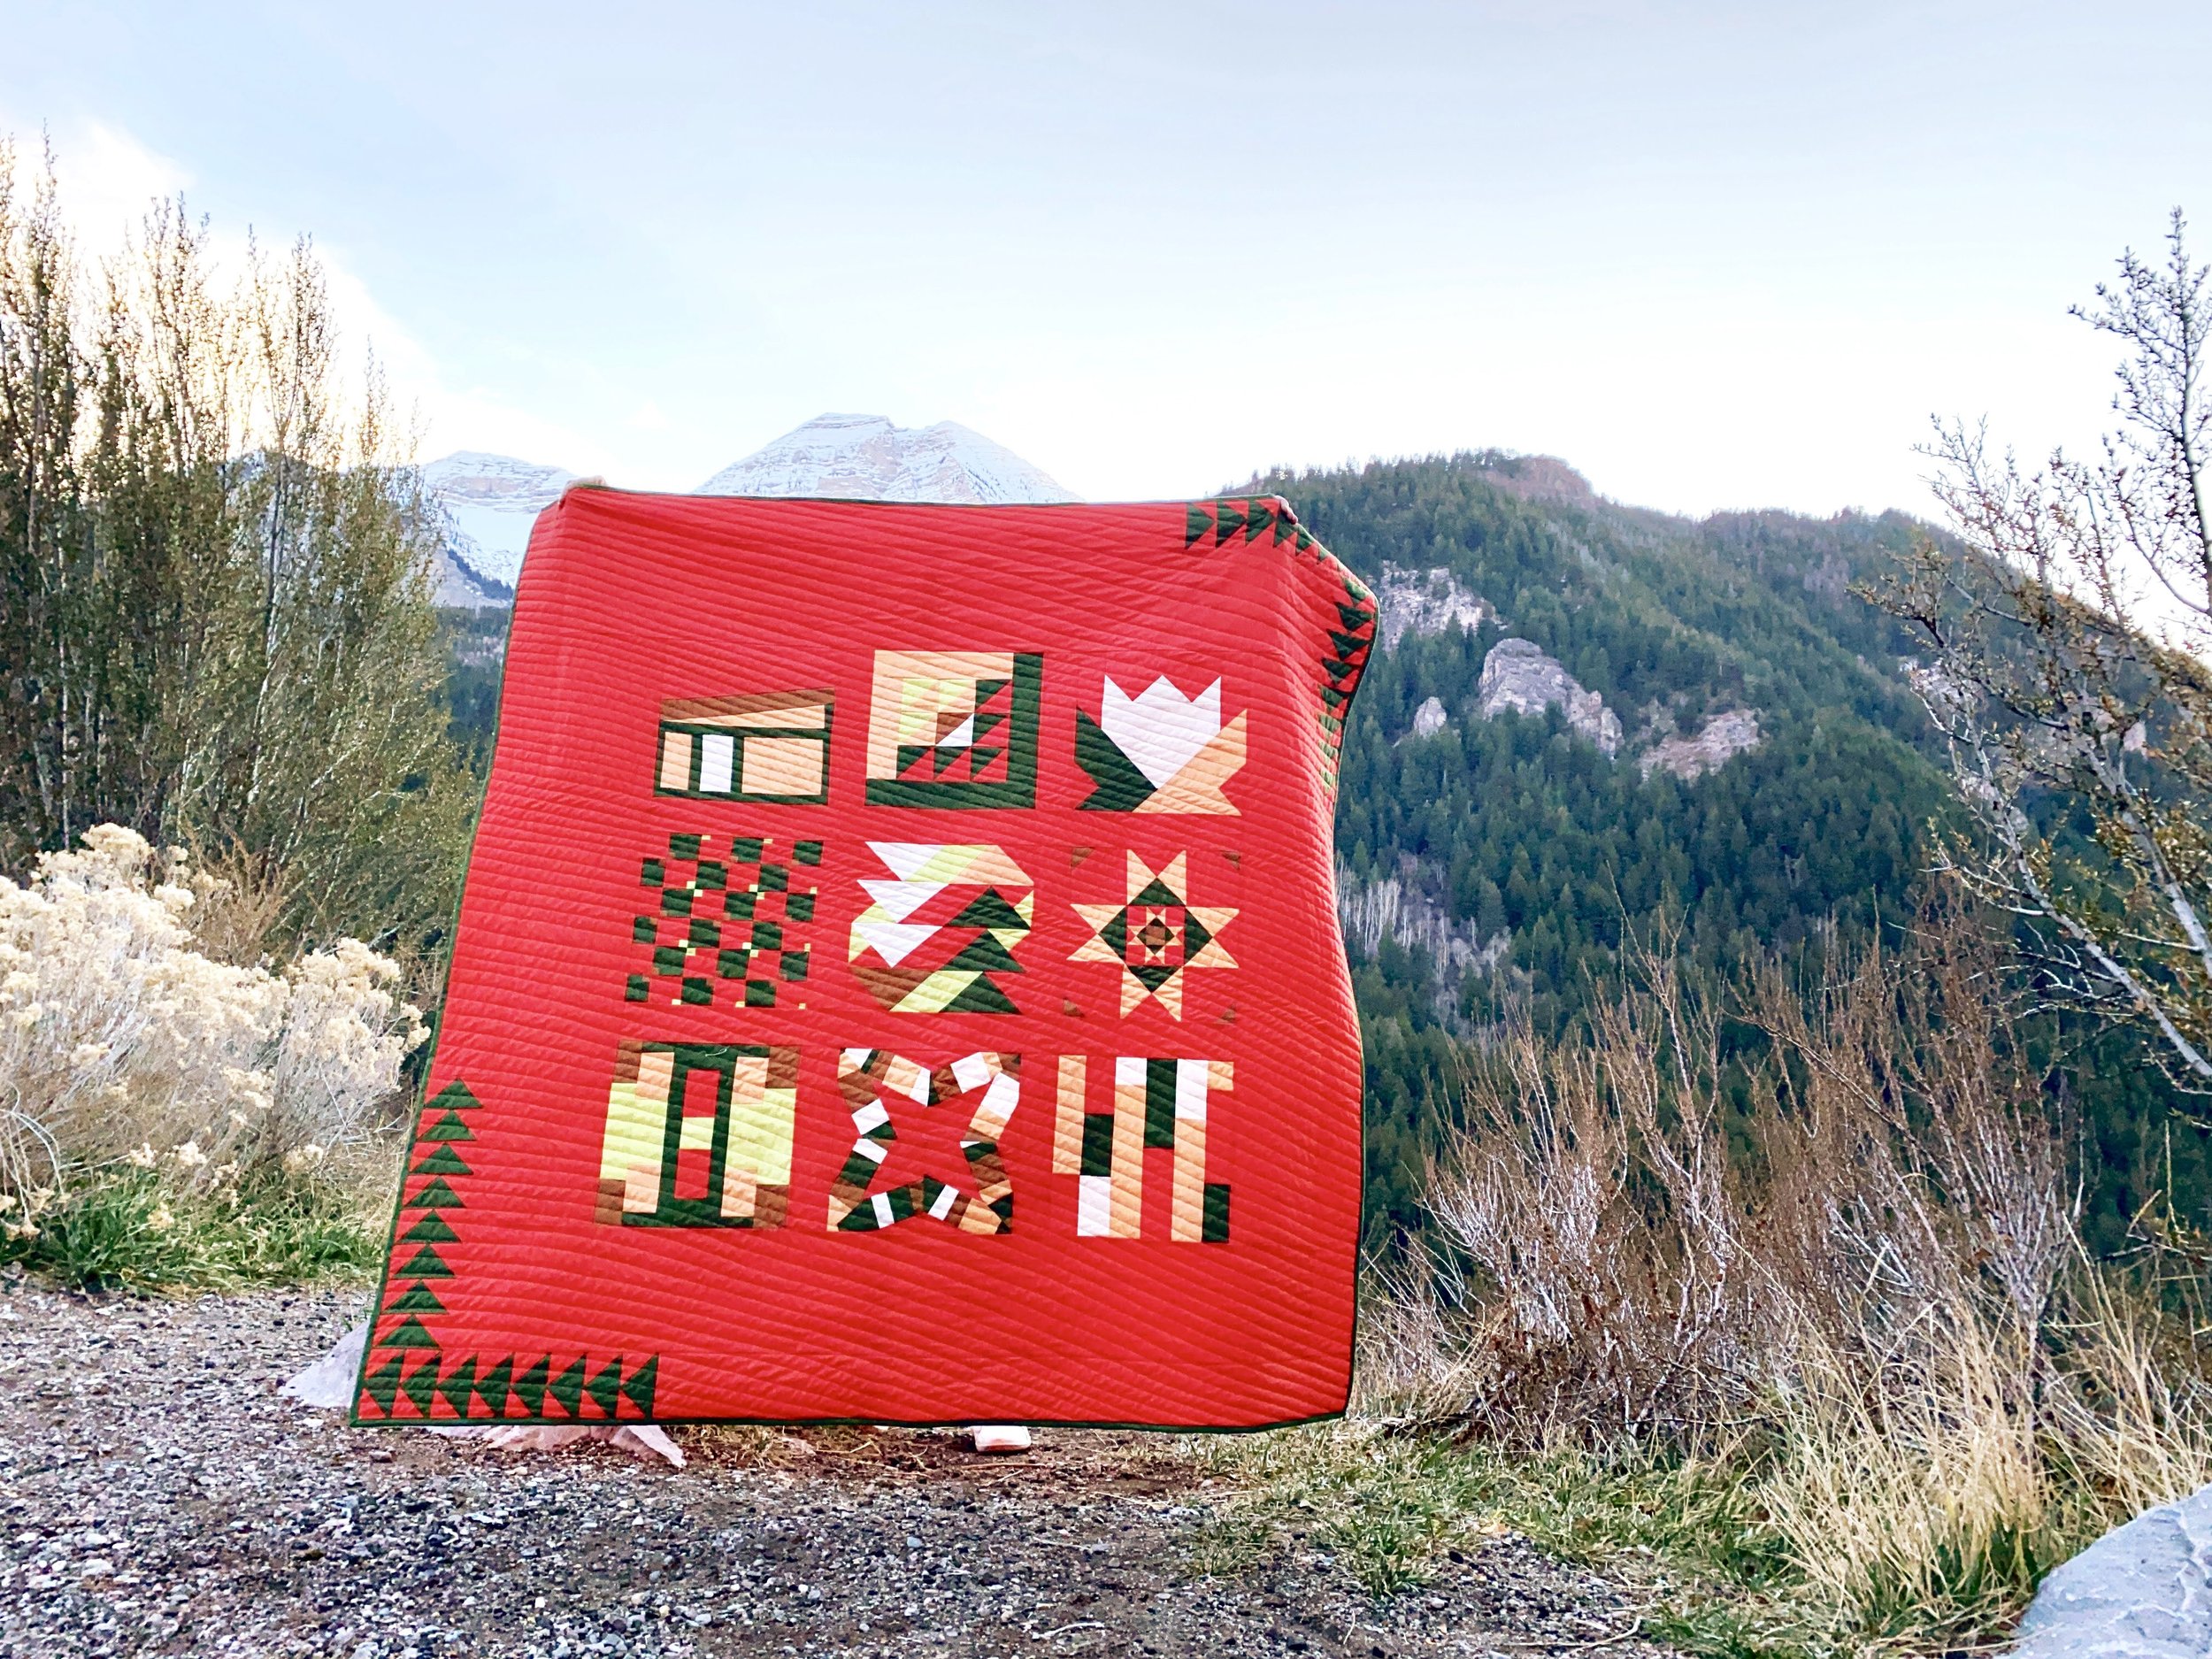
Here you can see how I incorporated my flying geese into the border of this MFA Quilt Along quilt. I love how they help frame the quilt! Share your flying geese blocks with me on Instagram by tagging me @bayhillstudio. Happy Quilting!