Quilted Hydro Flask Holder Tutorial
Meet the Quilted Hydro Flask Holder! This time of year I am constantly looking out for handmade gift ideas that will pass muster with my picky teen and young adult kids. As they leave home, one by one, I want them to have mom-made items to take along as a token of home, but creating something they will actually want and use is a huge challenge.
One thing I noticed recently is that they all carry around Hydro Flask water bottles everywhere they go. Suddenly, a little lightbulb went off in my head and the idea of a Quilted Hydro Flask Holder began to form. I played with the idea and finally landed on this totally groovy version with a fun retro stripe.
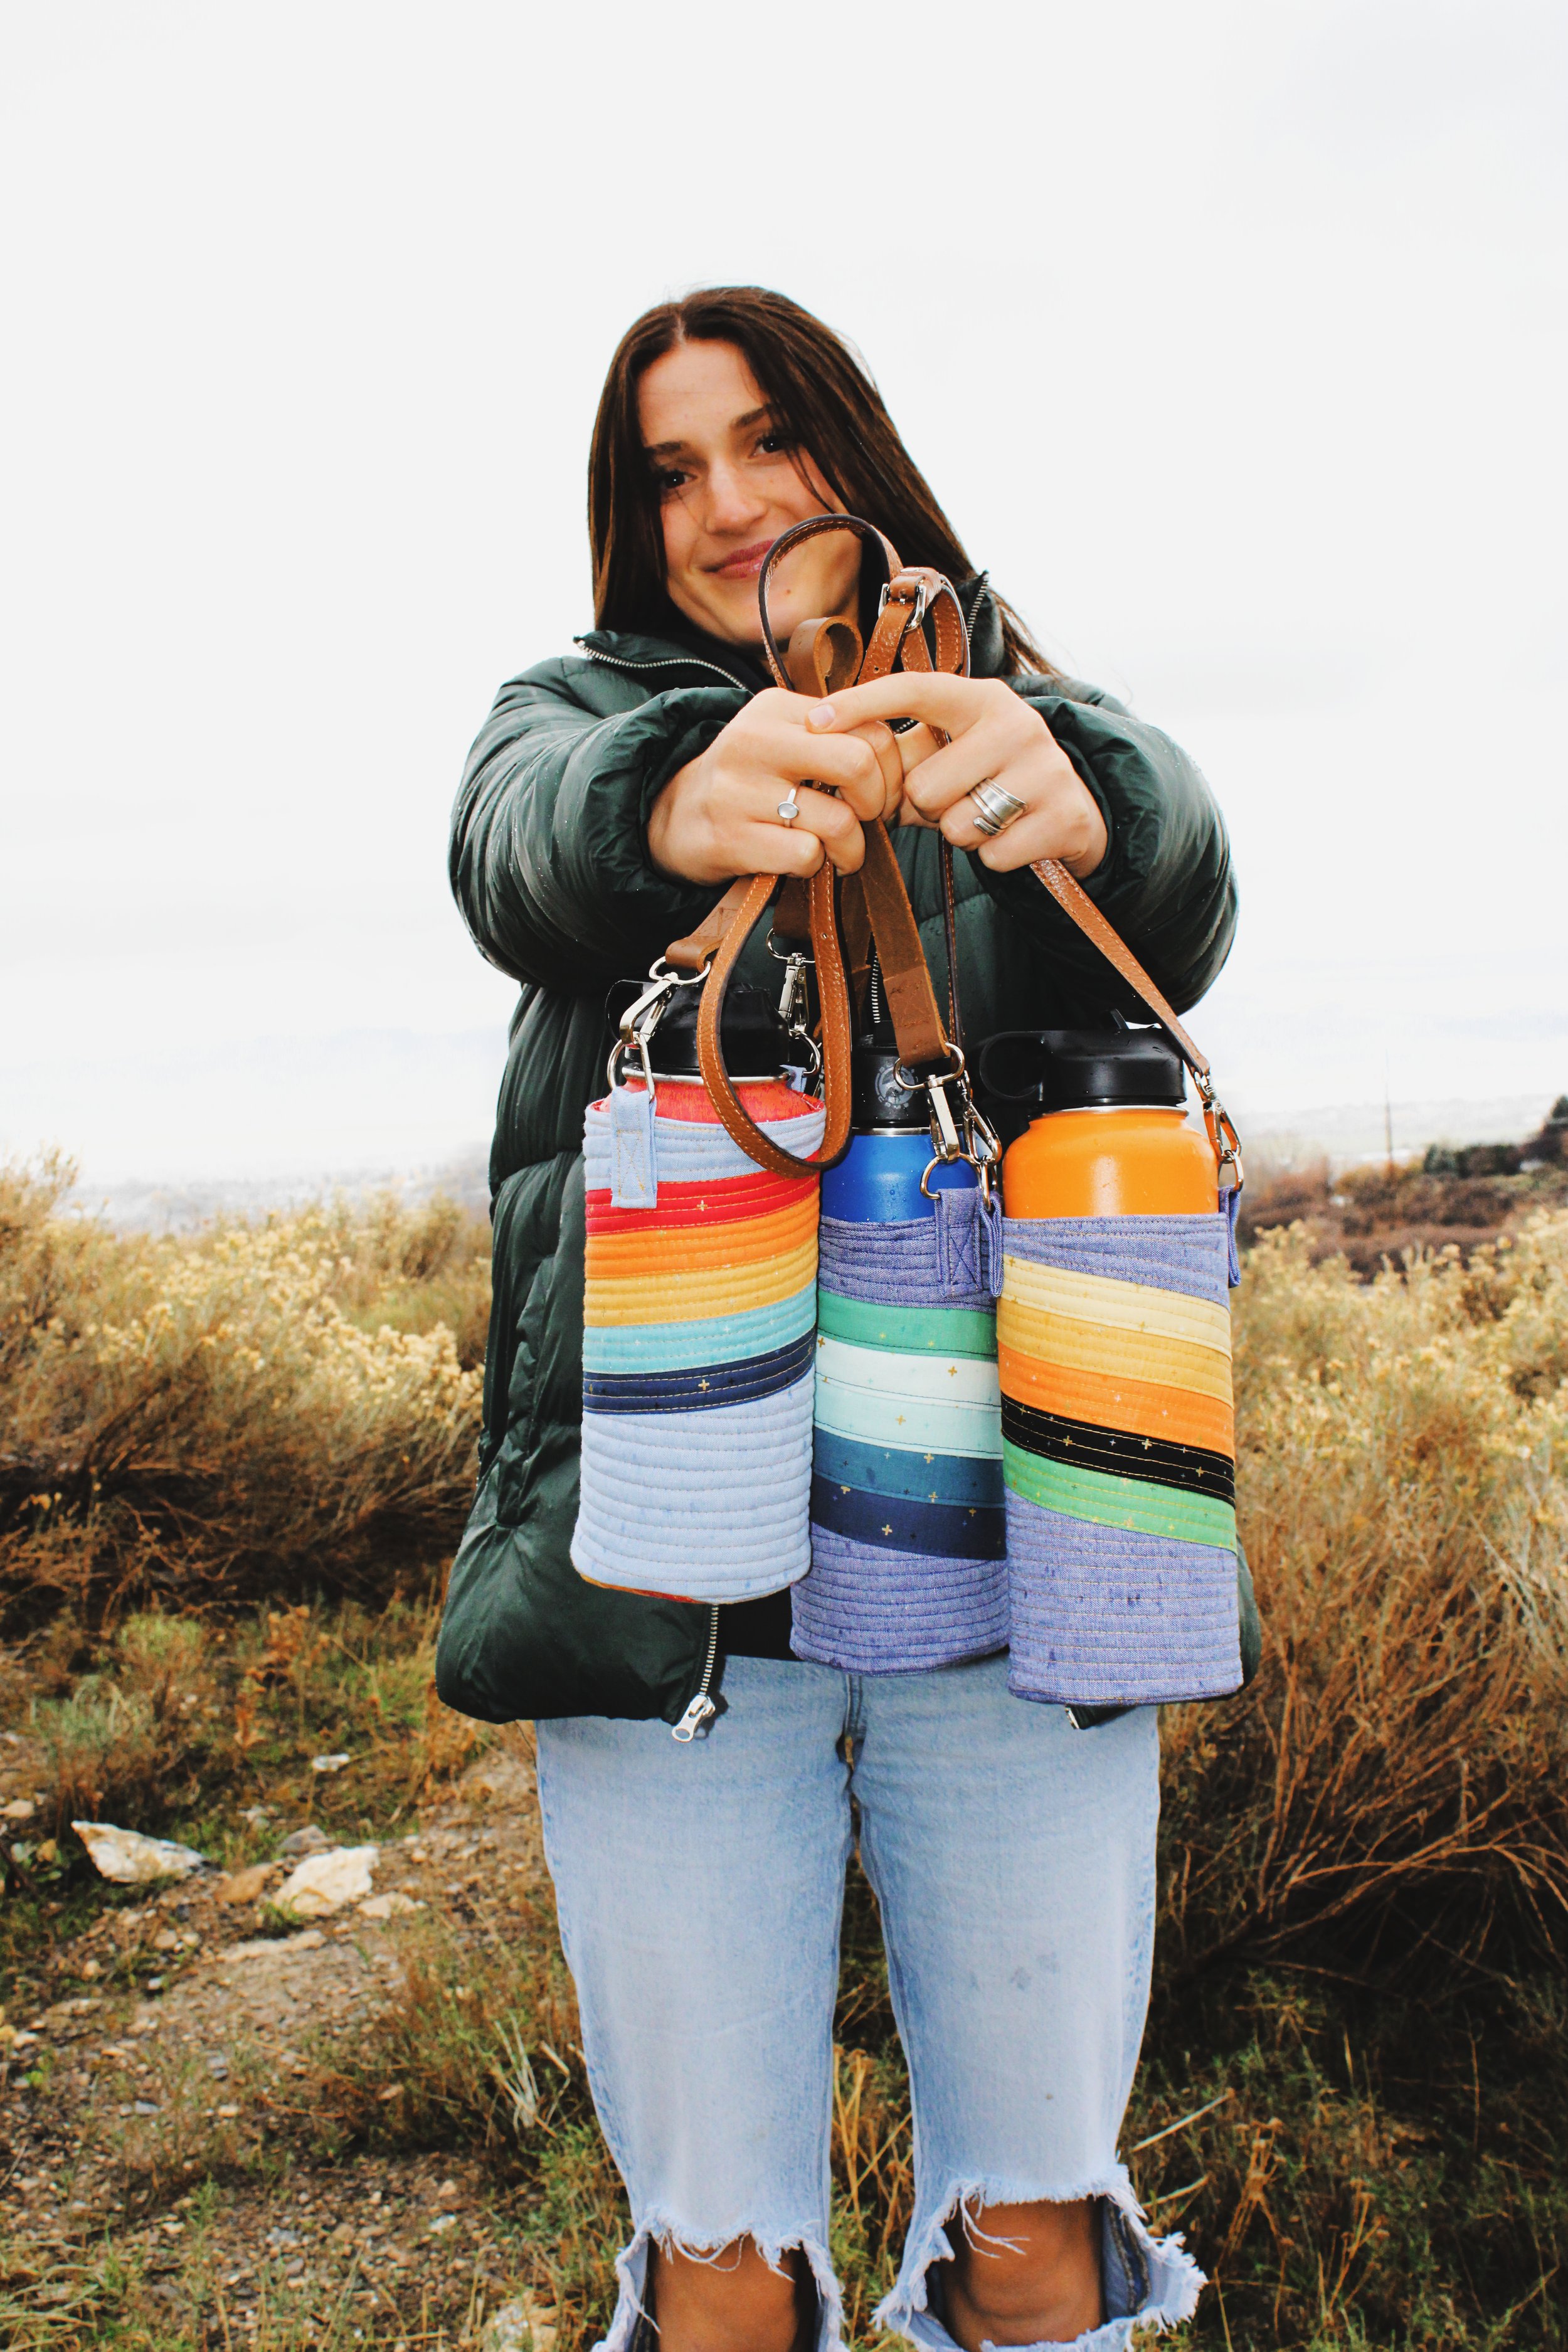
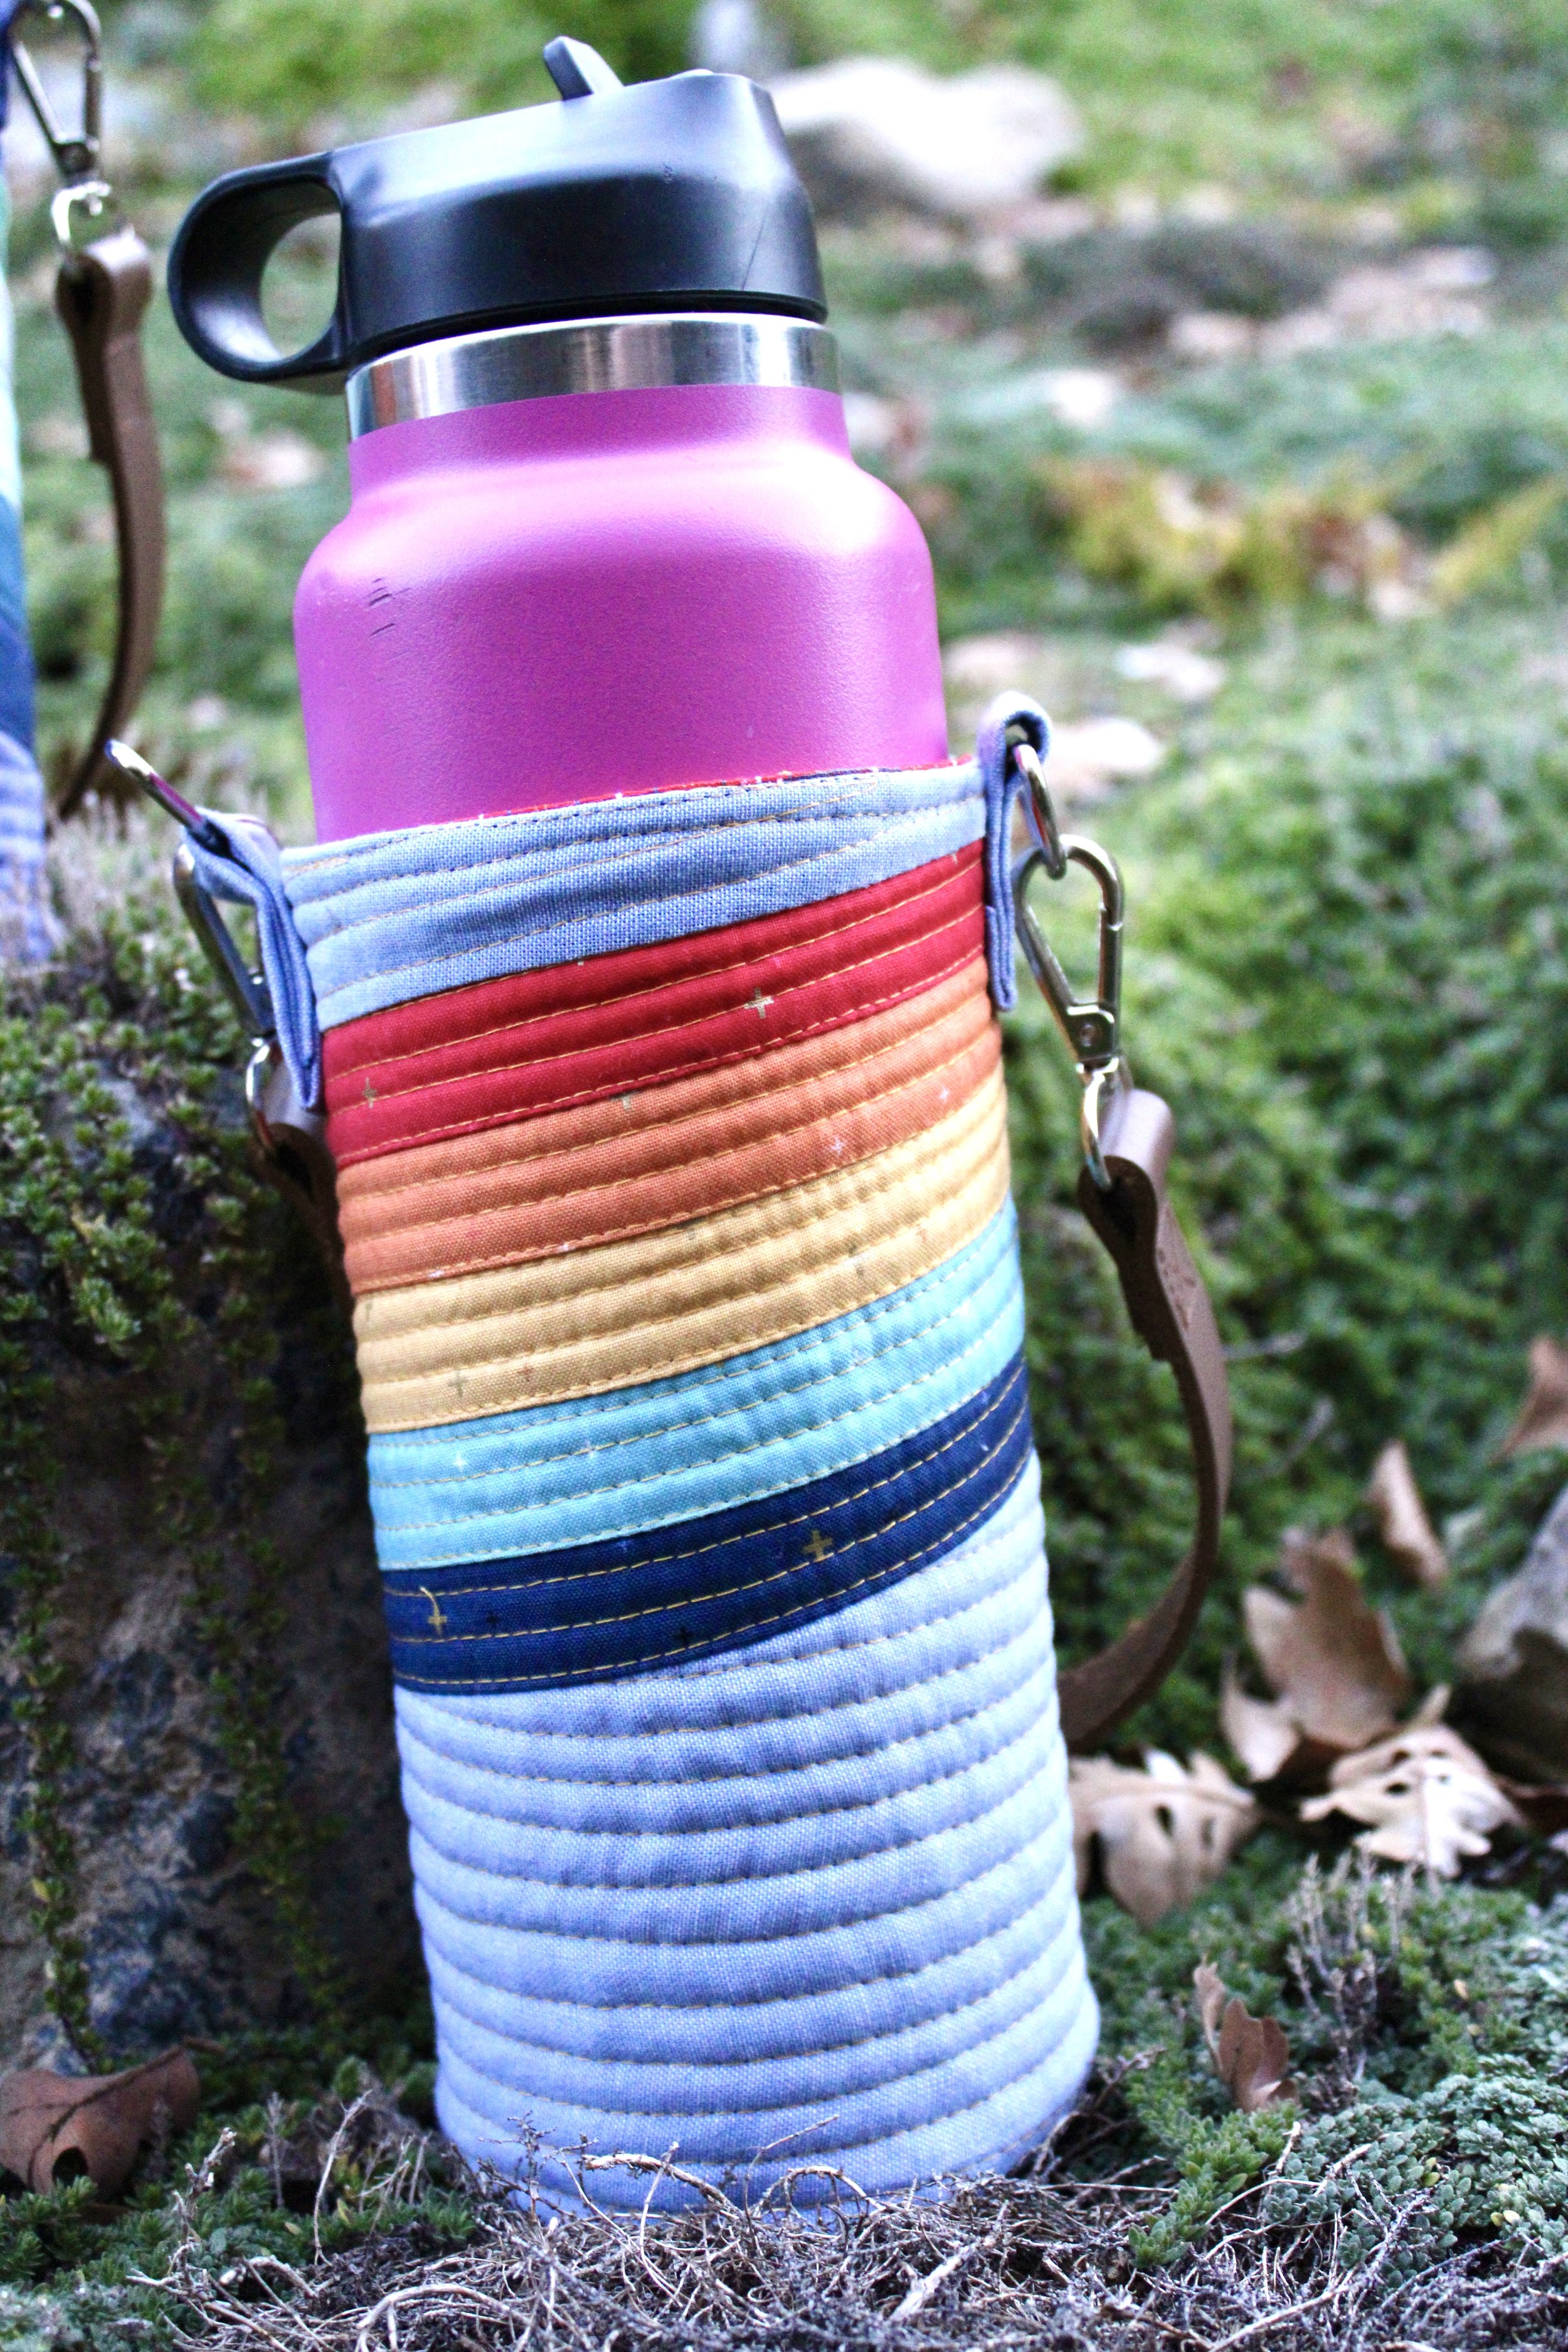
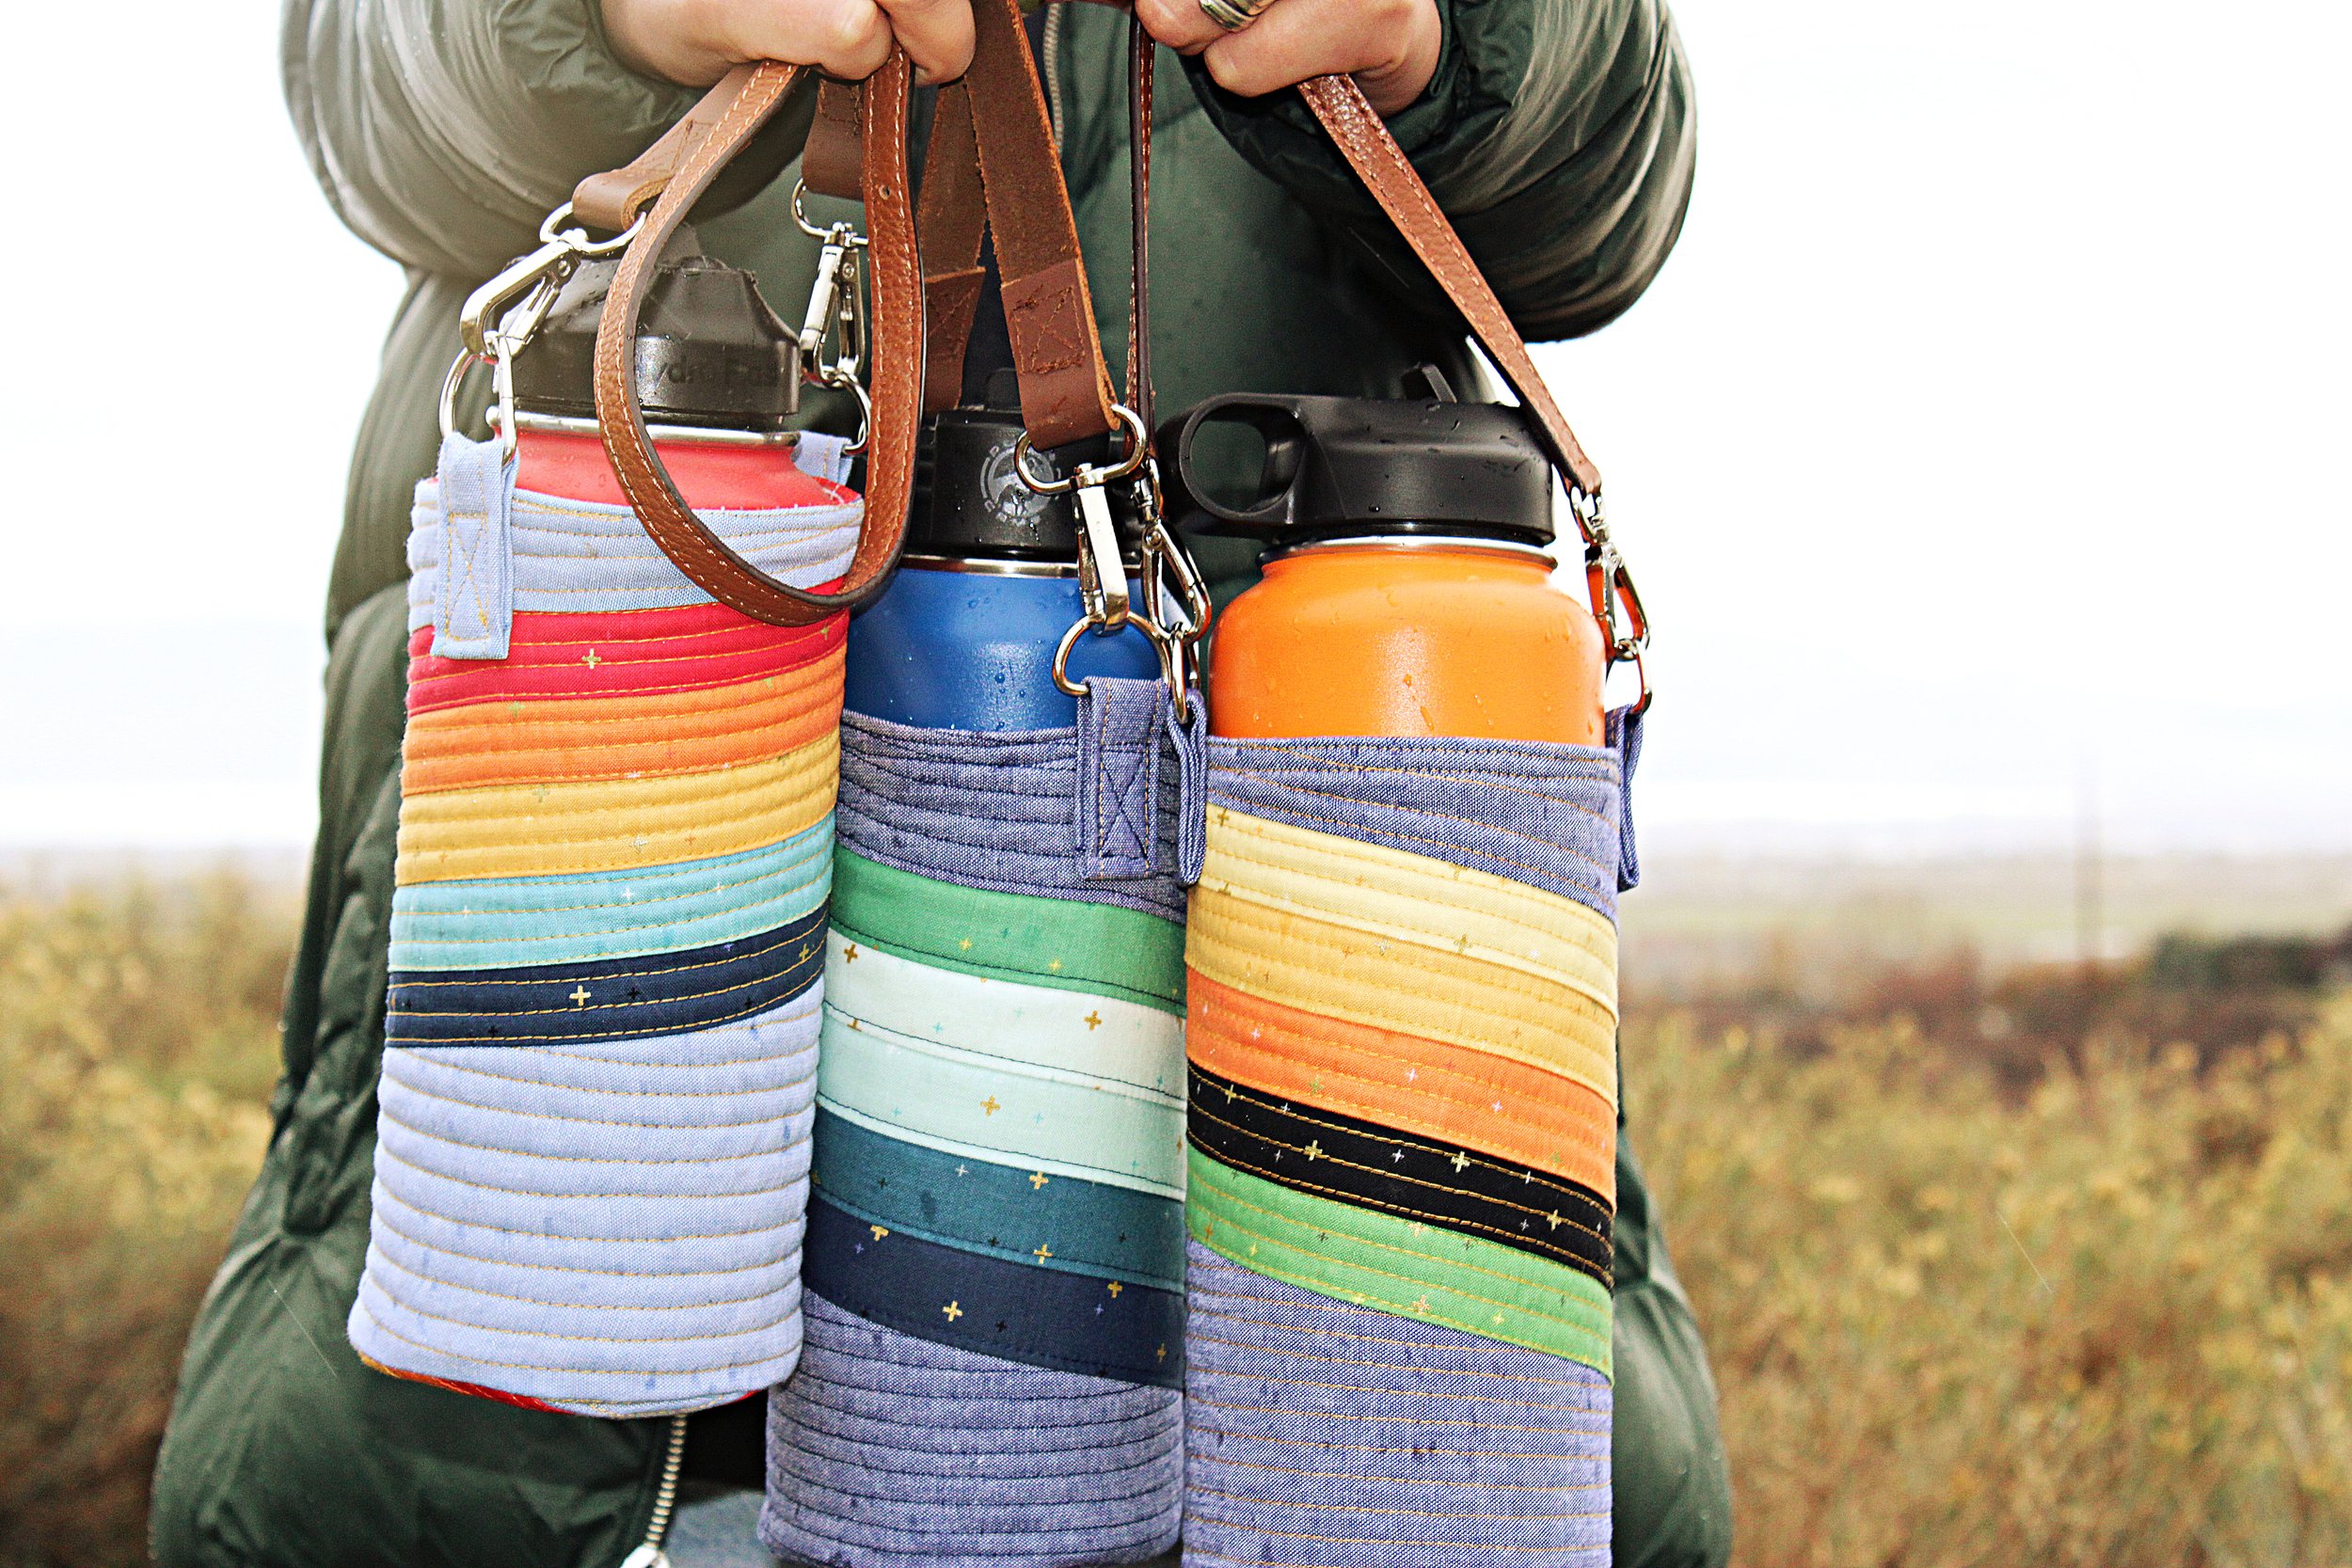
All total, I made six of these — three were practice versions (i.e. flops), and the final three were exactly how I envisioned - each with different colored stripes to show just how easy it is to change the look to suit your aesthetic. My teen latched onto this retro rainbow version. Notice the rainbow stripes on the circle bottom piece — those were repurposed from one of my previous failures. Why waste a perfectly cute rainbow?
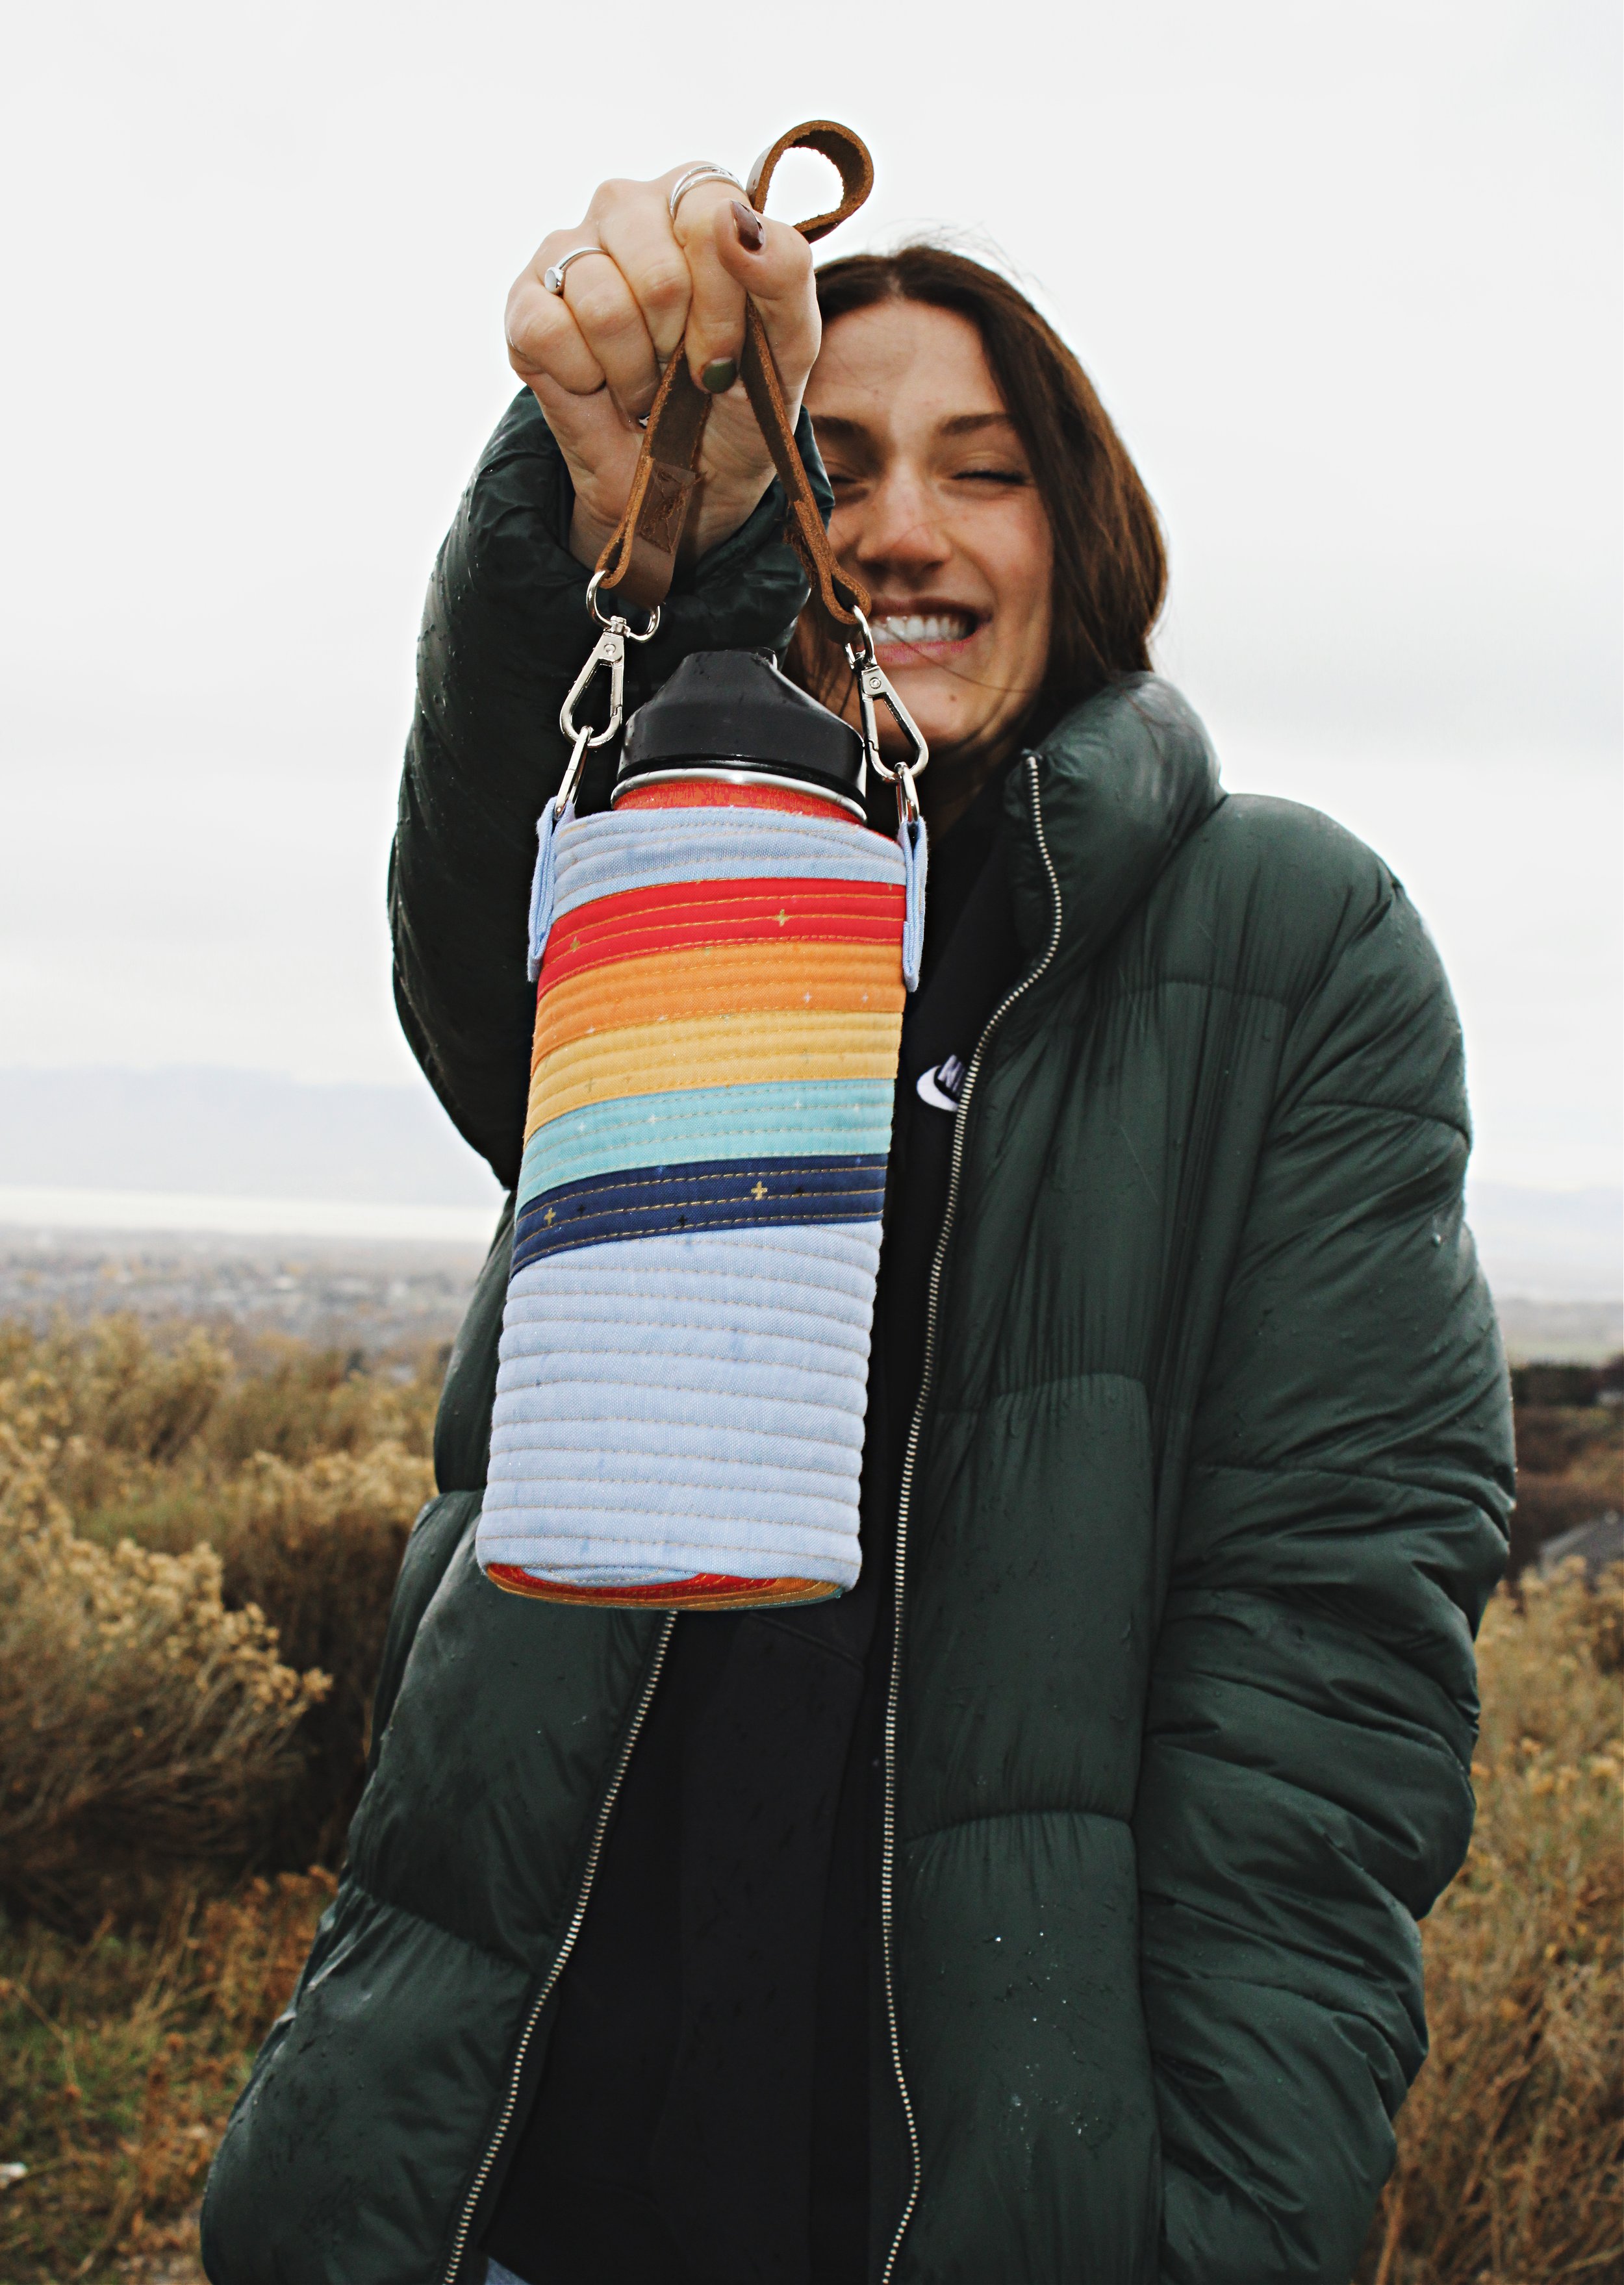
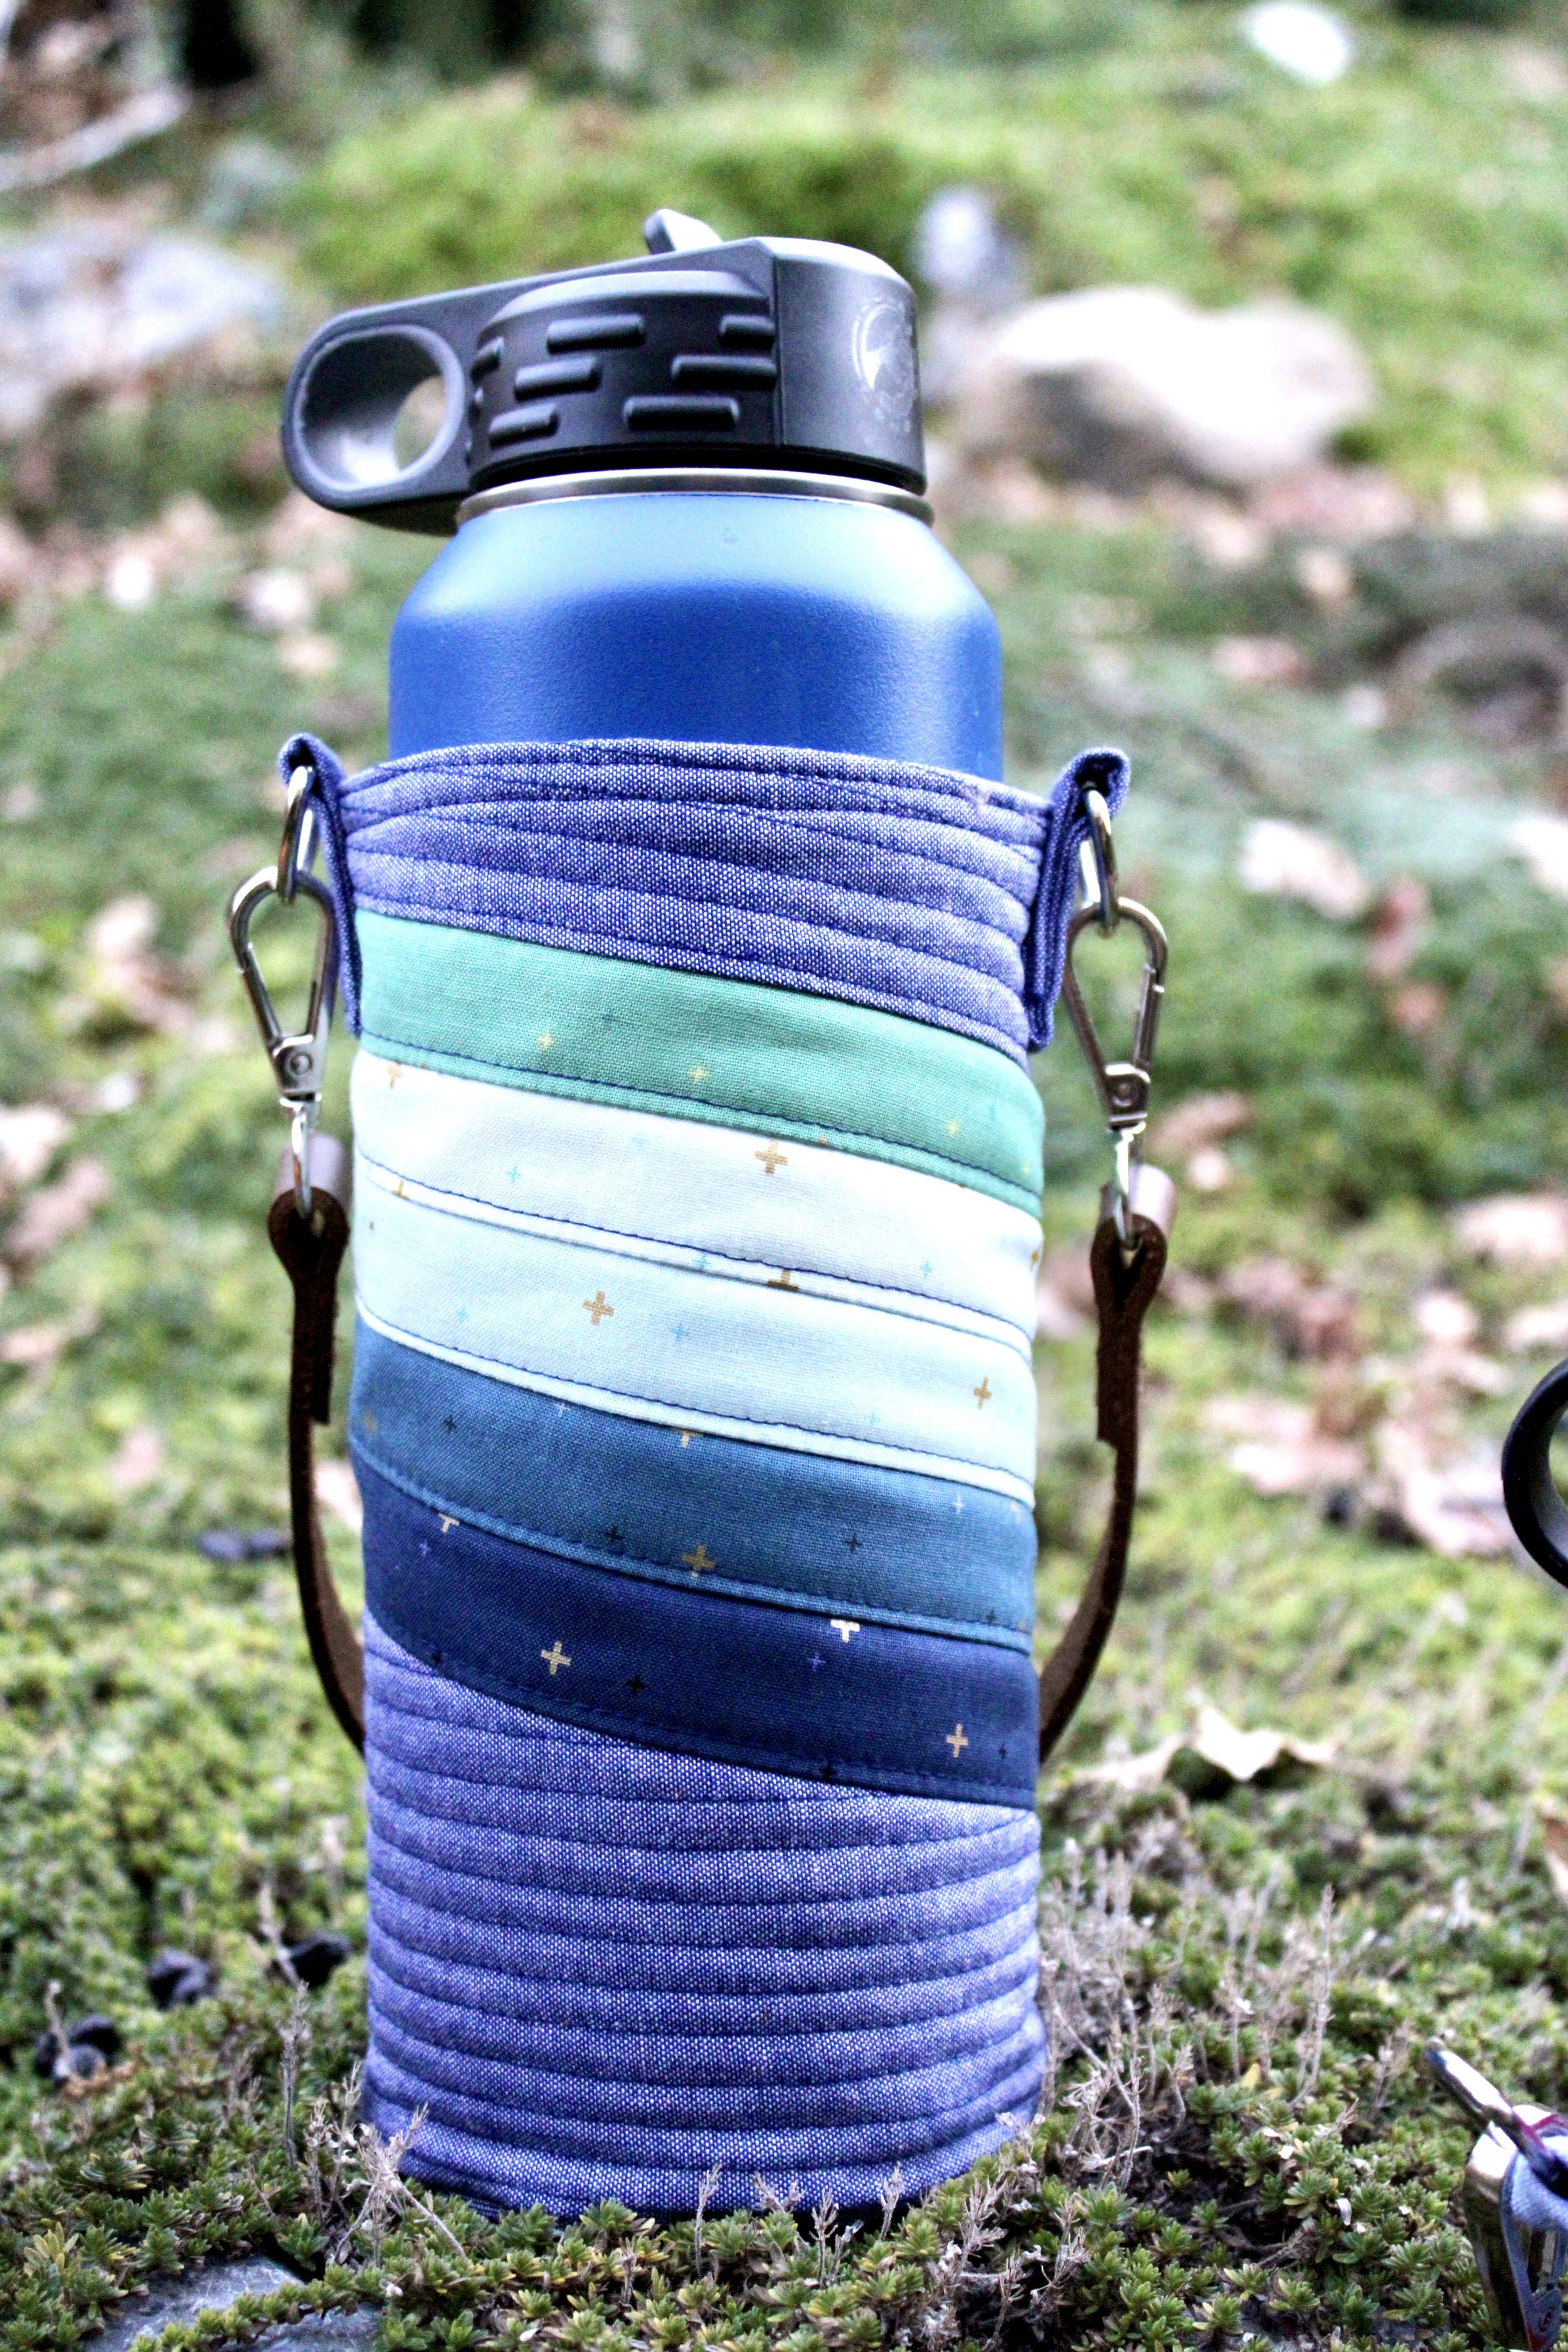
In all three versions, I used fabric from the Sparkler collection, designed by Melissa Mortenson of The Polka Dot Chair for the stripes. I love the pop of gold sparkle in these prints, which I think goes perfectly with the retro look I was going for. Sparkler is a new addition to the Riley Blake Basics. Yay! The Chambray also comes from Riley Blake Designs. In the photo above, I used the Light Indigo Chambray. In the photo below, I used the regular Indigo Chambray.
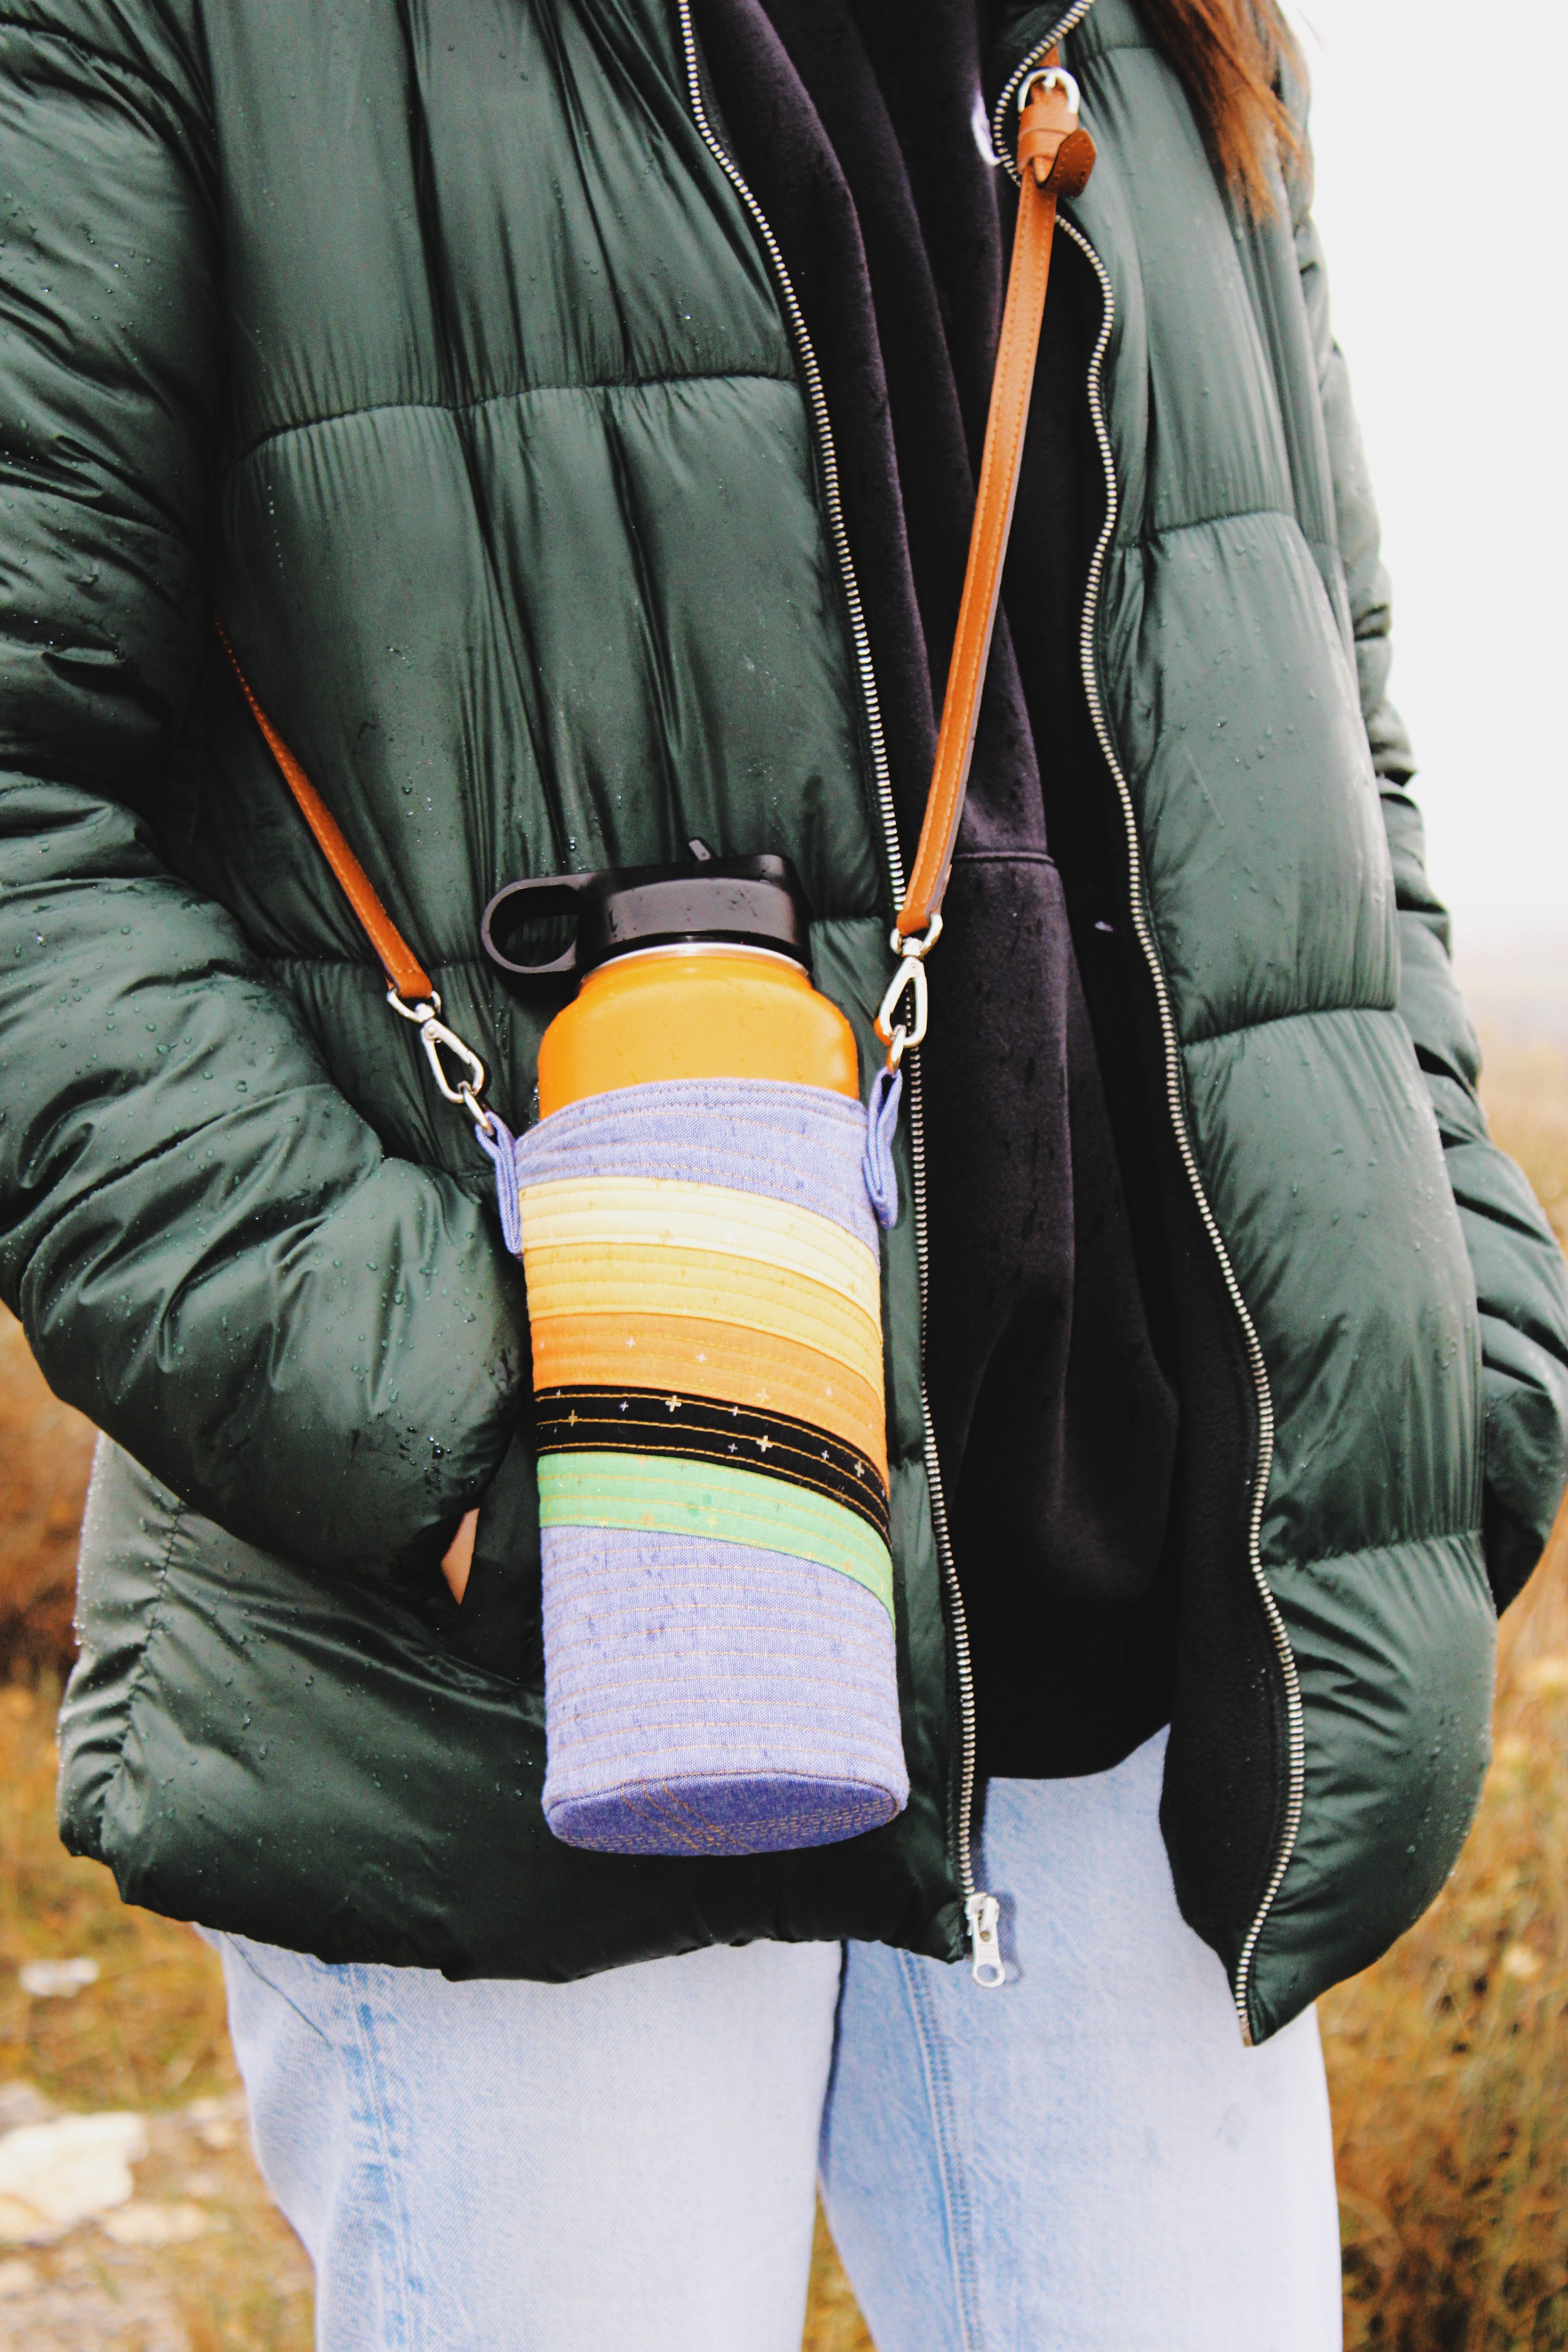
This super groovy Hydro Flask Holder has two strap options: you can purchase a pre-made cross body strap, or you can create a shorter handle strap - or both!
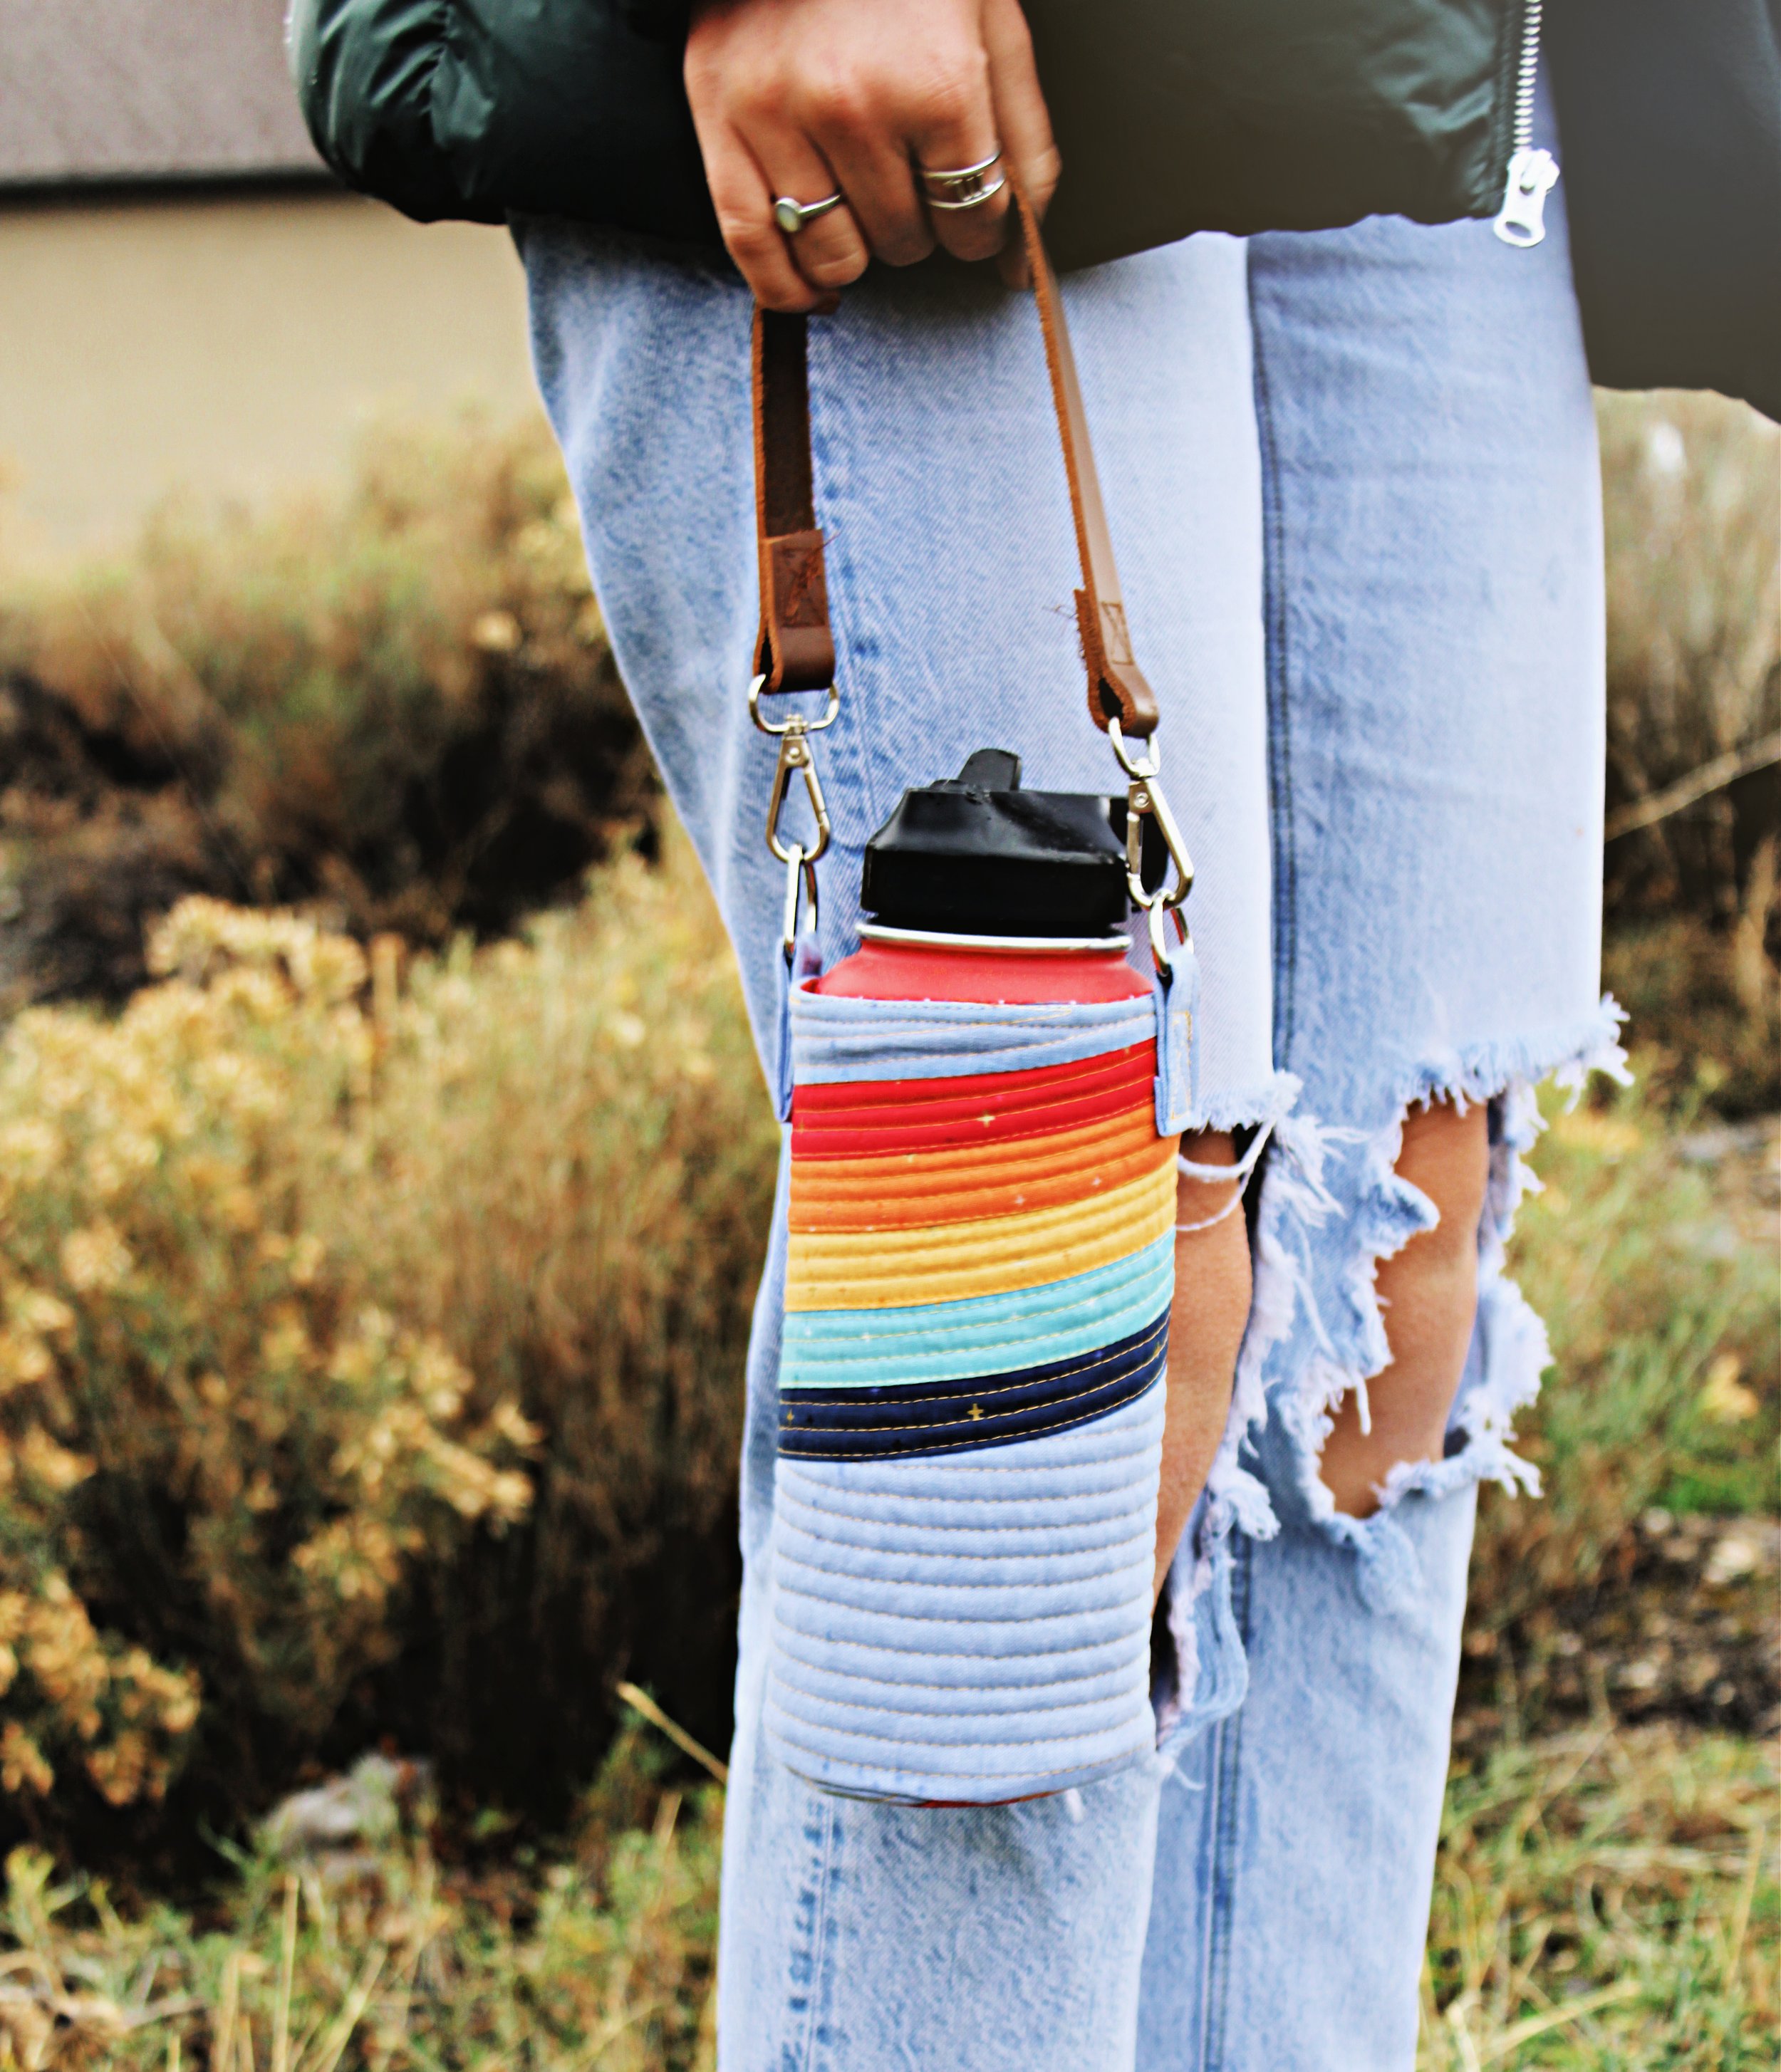
The d-rings allow for any handle to be clipped on. You could also clip on car keys, a chapstick holder, or anything you want!

Here you see all three versions holding the taller Hydro Flask, but if you look at the previous images, we used a shorter 32 oz. red Hydro Flask. The quilted sleeve measures about 8” tall and fits both sizes perfectly.

Aren’t they fun? I have included a step-by-step tutorial so you can easily make your own!
You can also view my YouTube video and sew along with me as I demonstrate how I make the Quilted Hydro Flask Holder from start to finish!
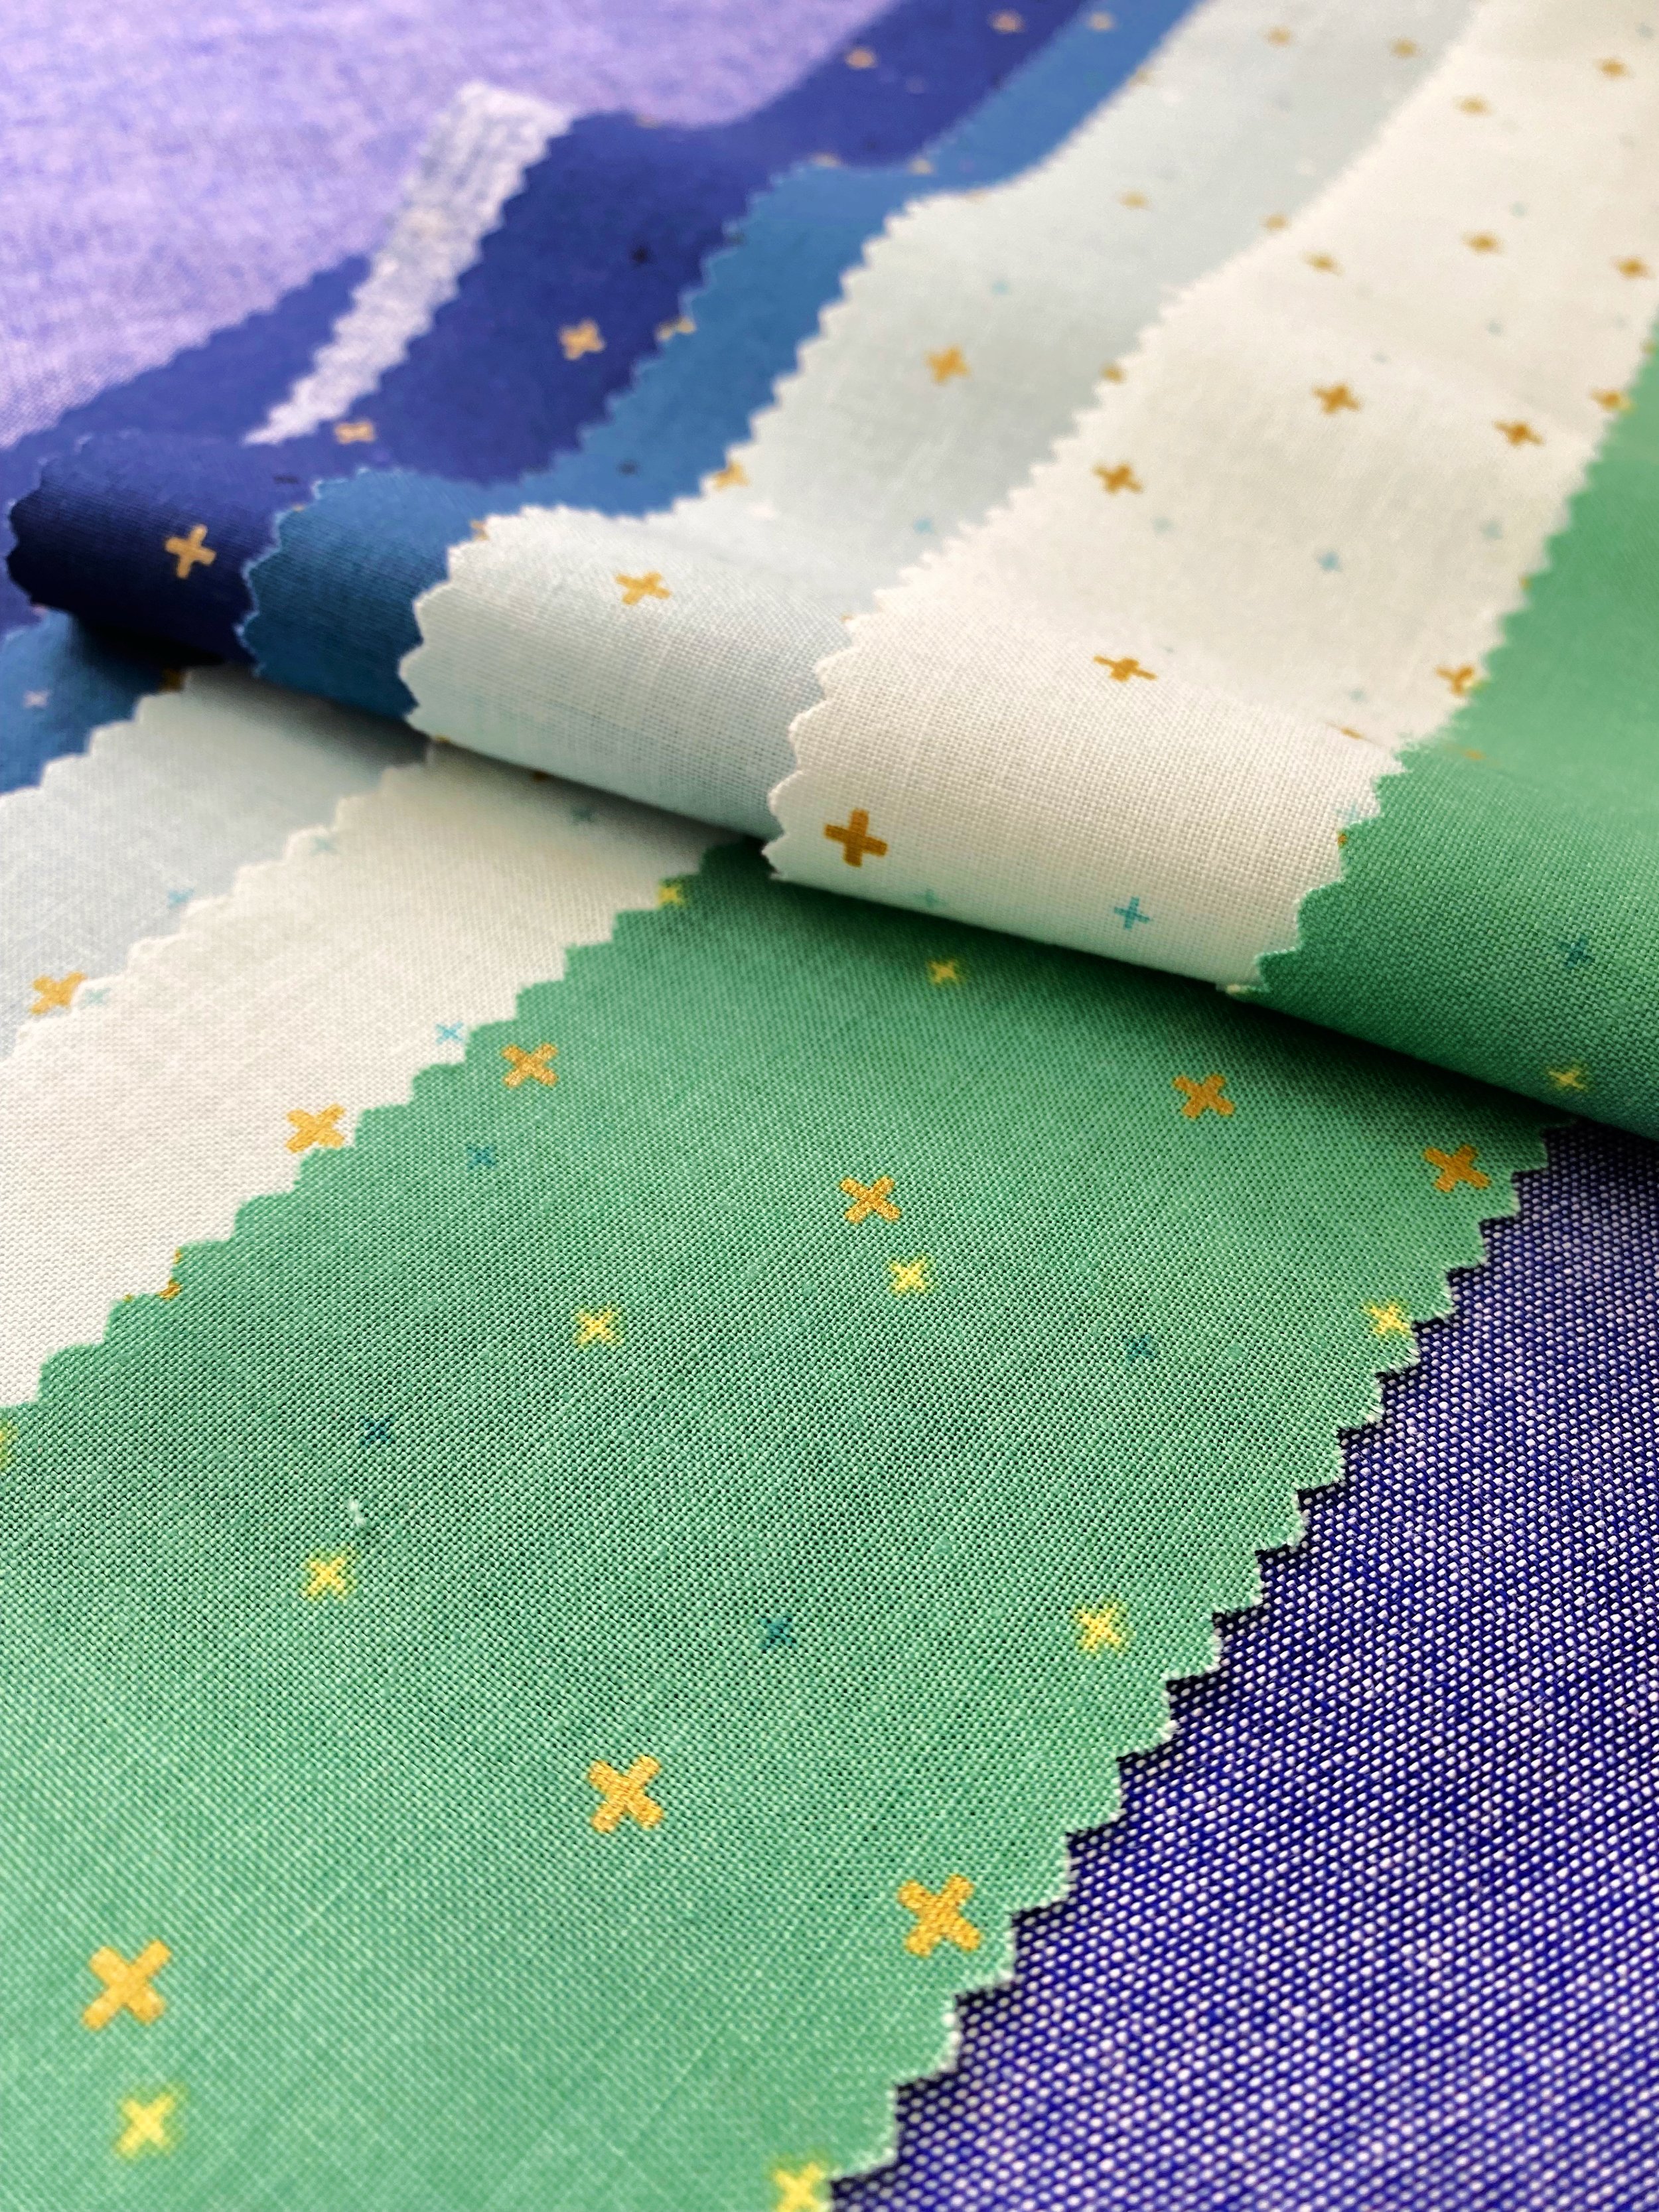
As I mentioned, I made three versions trying out different color combinations. For this tutorial, I used the Sparkler fabric (by Melissa Mortenson of The Polka Dot Chair) in Navy, Denim, Songbird, Bleached Denim, and Alpine, paired with an Indigo Chambray (by Christopher Thompson, aka The Tattooed Quilter) background fabric, and Neptune Texture lining - all from Riley Blake Designs.
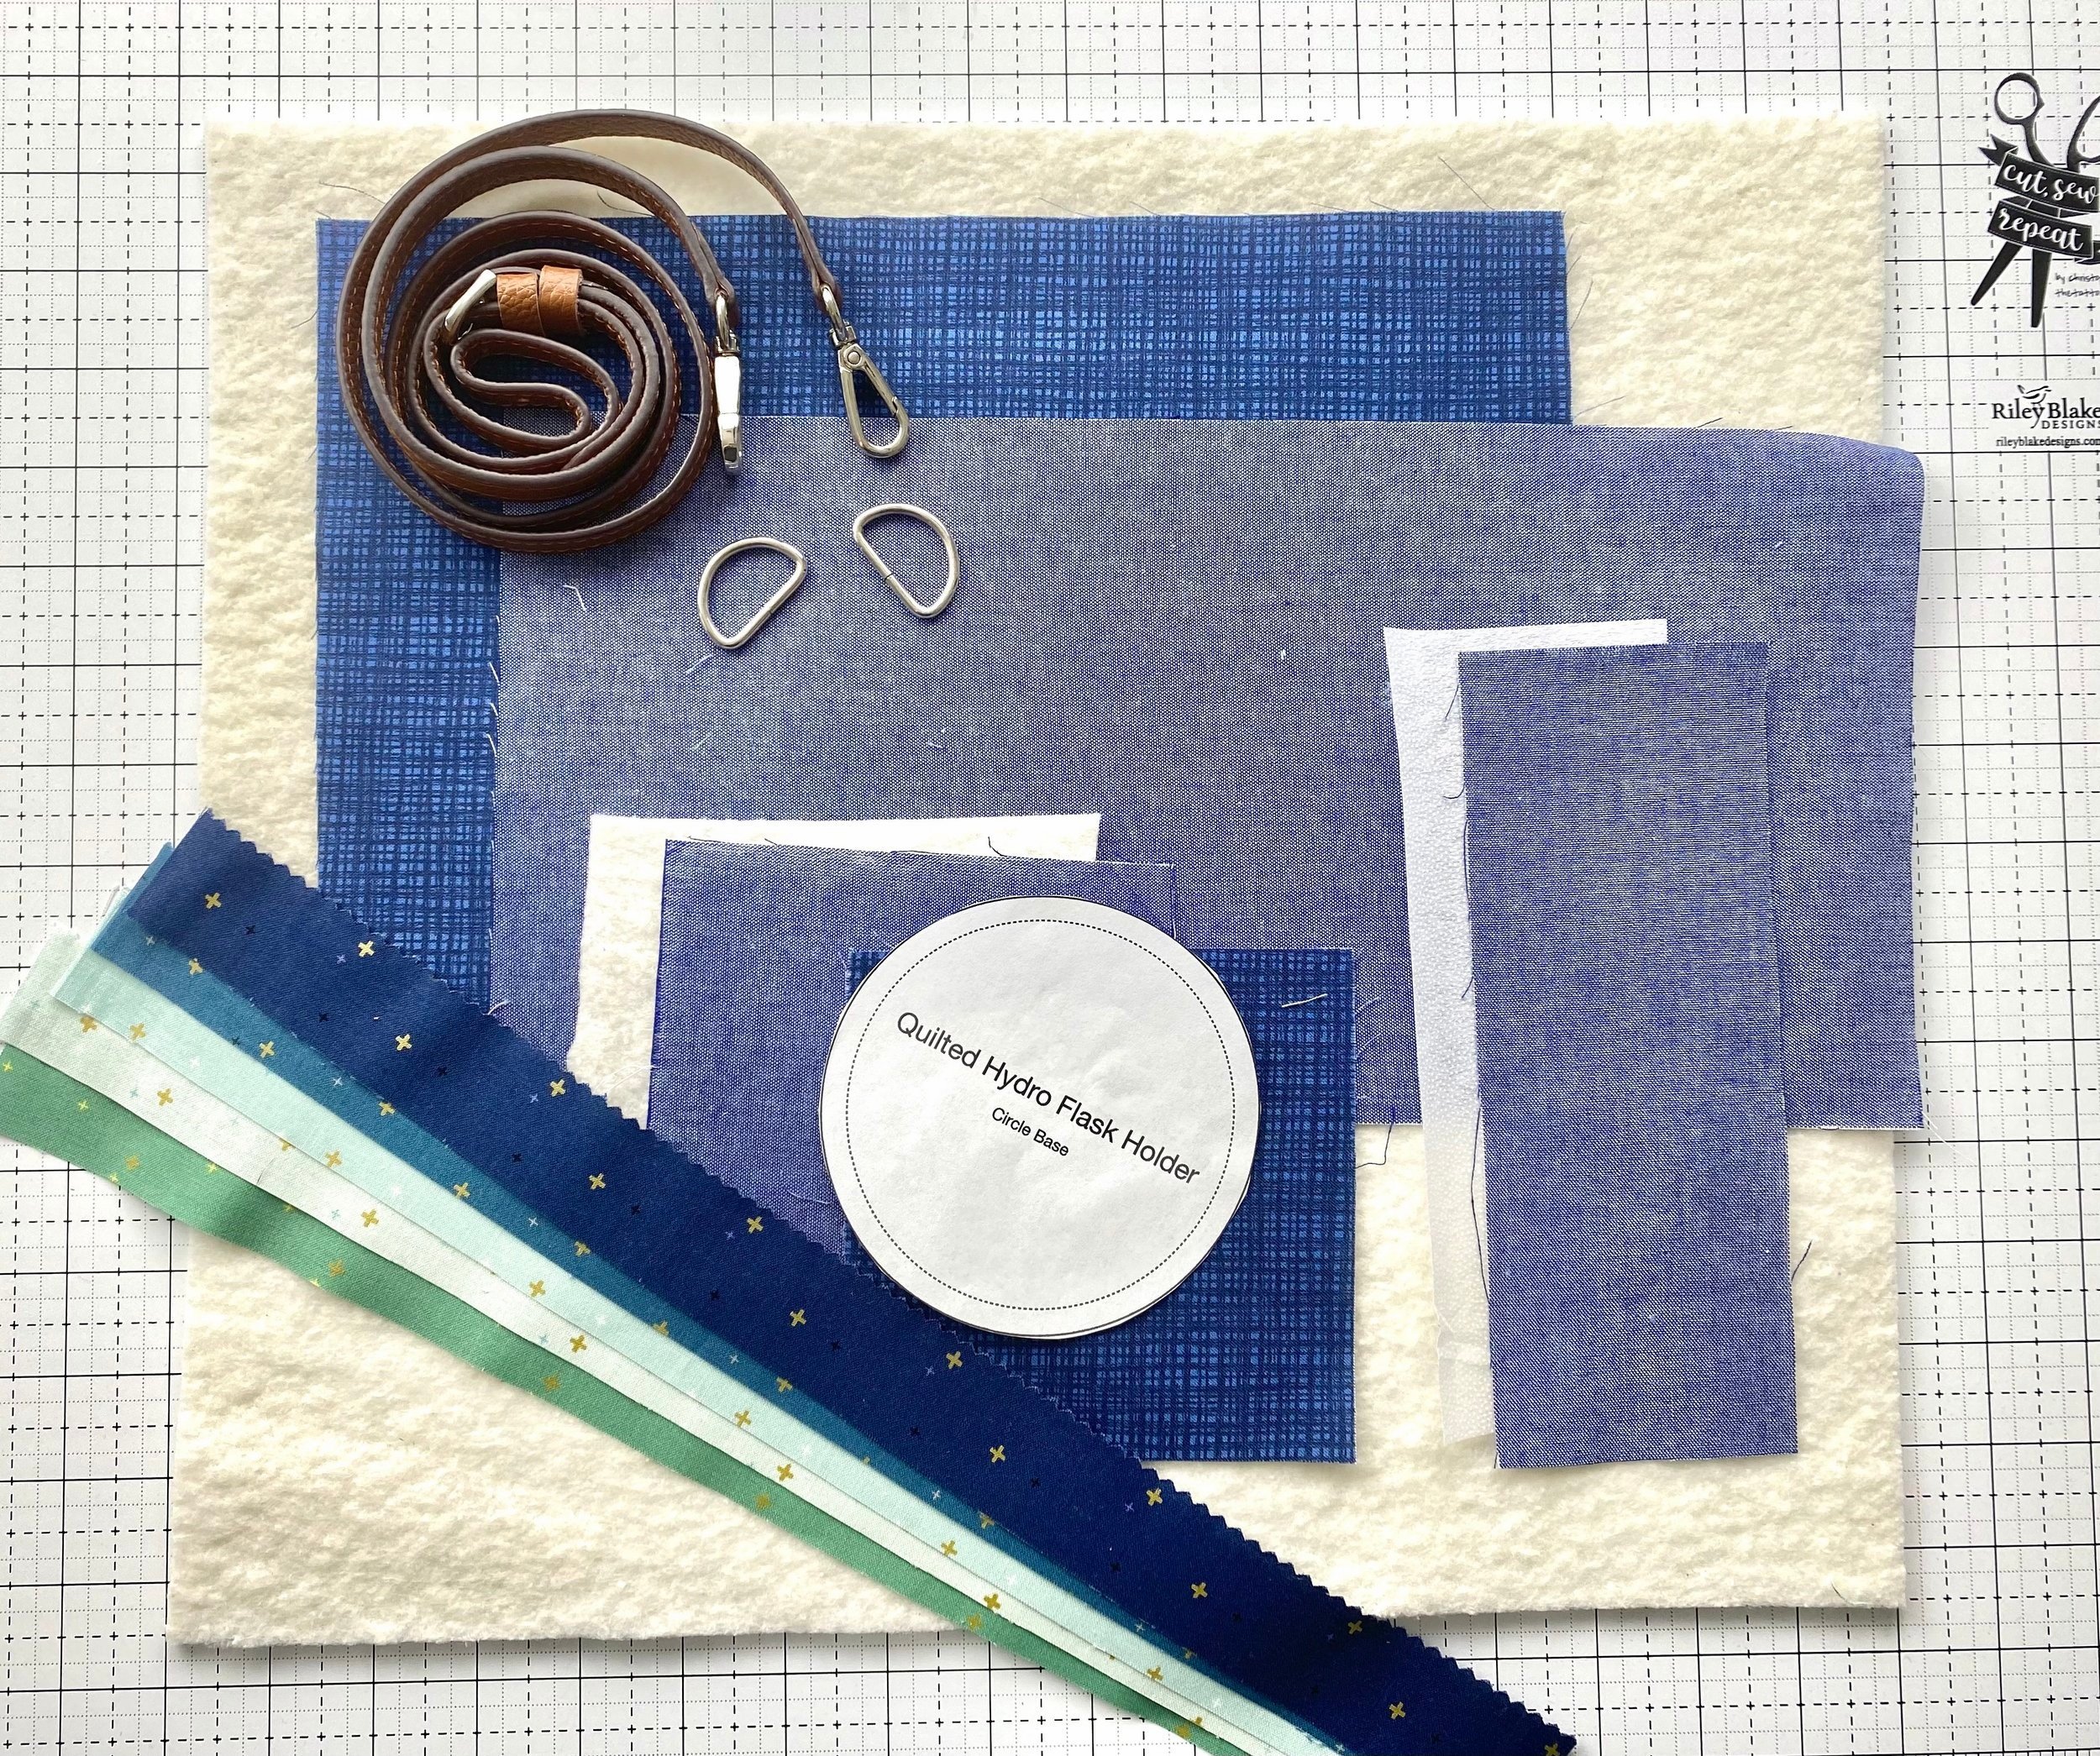
To make this Quilted Hydro Flask Holder, you will need:
1/4 yard Riley Blake Designs Indigo Chambray, or other background fabric
1/4 yard Riley Blake Designs Neptune Texture, or other lining fabric
5 - 1 1/2” x 16” strips from the Riley Blake Designs Sparkler collection — I used Navy, Denim, Songbird, Bleach Denim, and Alpine
1 - 15” x 17” piece of batting
1 - 6” square batting
1/4 yard fusible interfacing. I used Pellon 931TD
2 - 1” D Rings
2 - 1” Swivel Hooks ** Not needed if using a purchased cross body strap
16” x 1” leather strip for handle (I purchased mind HERE) **Not needed if using a purchased cross body strap
Optional Cross Body Strap (I purchased mine HERE)
Base Template ** NOTE: If your circle is printing too small (Mine did), click “Print”, then go to “Print using System Dialog”, then change paper size to BORDERLESS 8” x 11”. Some computers/printers will automatically add a border which shrinks the circle down just a smidge, but this difference trickles down so that the Hydro Flask tube become too large for the circle base.
From the 1/4 yard Chambray, cut:
1 - 7” x 14” rectangle
1 - 5” square
1 - 3” x 8” strip
From the Texture lining fabric cut:
1 - 8 1/2” x 12 1/2” rectangle
1 - 5” square
From the fusible interfacing, cut:
1 - 3” x 8” strip
1 - 5” square
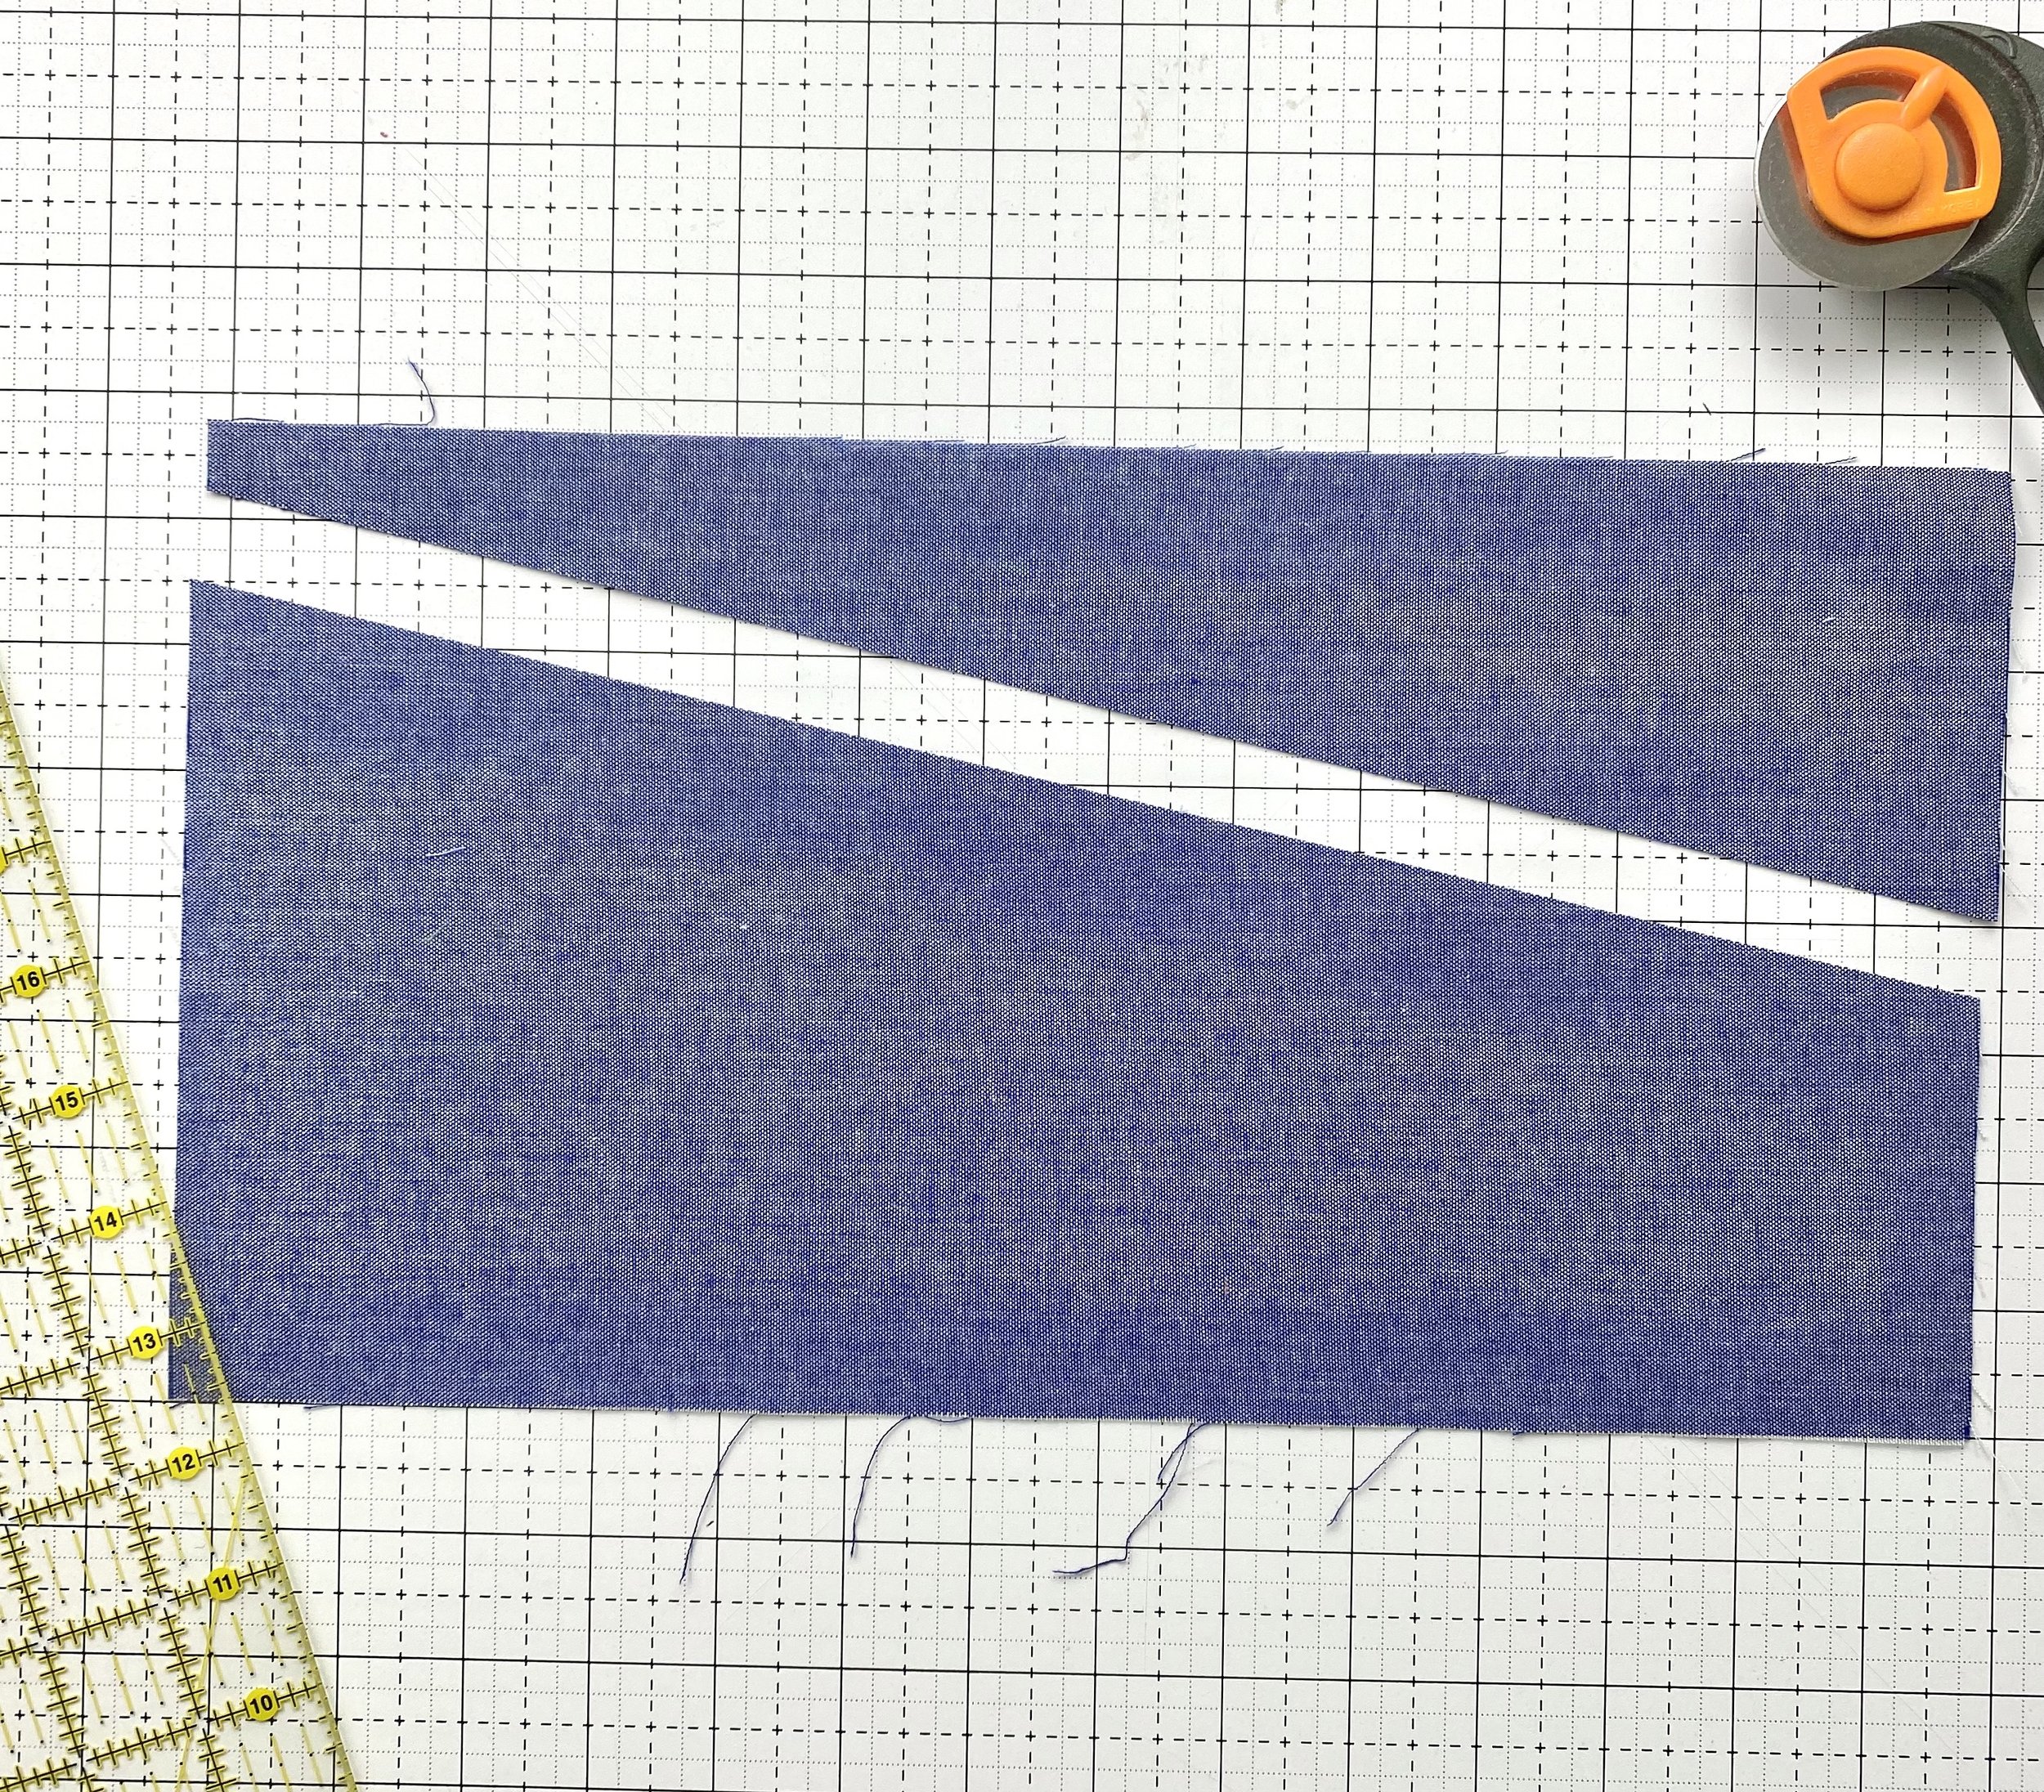
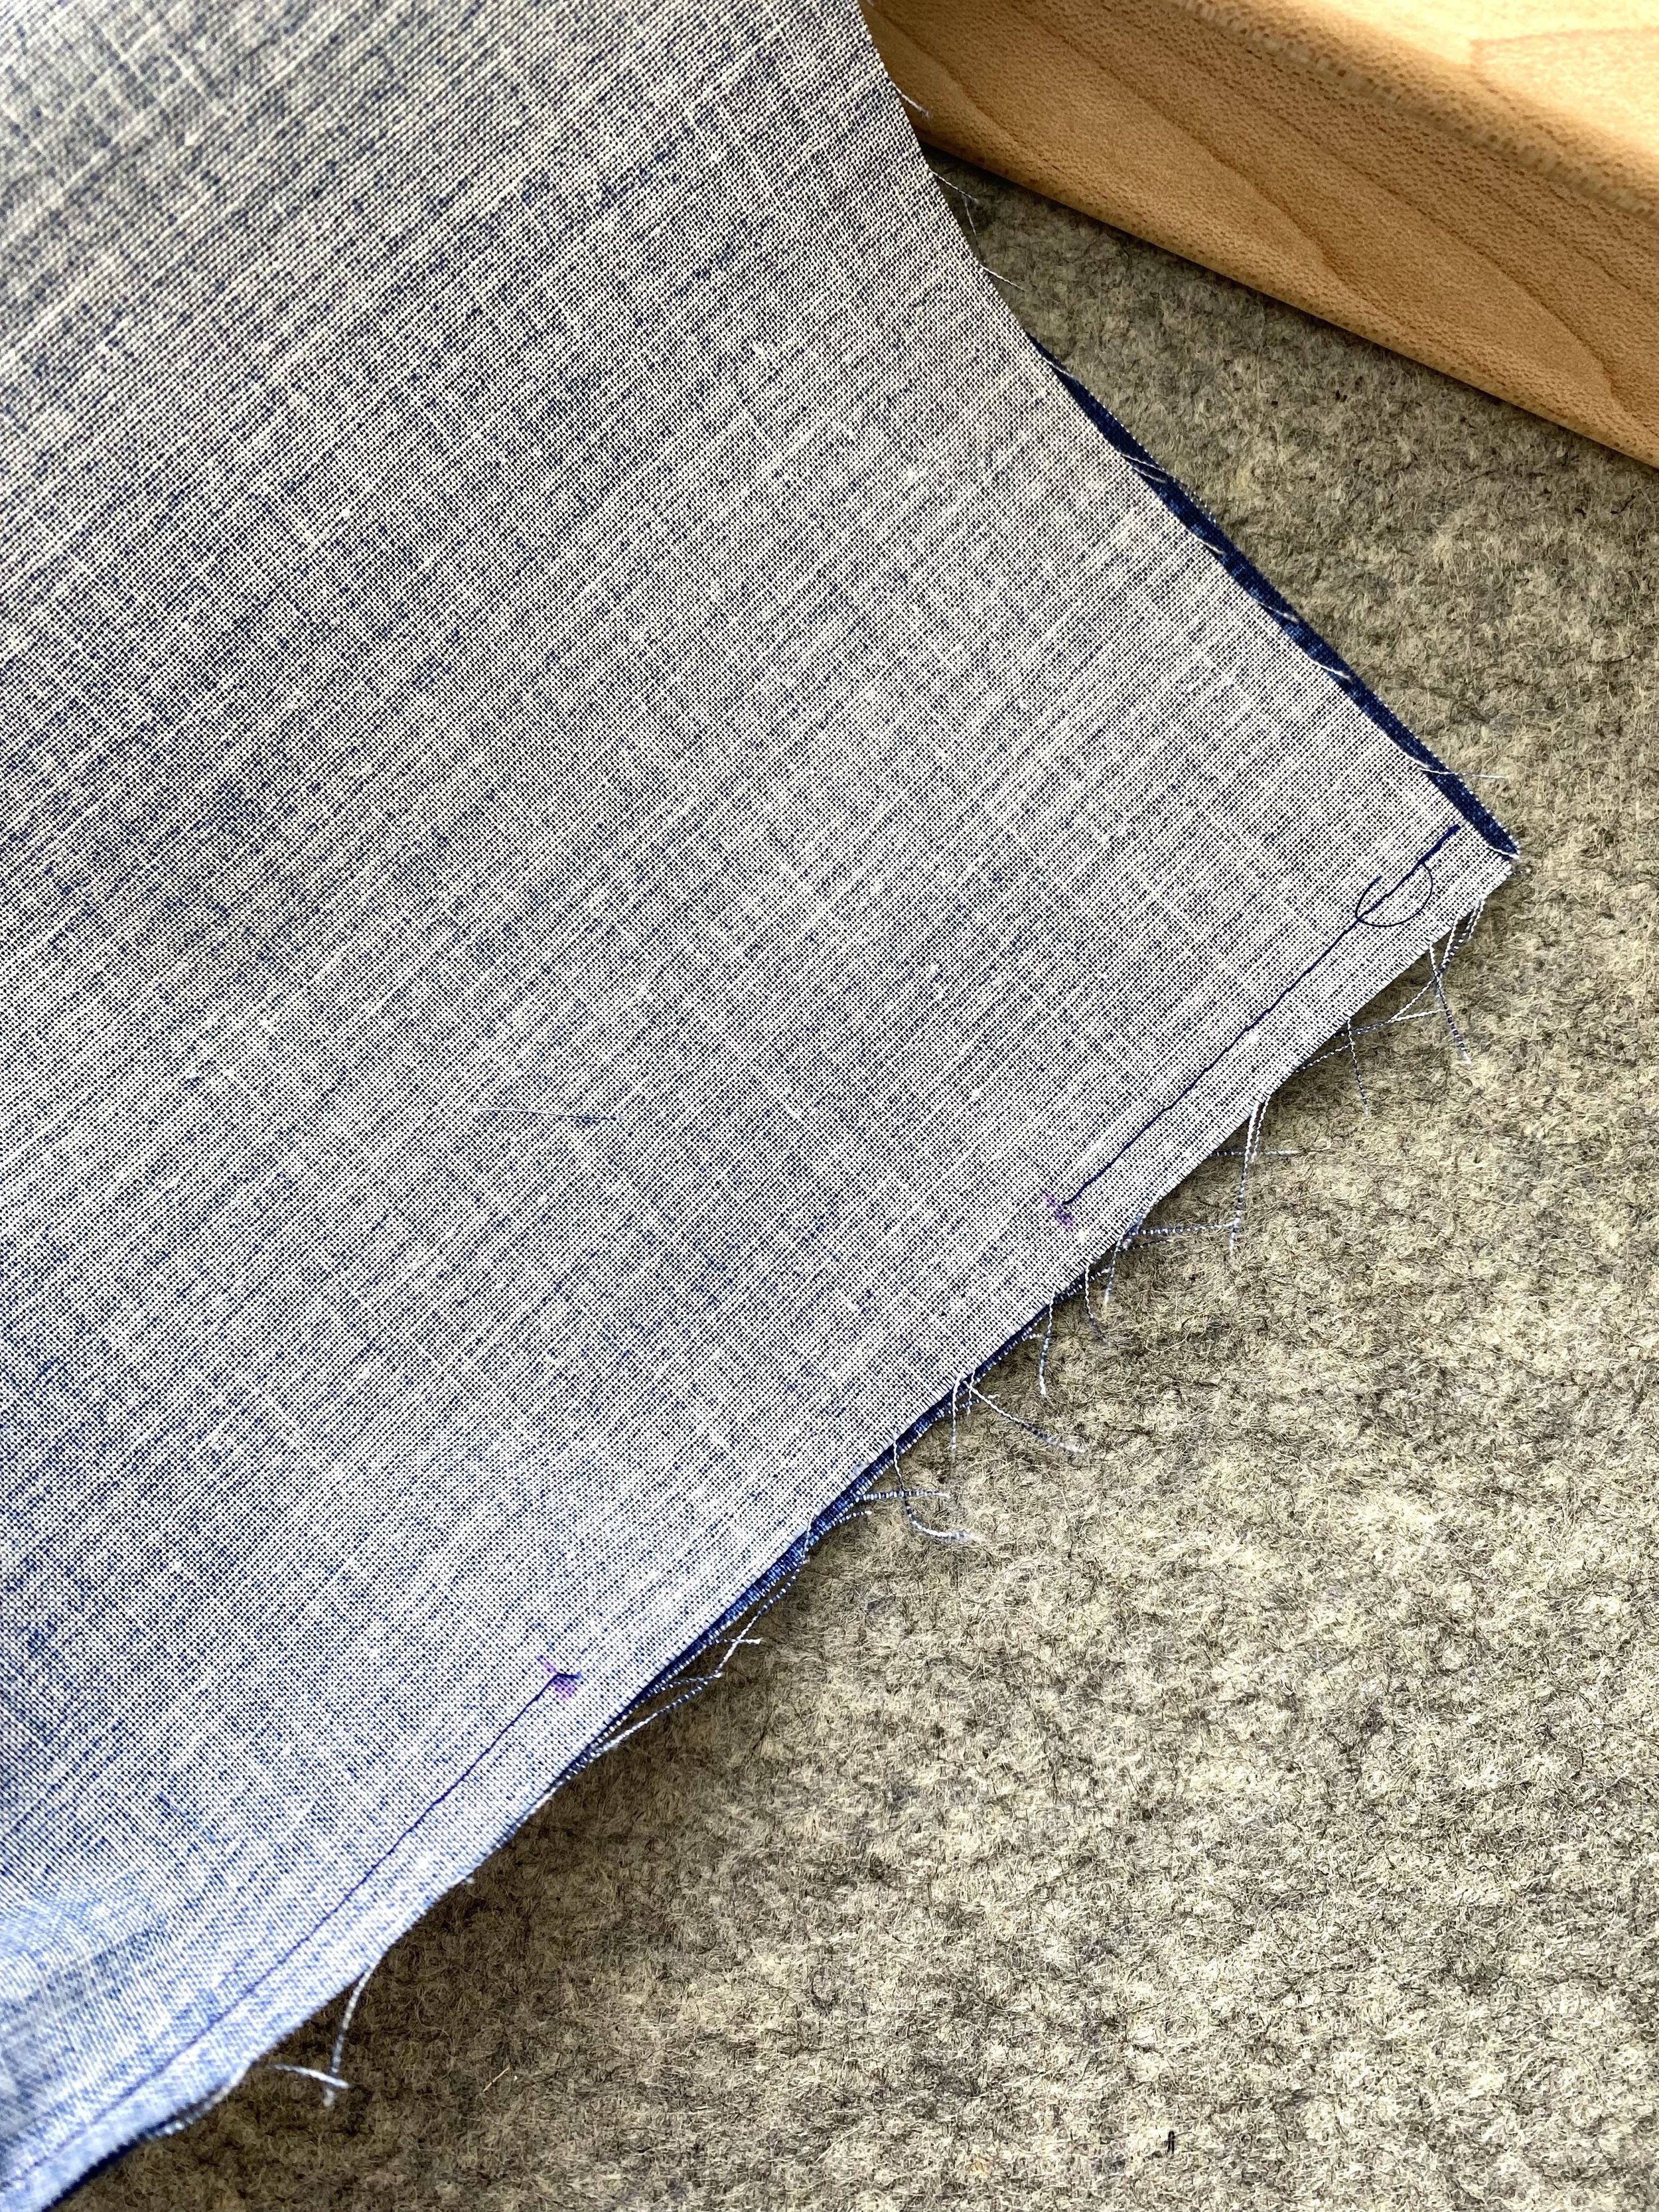
To begin, take your 7” x 14” Chambray rectangle and cut a diagonal line. I start about 1/2” from the top corner on one side, and end about mid point on the other side. Set the top portion aside for now. You will need it later.

2. Place the Chambray bottom piece toward the bottom long edge of your batting. I leave about 1” extra batting around the edges as a buffer.
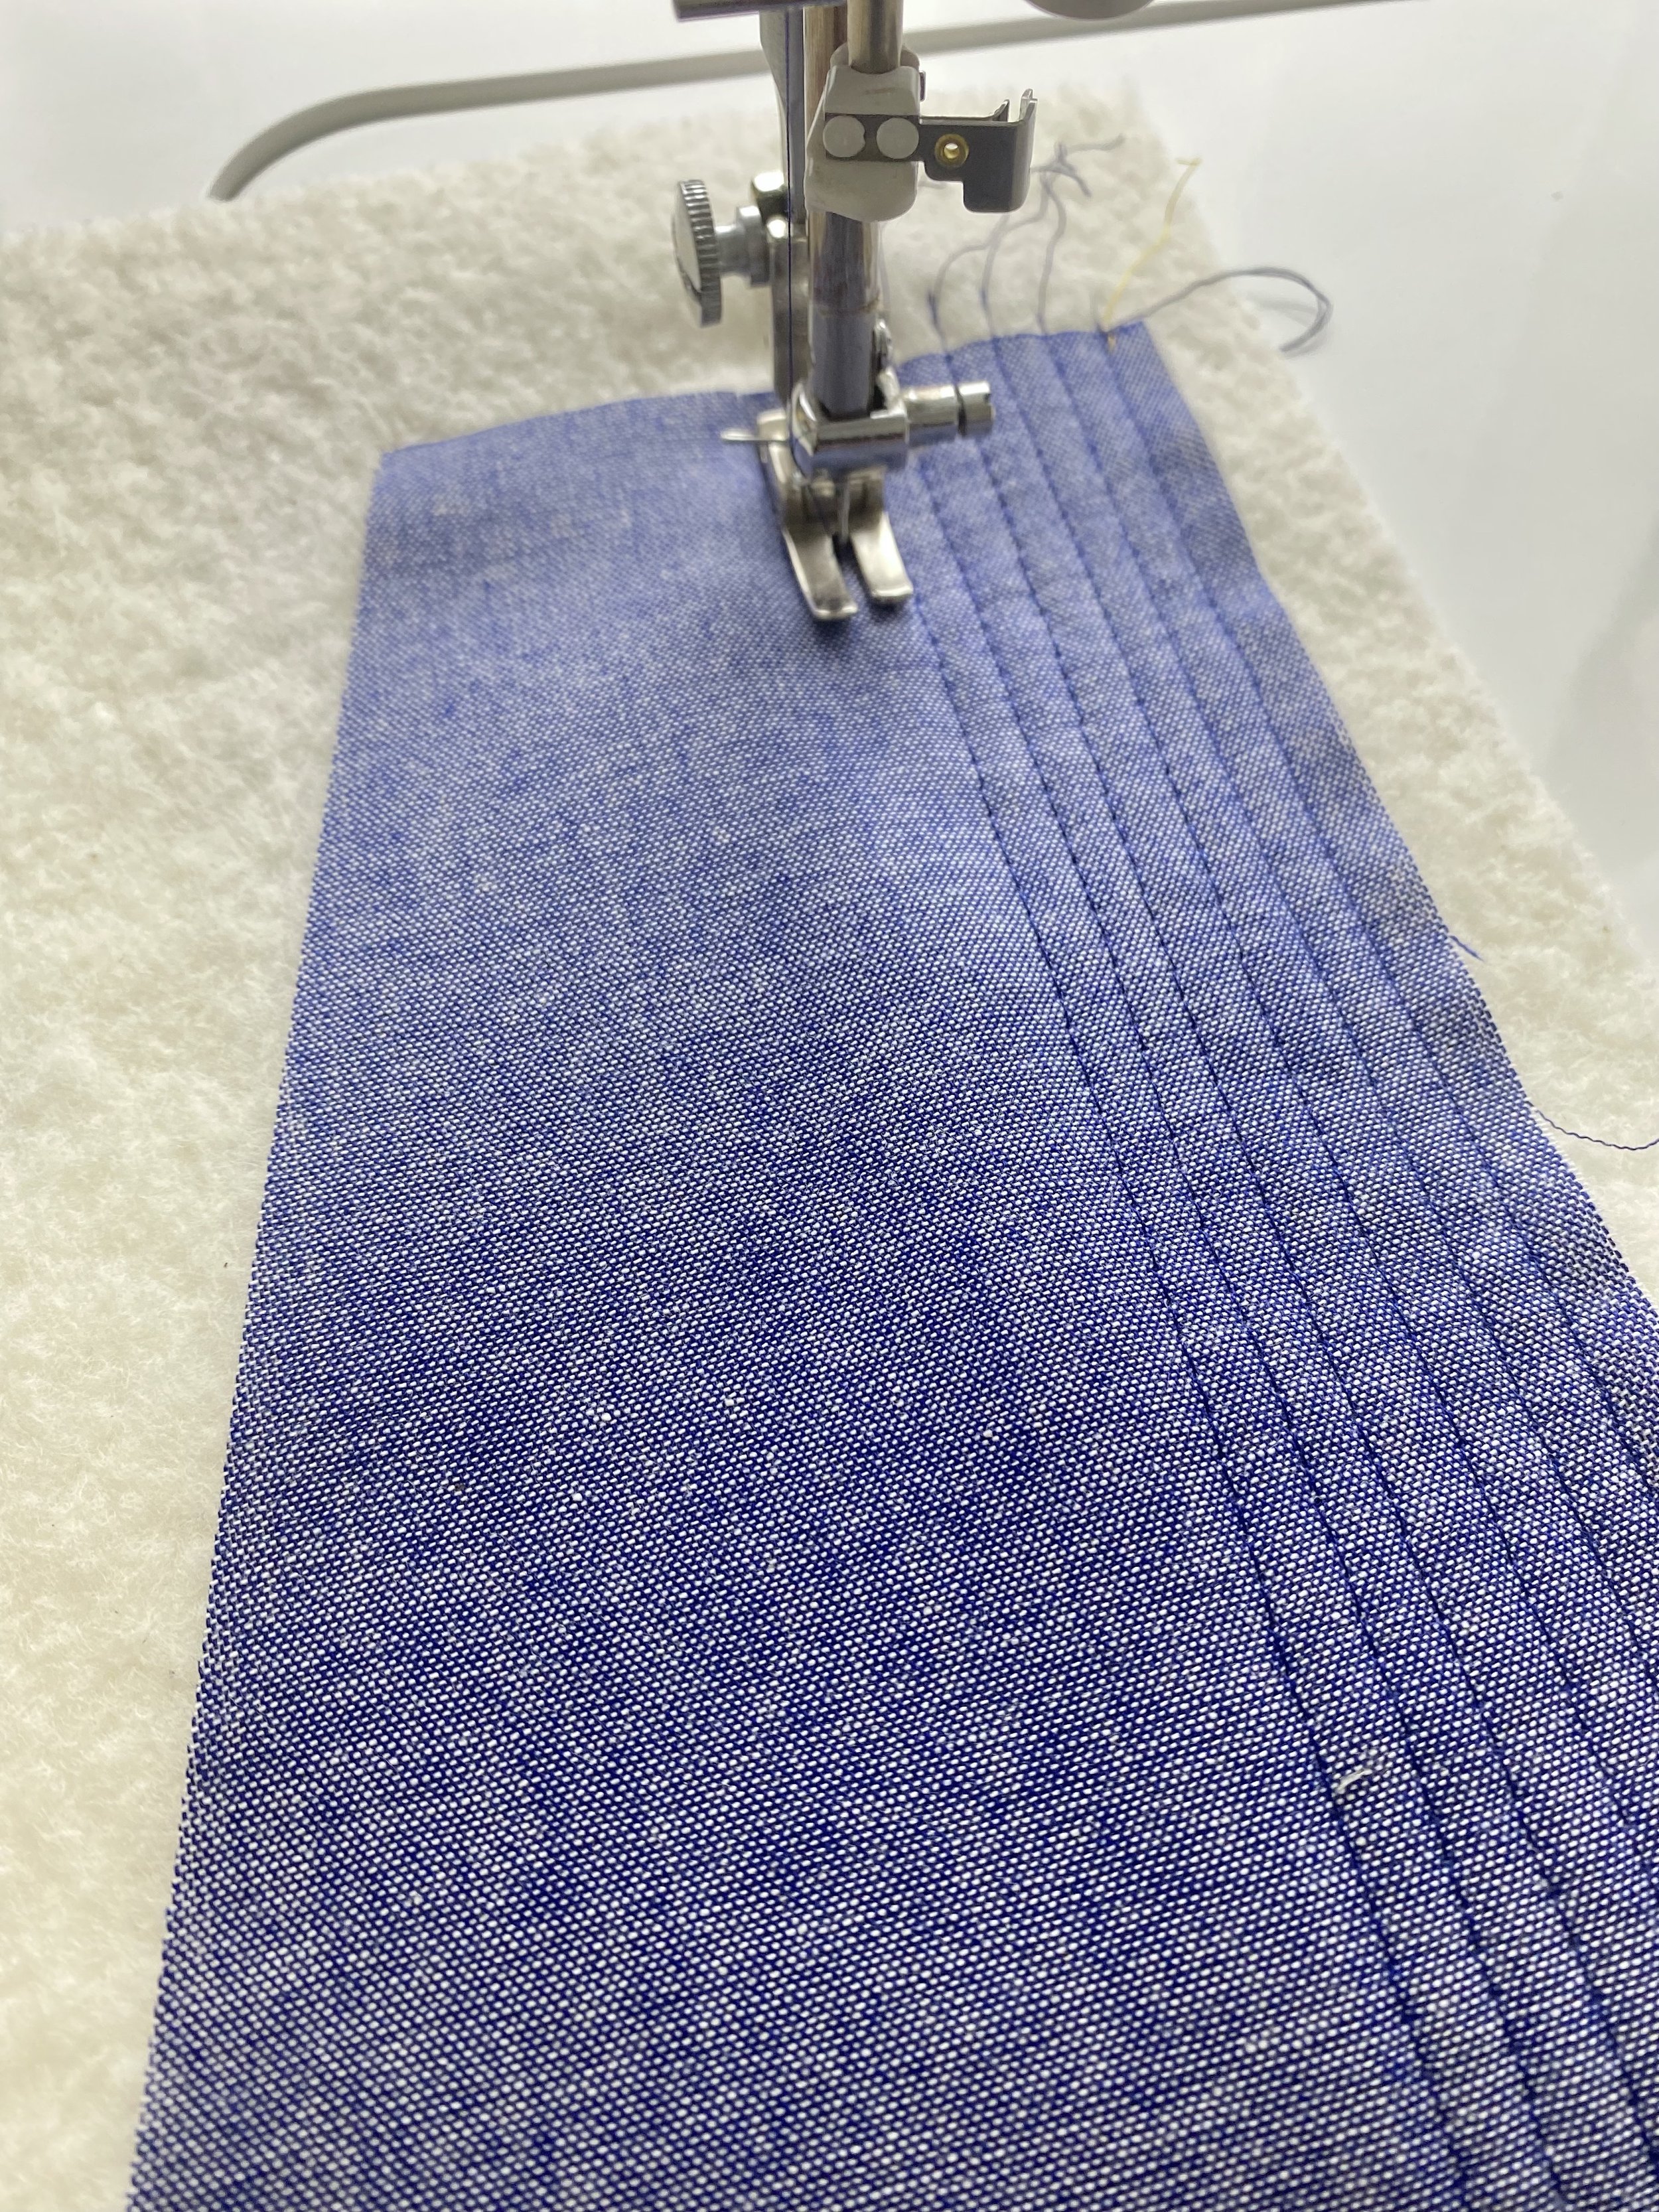
3. We are using a simple quilt-as-you-go method to create our outer cover. You can quilt this section of Chambray any way you want. I opted for straight lines stitched 1/4” apart.

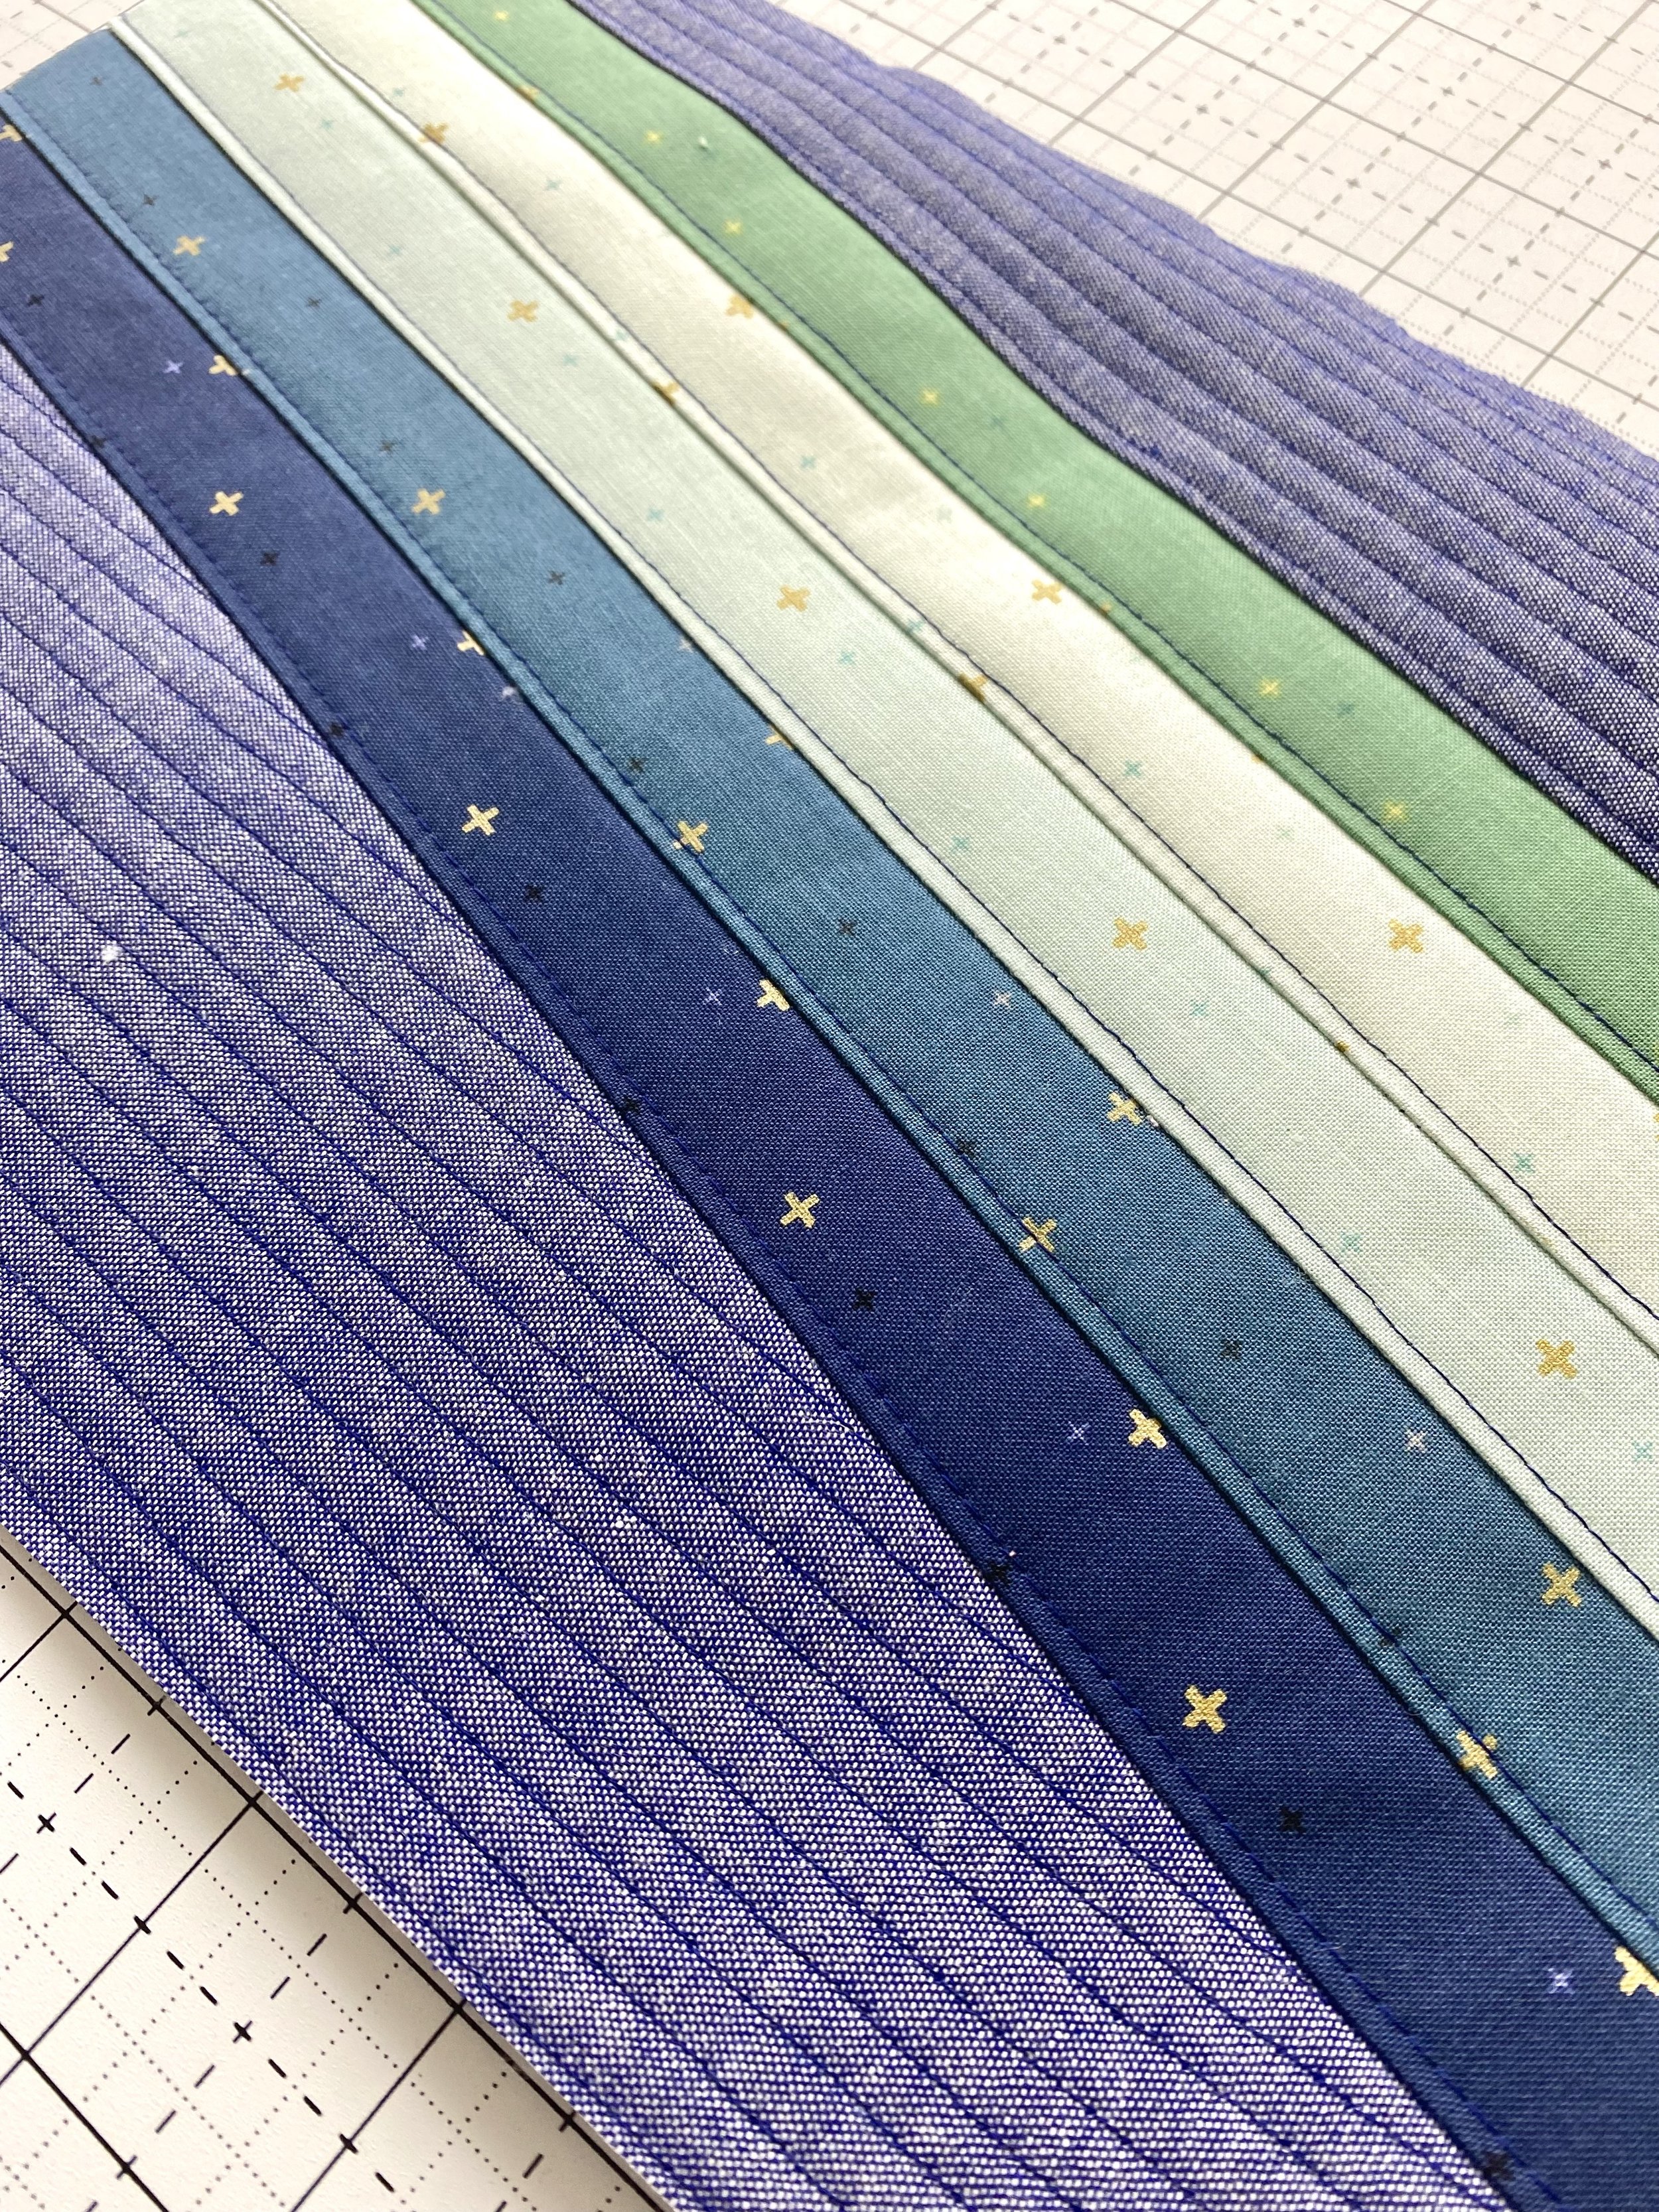
4. To add the Sparkler stripes, lay your first strip on the quilted Chambray so right sides are facing and edges align.

5. Sew 1/4” from raw edge.

6. Fold open and press with iron, or finger press. Again, you can quilt these any way you like. I opted to top stitch only each strip. However, you can see I stitched 1/4” rows on my other Hydro Holders. Repeat for all 5 Sparkler strips. Now it’s time to attach the top portion of the Chambray we cut off earlier. Line it up as shown in the photo above.

7. Then flip it, so it is facing downwards and the raw edge aligns with the raw edge of the last Sparkler strip. Sew 1/4” from raw edge like you did for the Sparkler strips.
8. Press open the top Chambray portion and quilt. I went back to sewing straight lines 1/4” apart for mine.
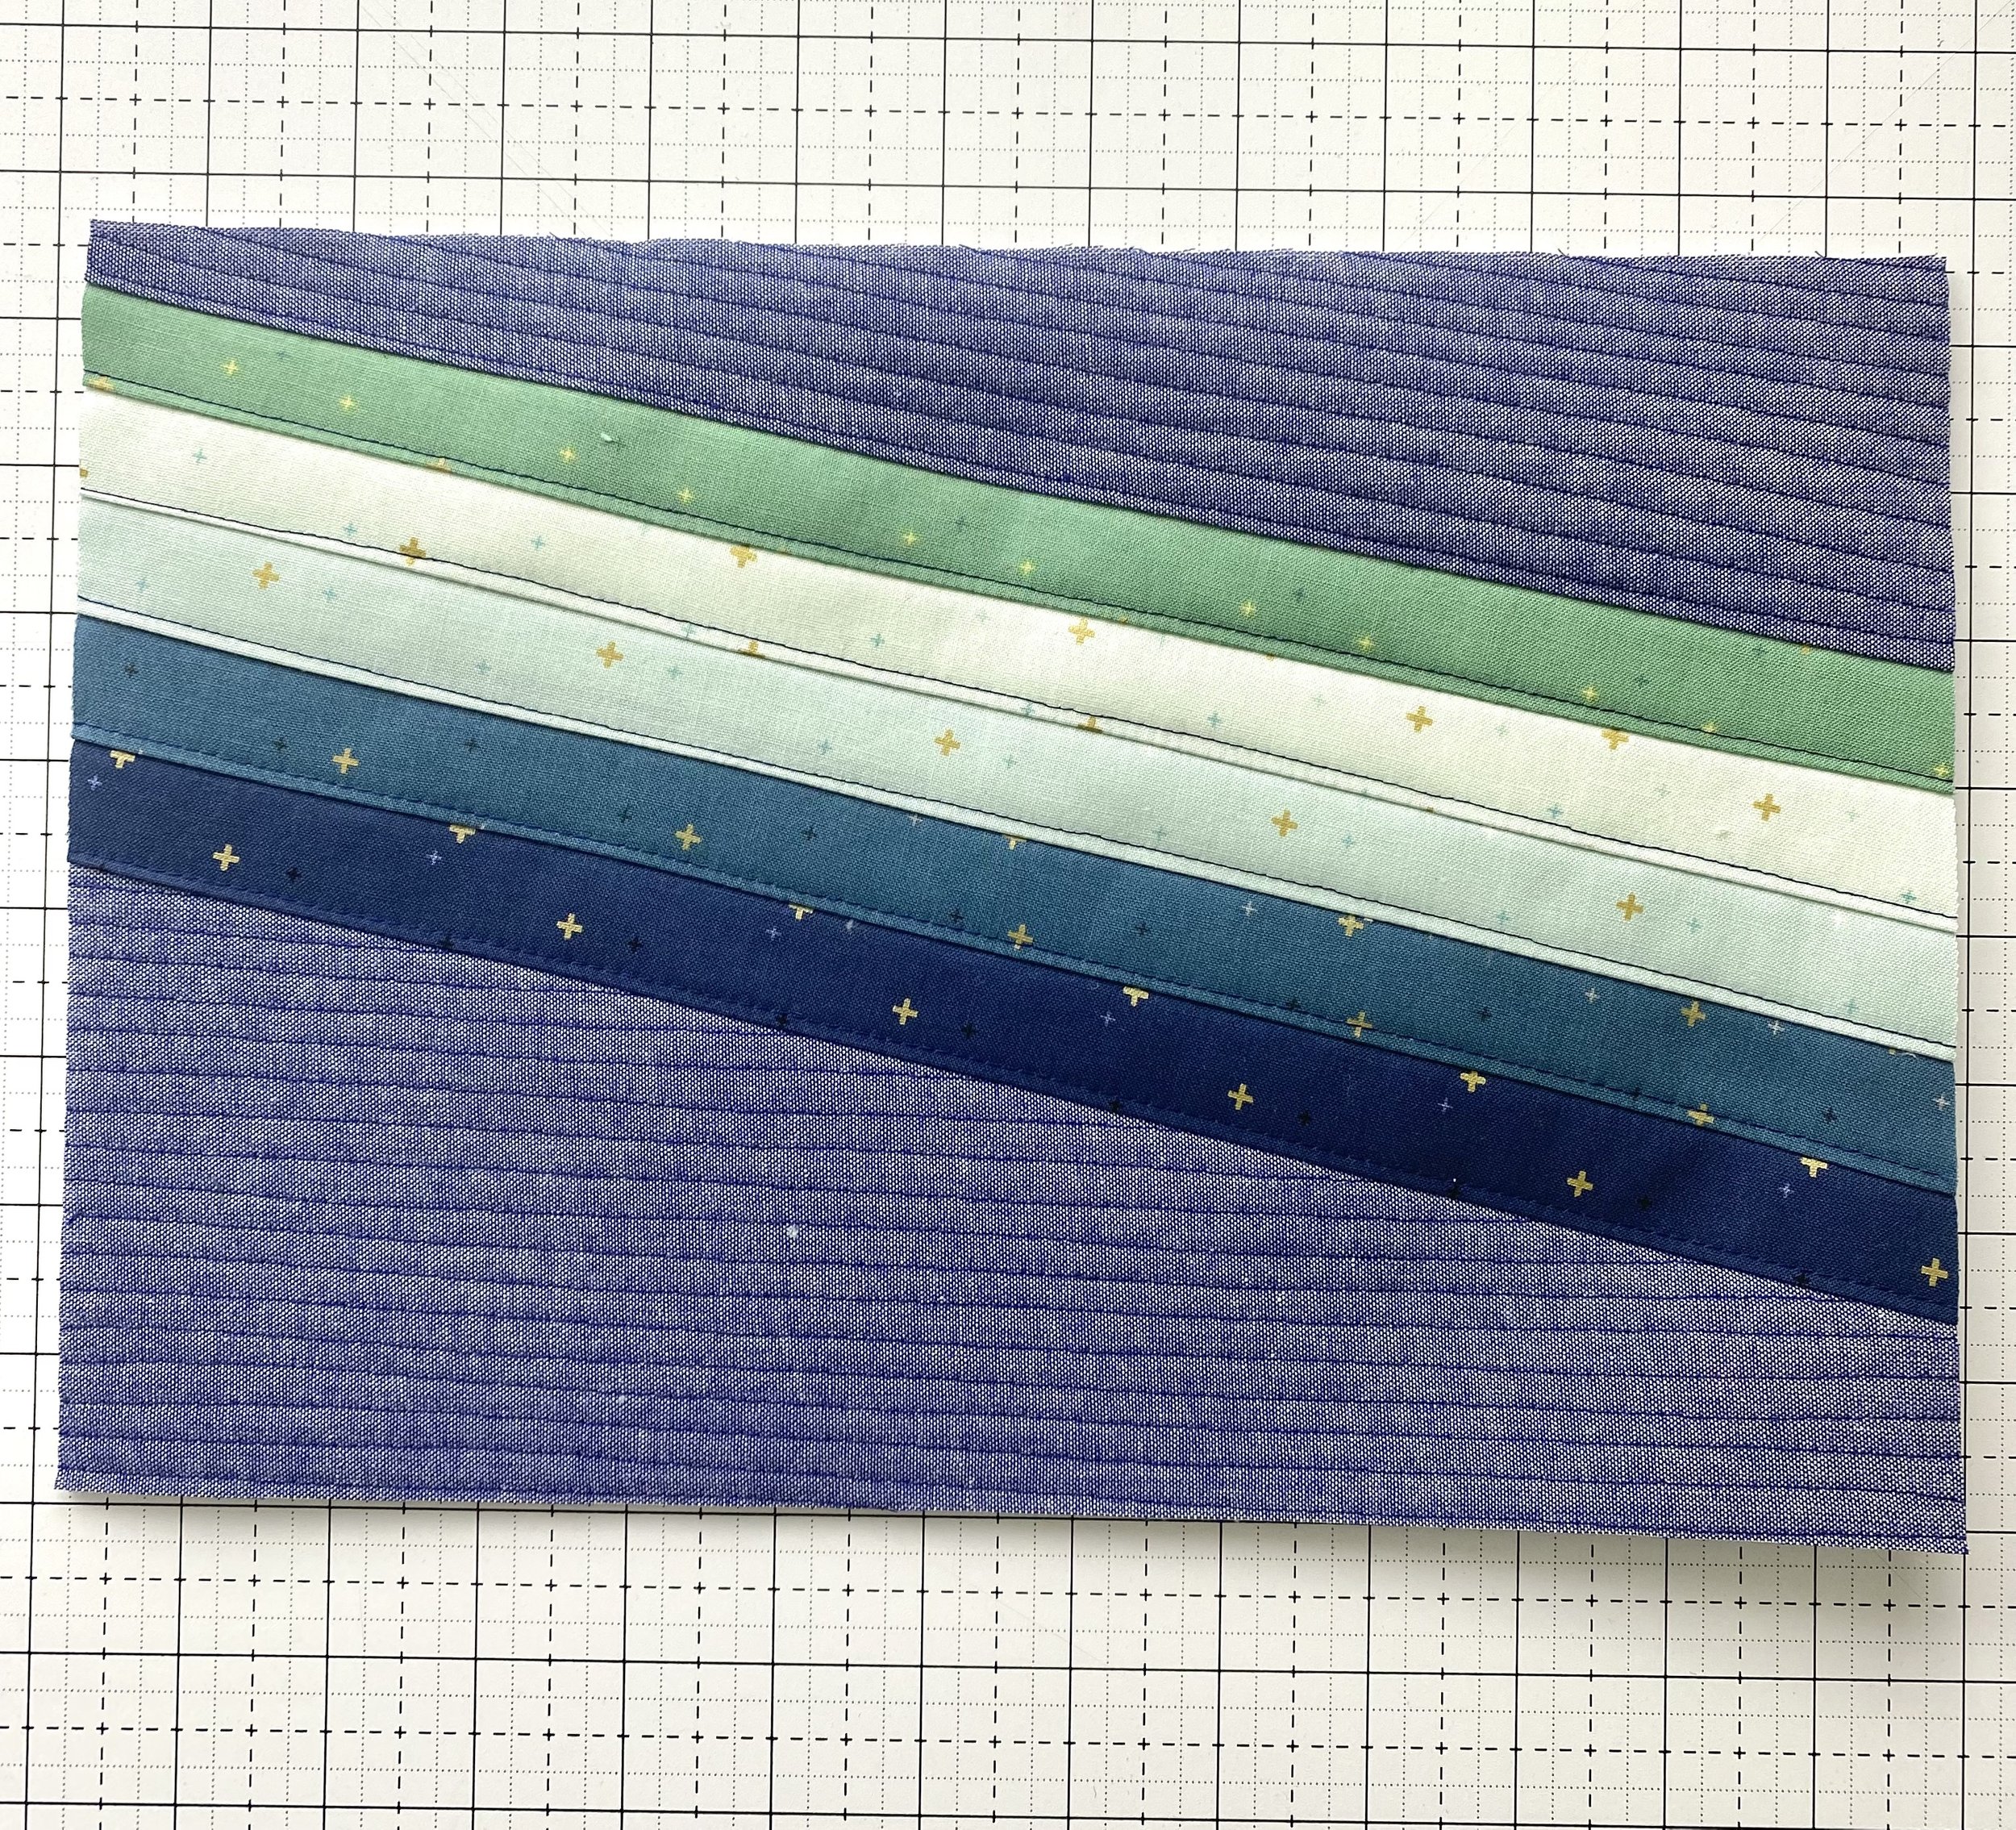
9. Trim so that this section measures 8 1/2” x 12 1/2”. Set this aside for now.
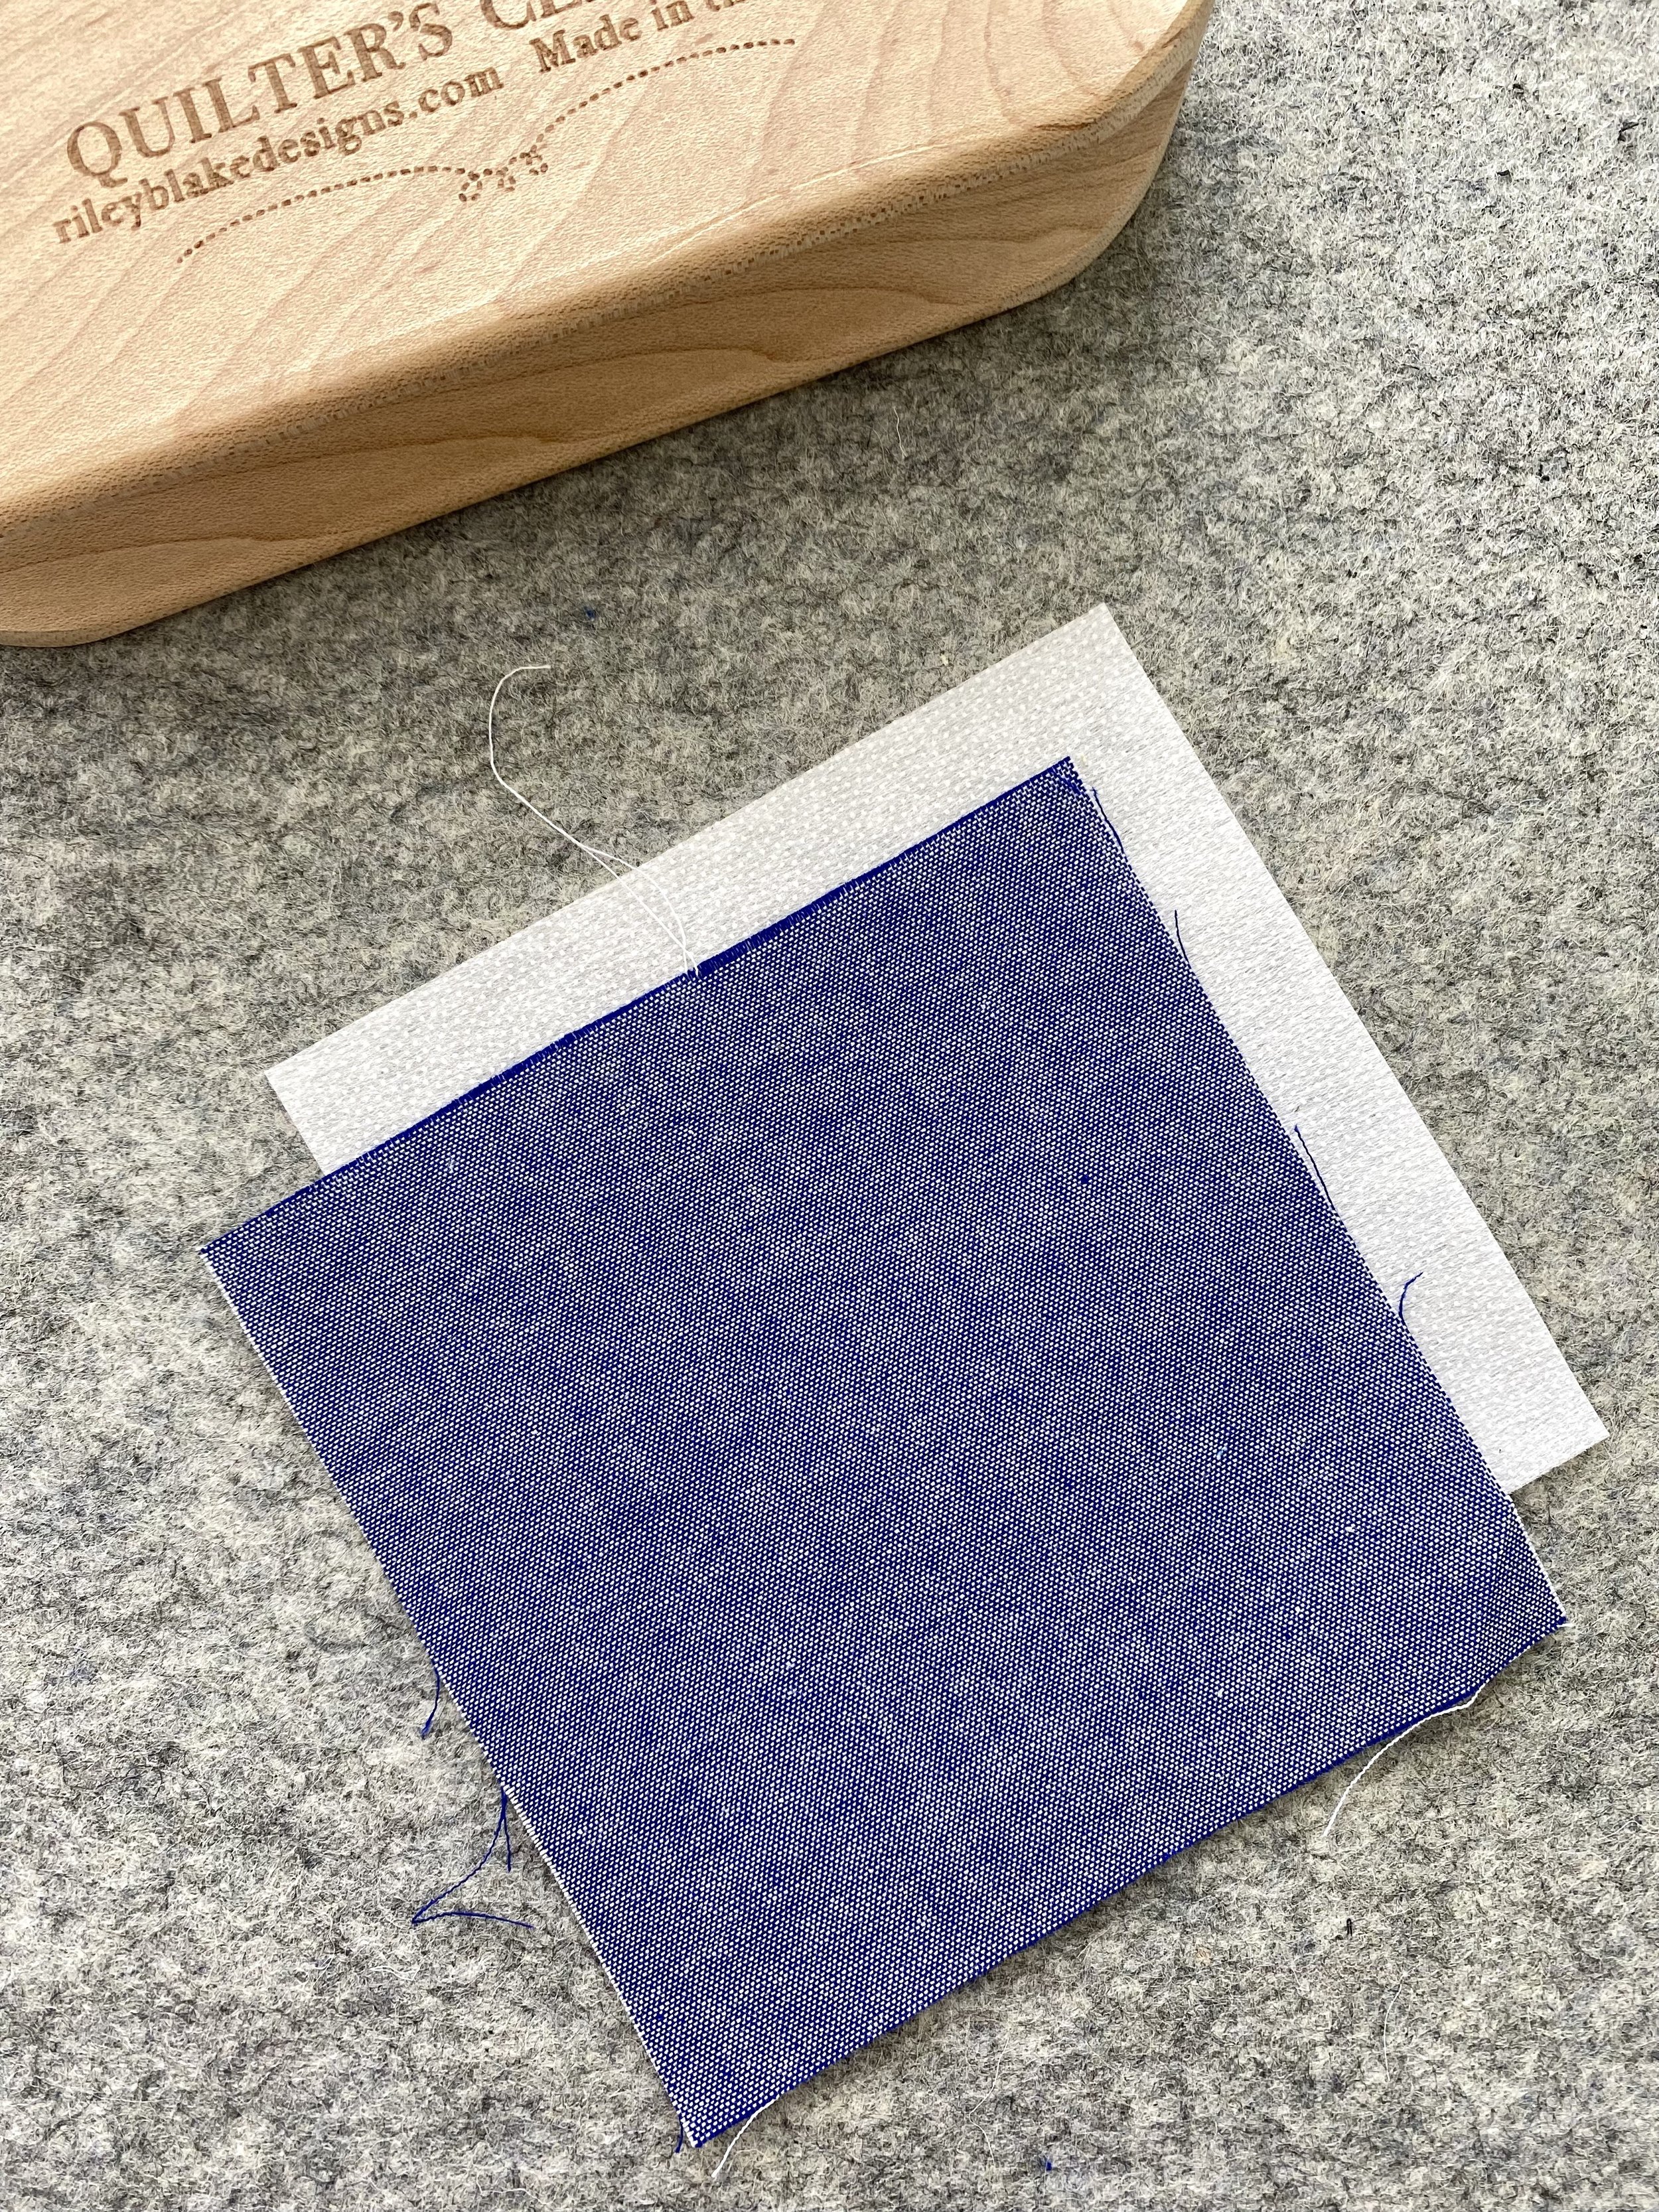
10. The Riley Blake Chambray has a bit more drape than quilting cotton. Since I would be using it for the base of my Hydro Holder, I wanted to give it more stability, so I decided to add fusible interfacing in addition to the quilt batting. I would do this with quilting cotton as well, but this interfacing step is entirely optional. Fuse the 5” square interfacing to one side of the Chambray (there is no wrong side on the Chambray fabric).
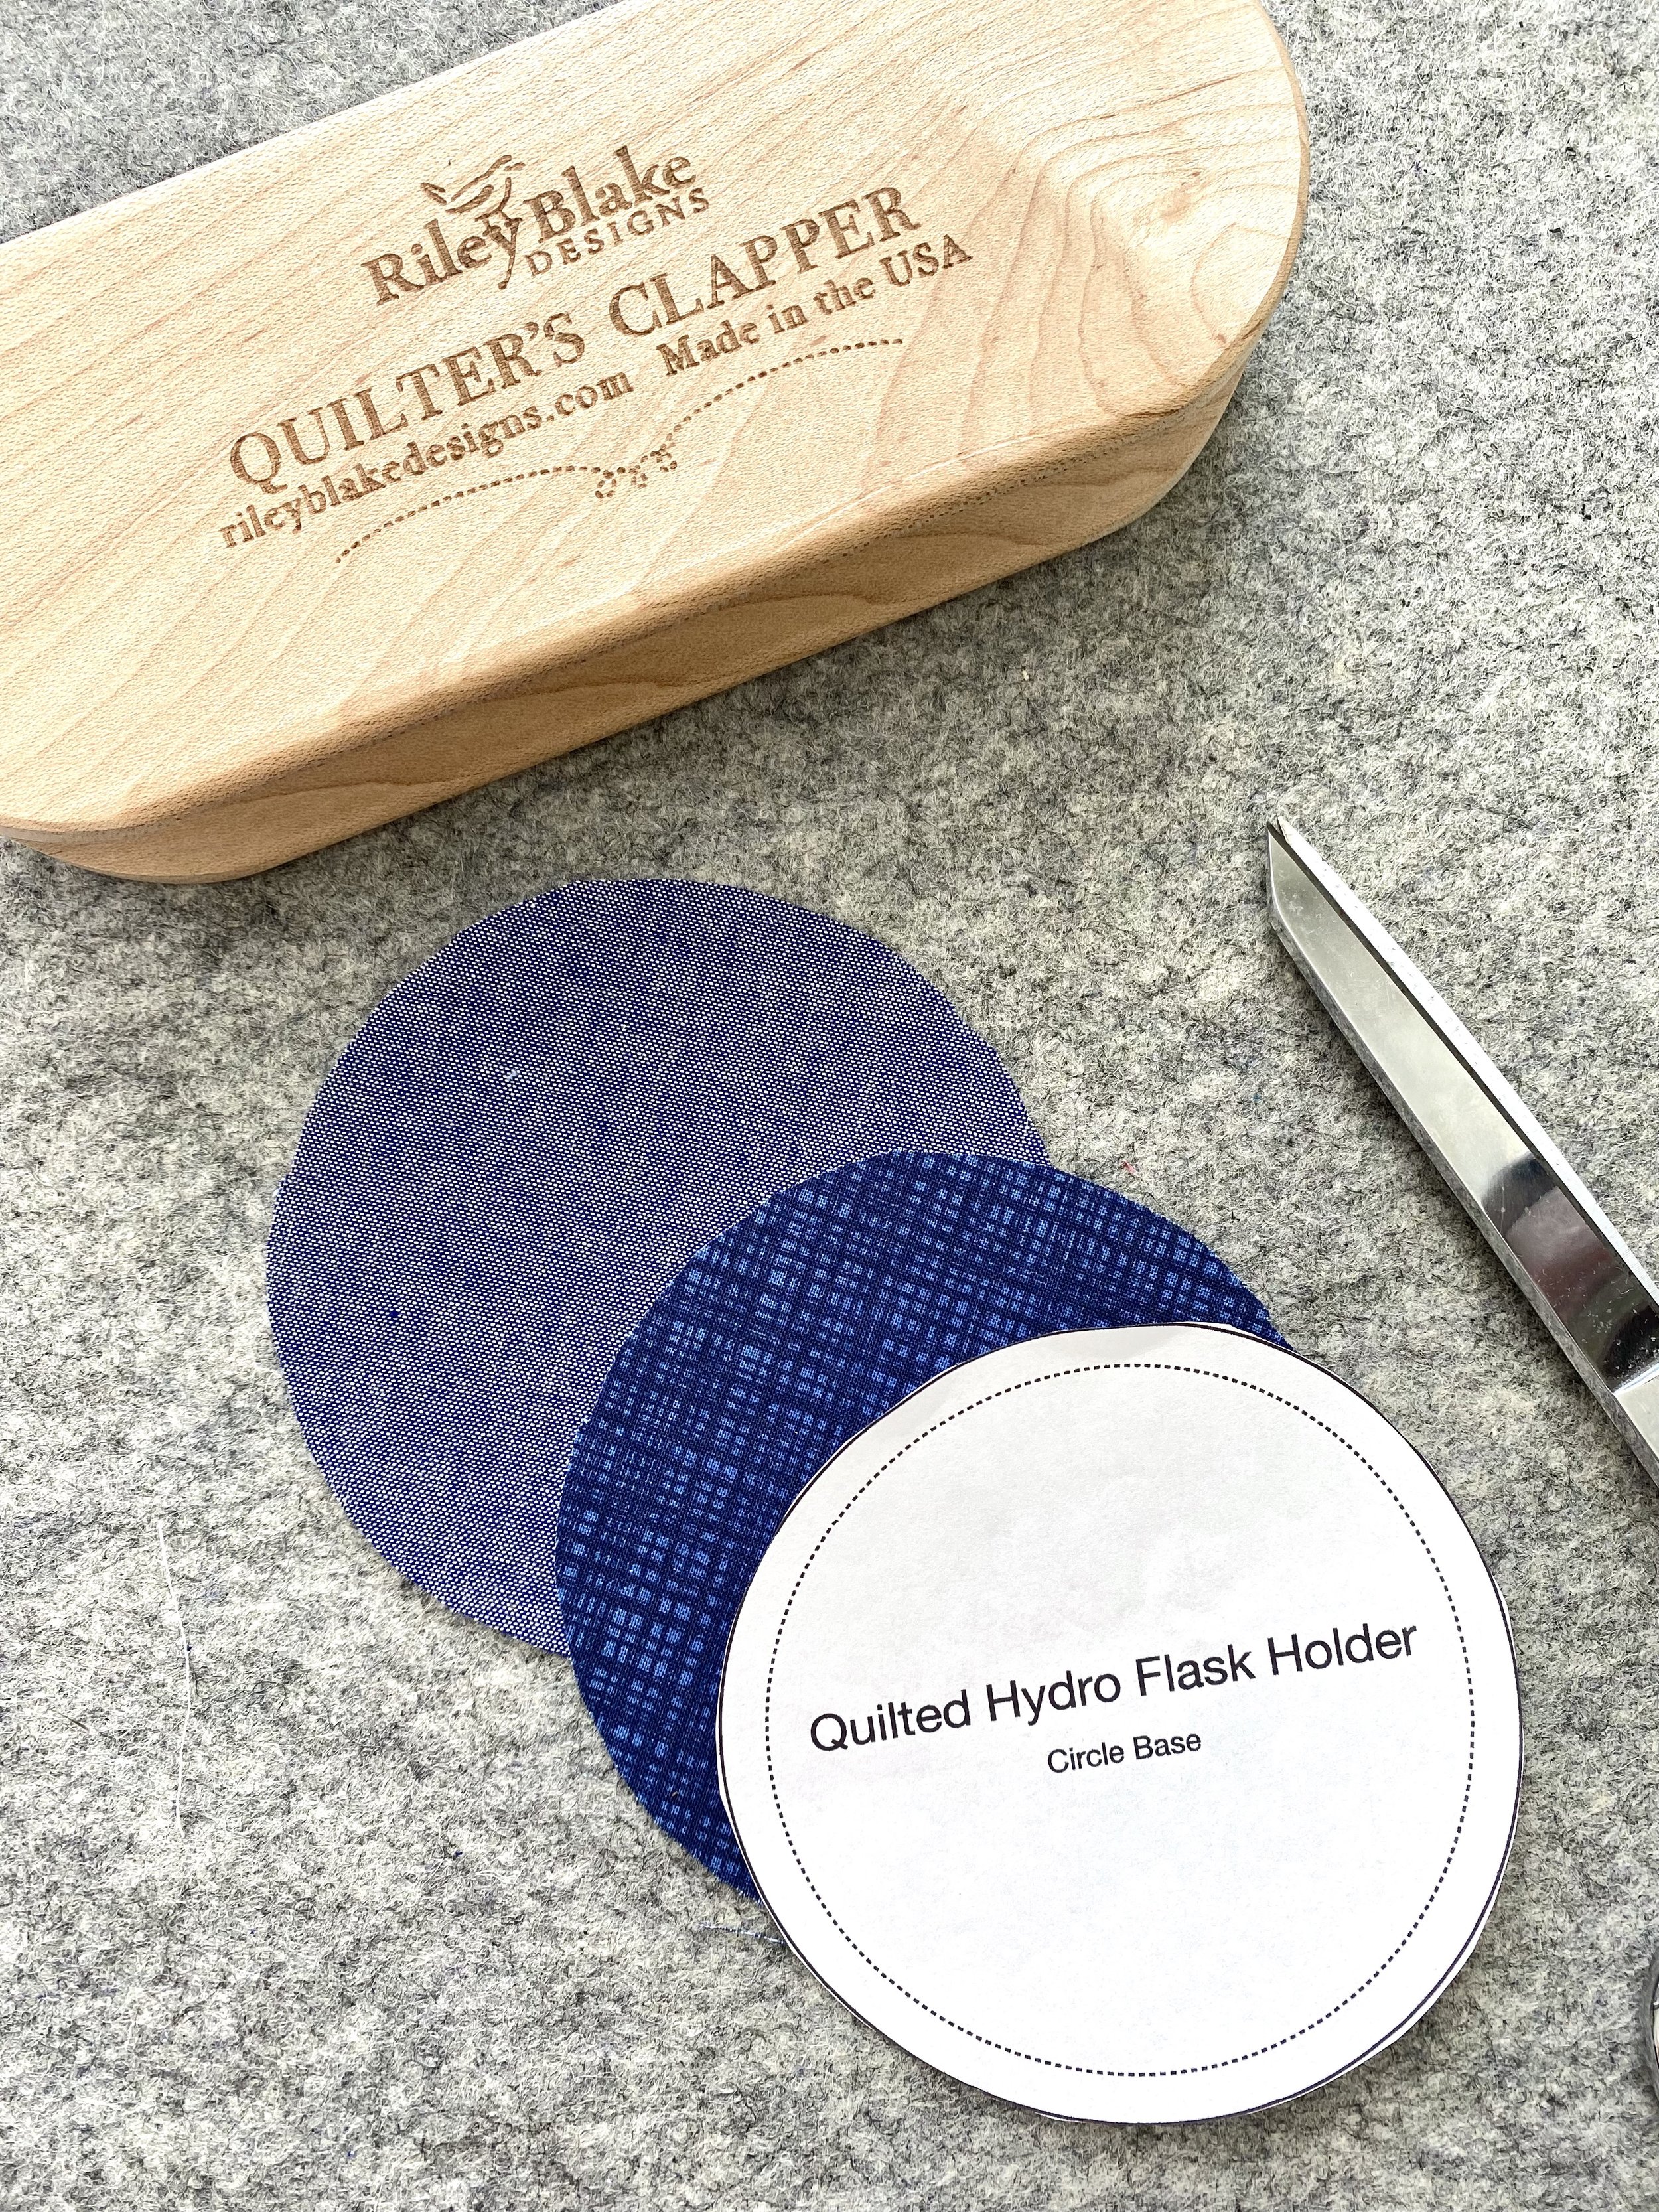
11. Cut out your Circle Base Template. Take your Texture Lining 5” square and your Chambray 5” square, and use the Circle Base Template to cut both pieces into a circle shape. If you haven’t already printed out your Circle Base Template, you can click on the button below to print and cut it out.

12. Place the Chambray circle on a small scrap of batting (about 6” square) and quilt it. I didn’t quilt the entire circle. Instead I stitched 4 horizontal rows, and 5-6 vertical rows. How you quilt it is entirely up to you.
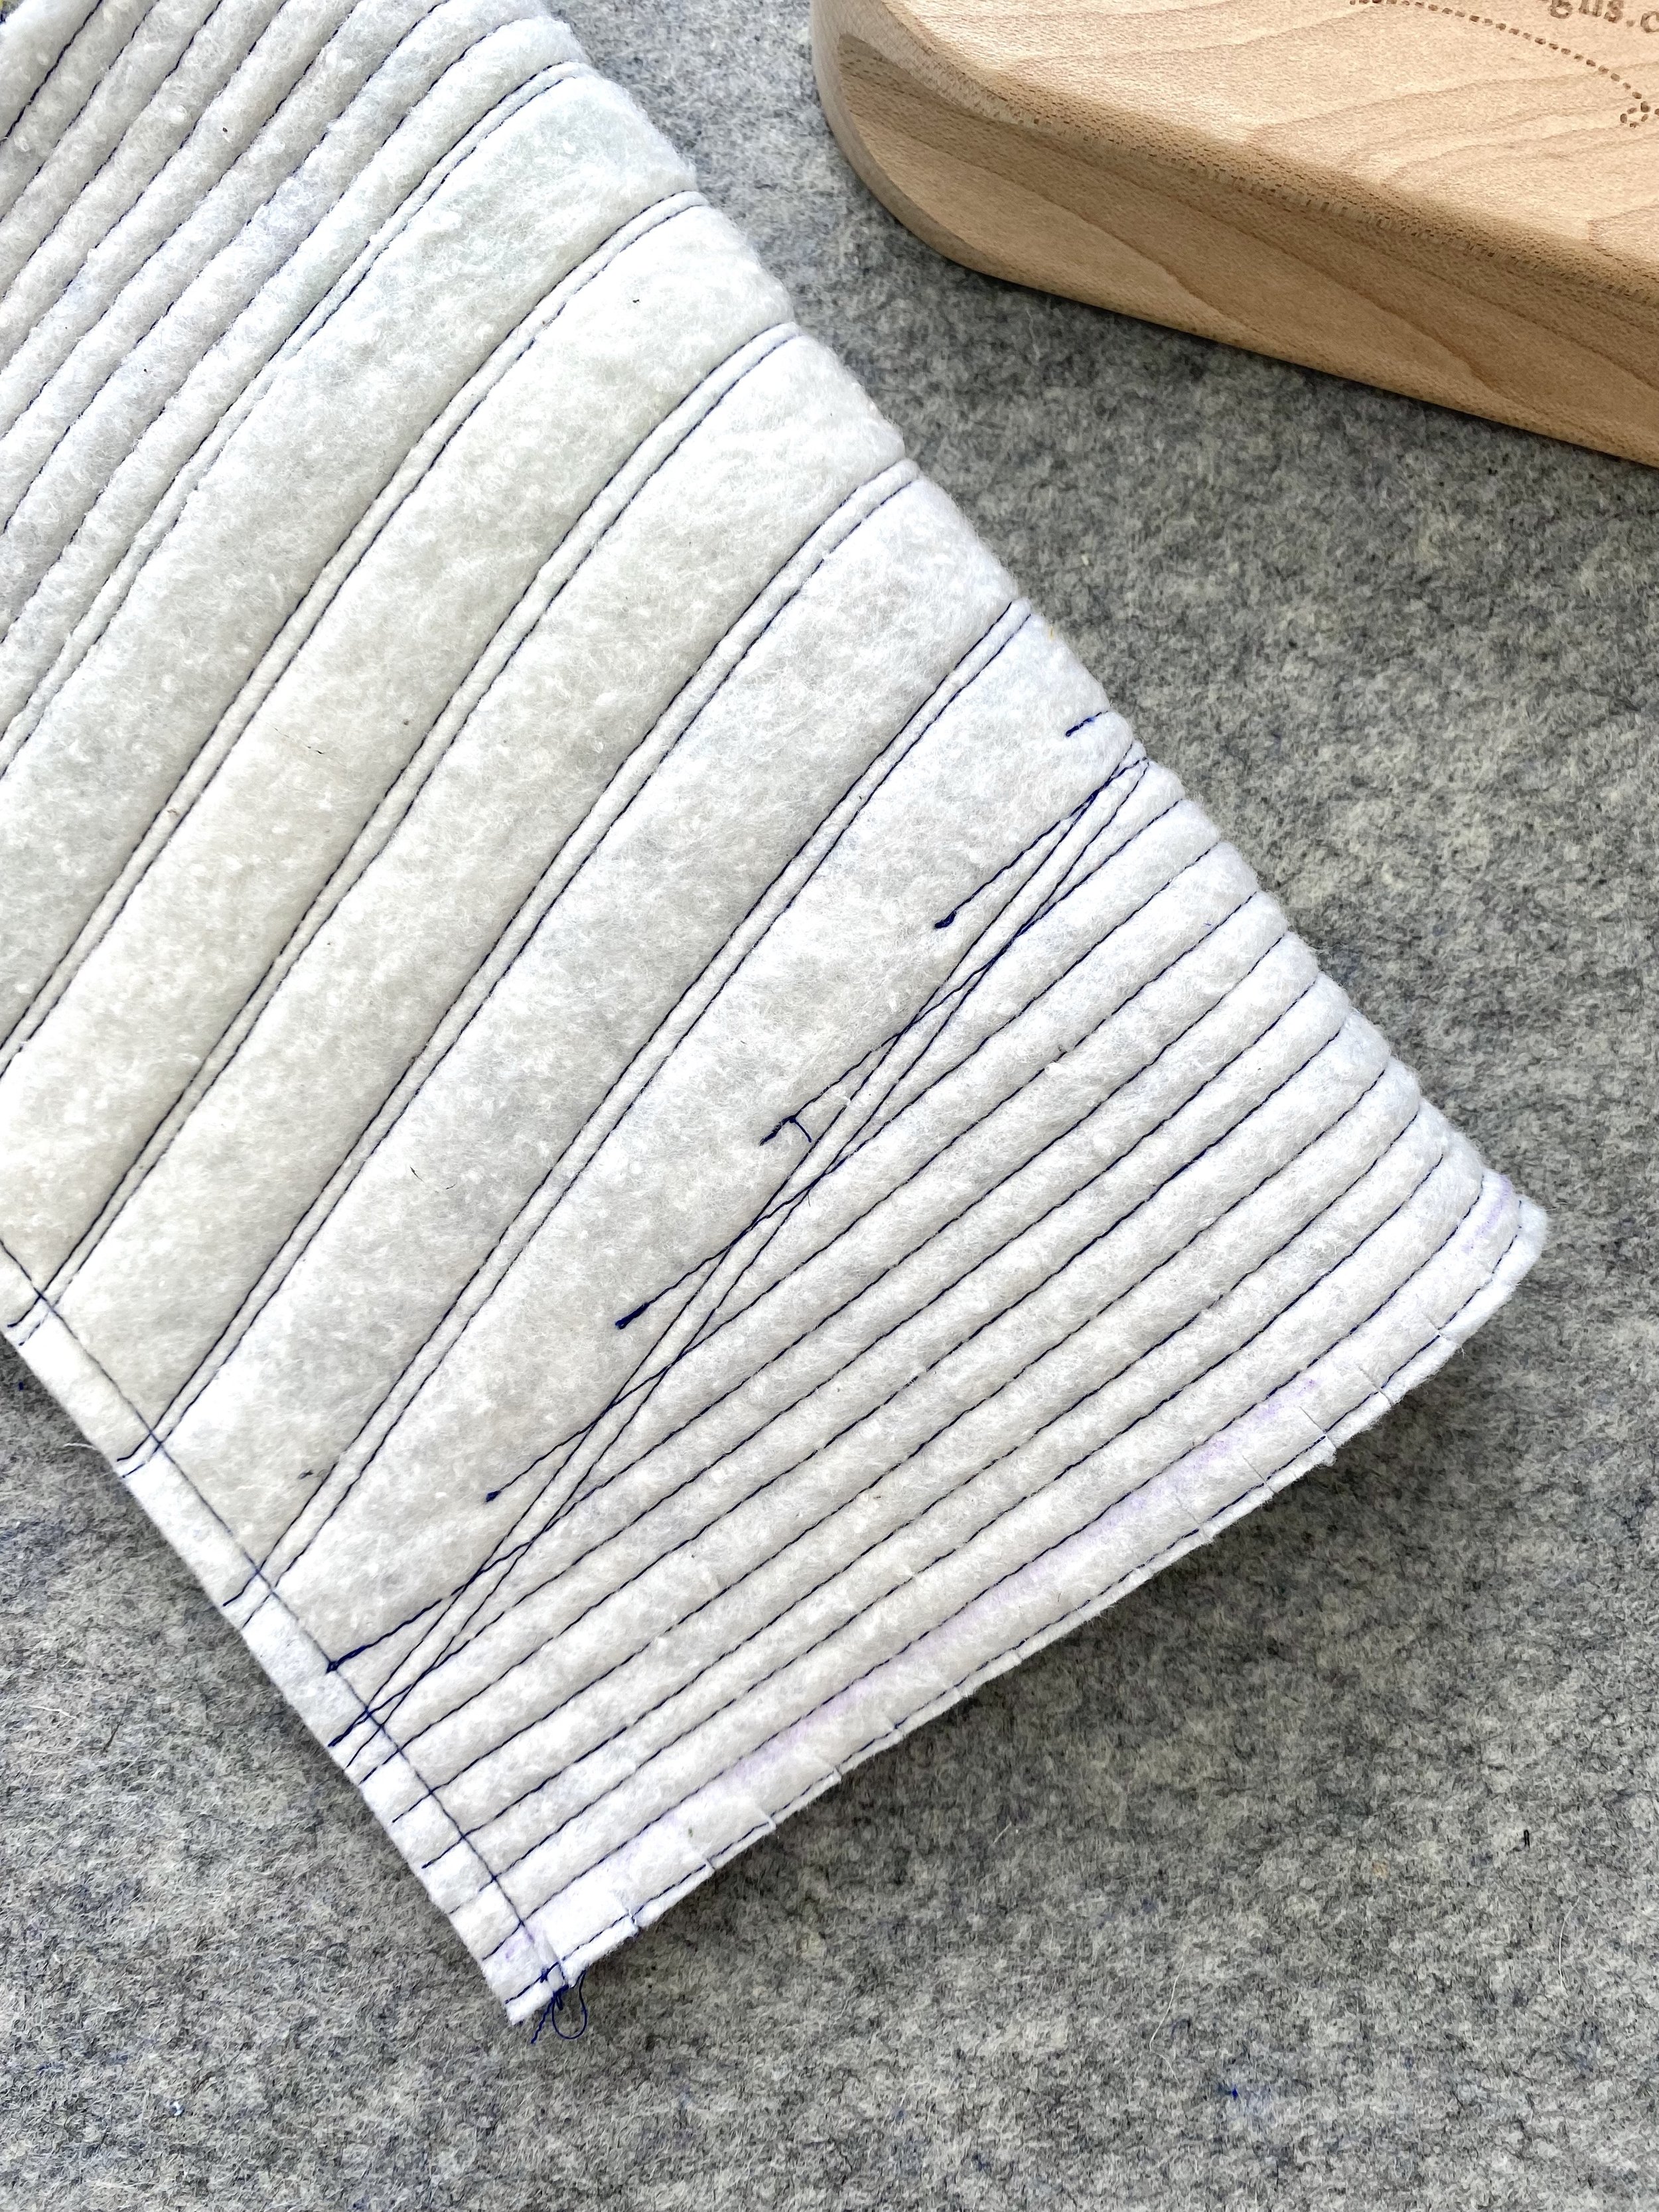
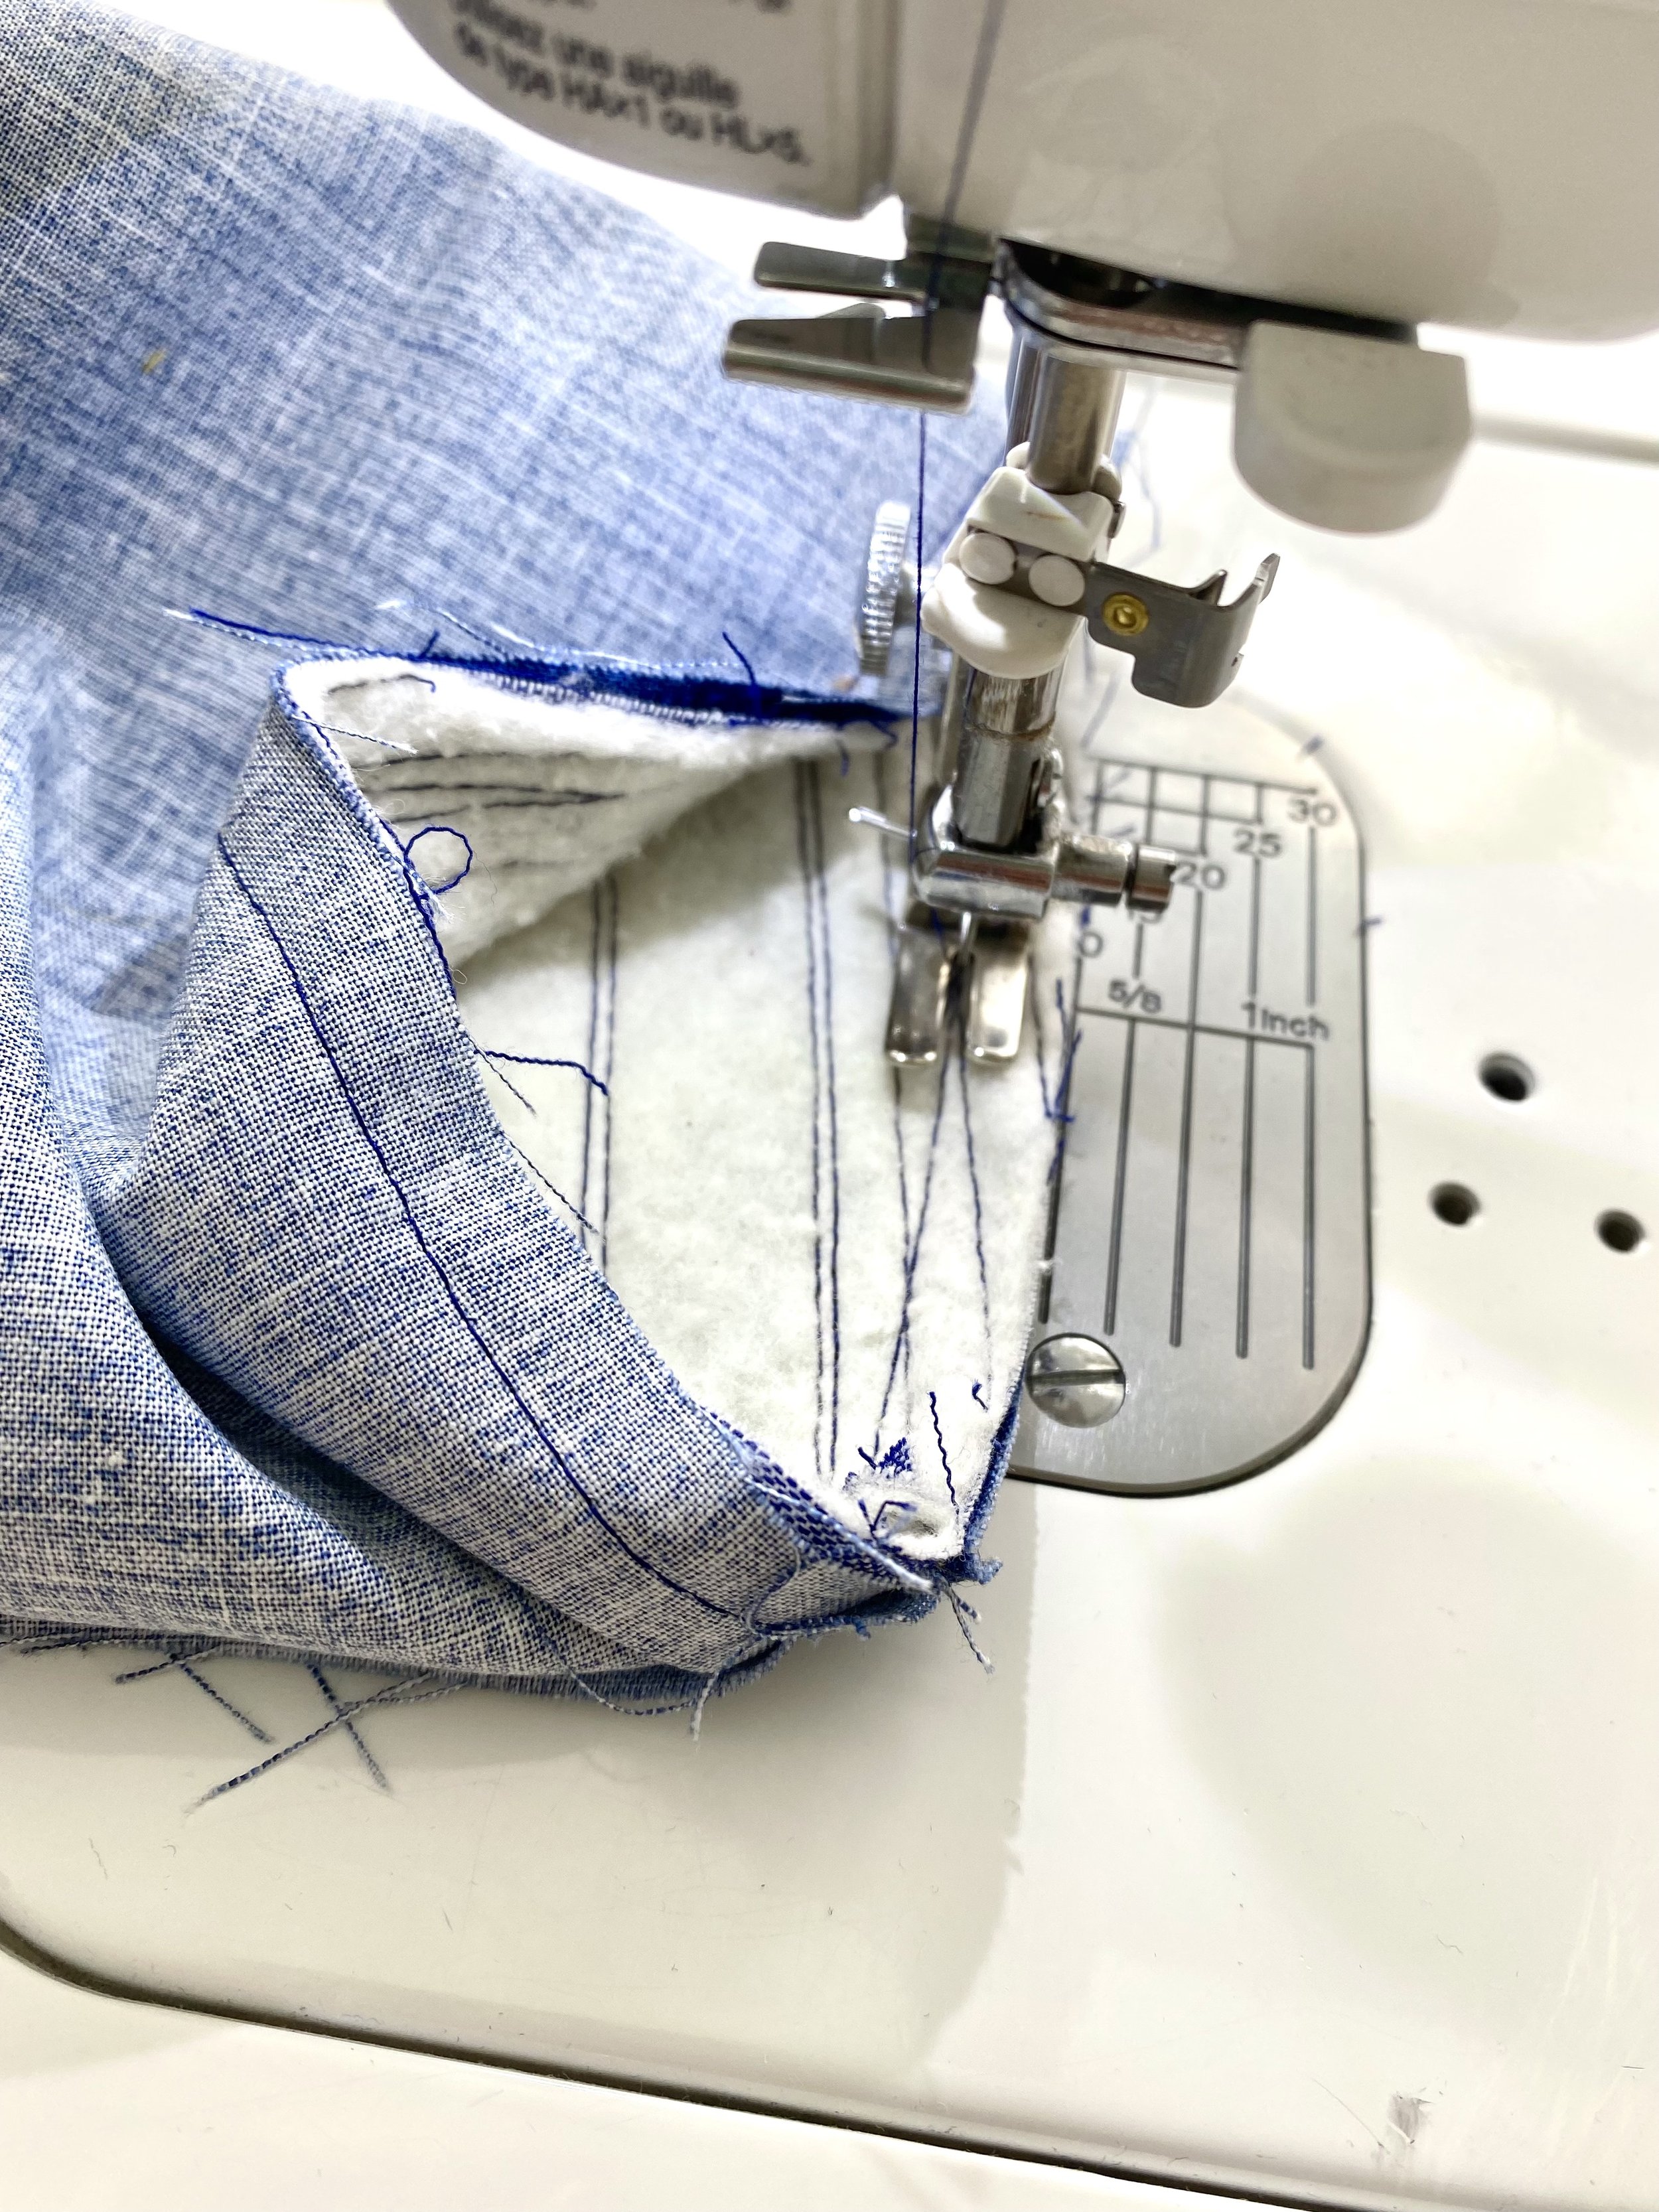
13. Turn the outer quilted rectangle piece over so the batting is facing up. Using a fabric pen, draw a line 1/4” from bottom edge. Carefully snip along the bottom edge so that you get near your drawn line, but do not cut into the stitching. The drawn line represents your stitch line in the next step.
14. Fold the outer quilted rectangle piece so the sides are lined up. Stitch along the side using a 1/4” seam allowance.
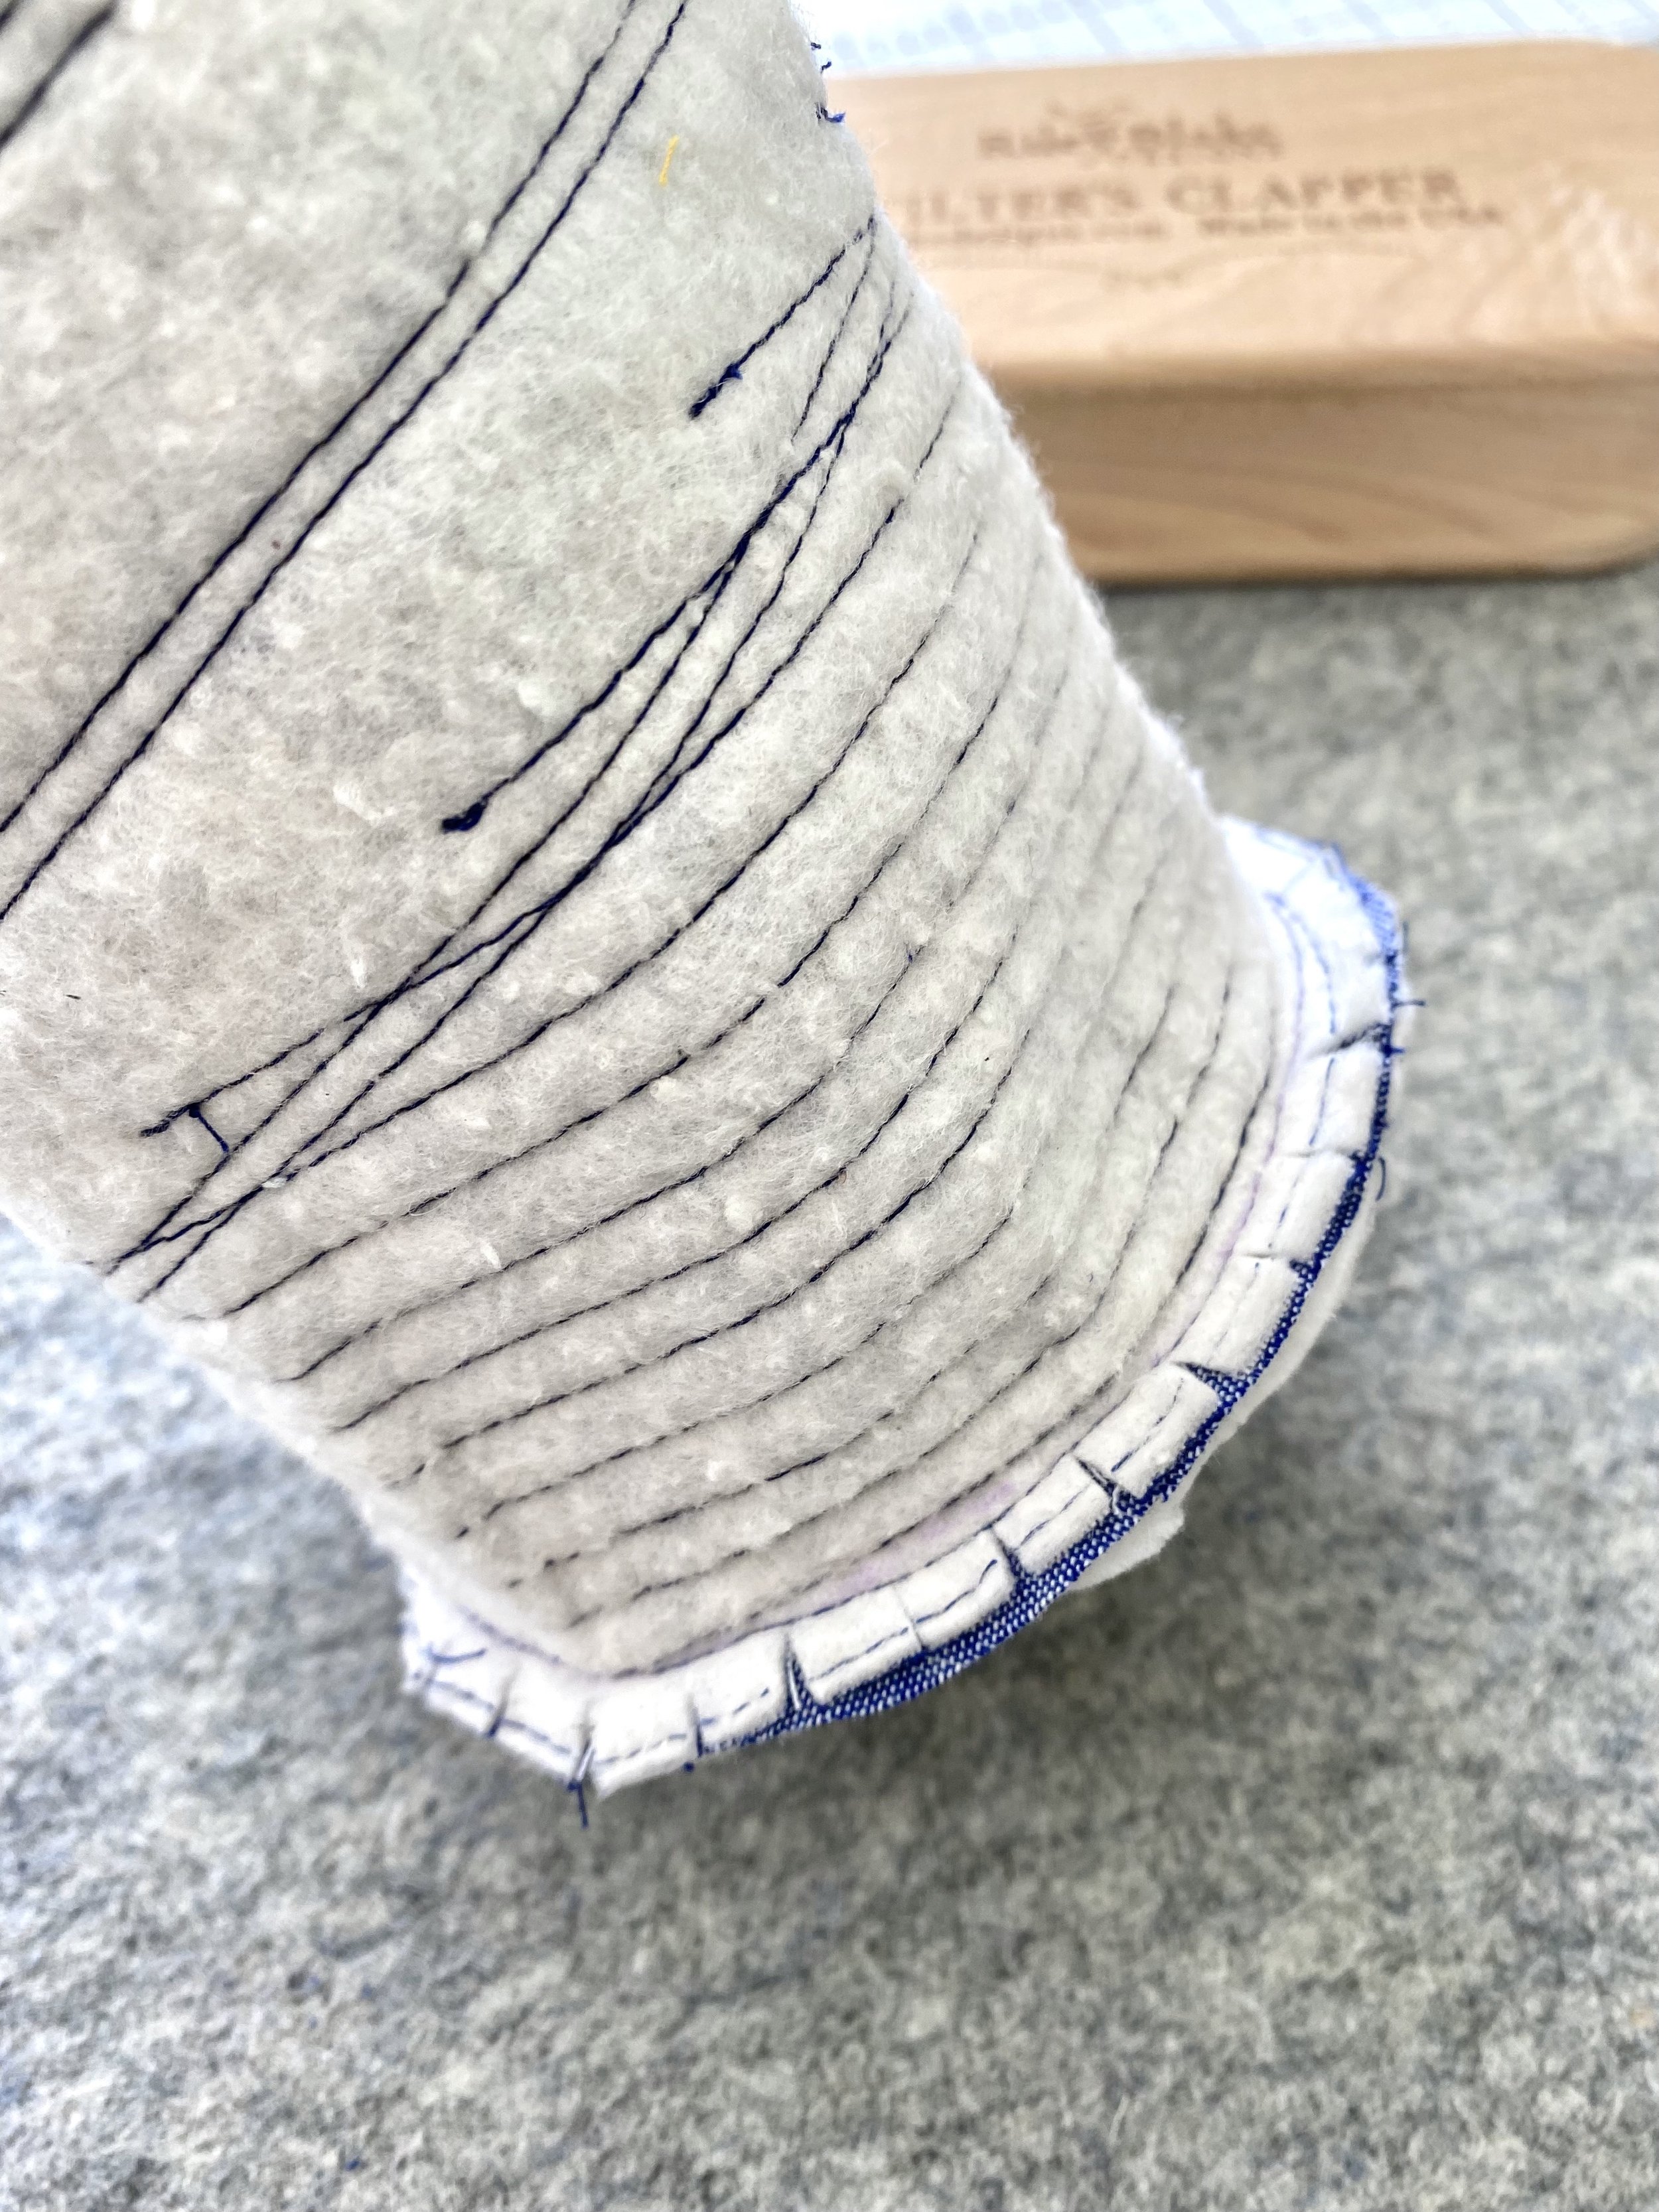
15. Pin the notched base of your outer tube to the quilted Chambray circle. Slowly stitch the two pieces together using a 1/4” seam allowance.
16. Turn the tube right side out.
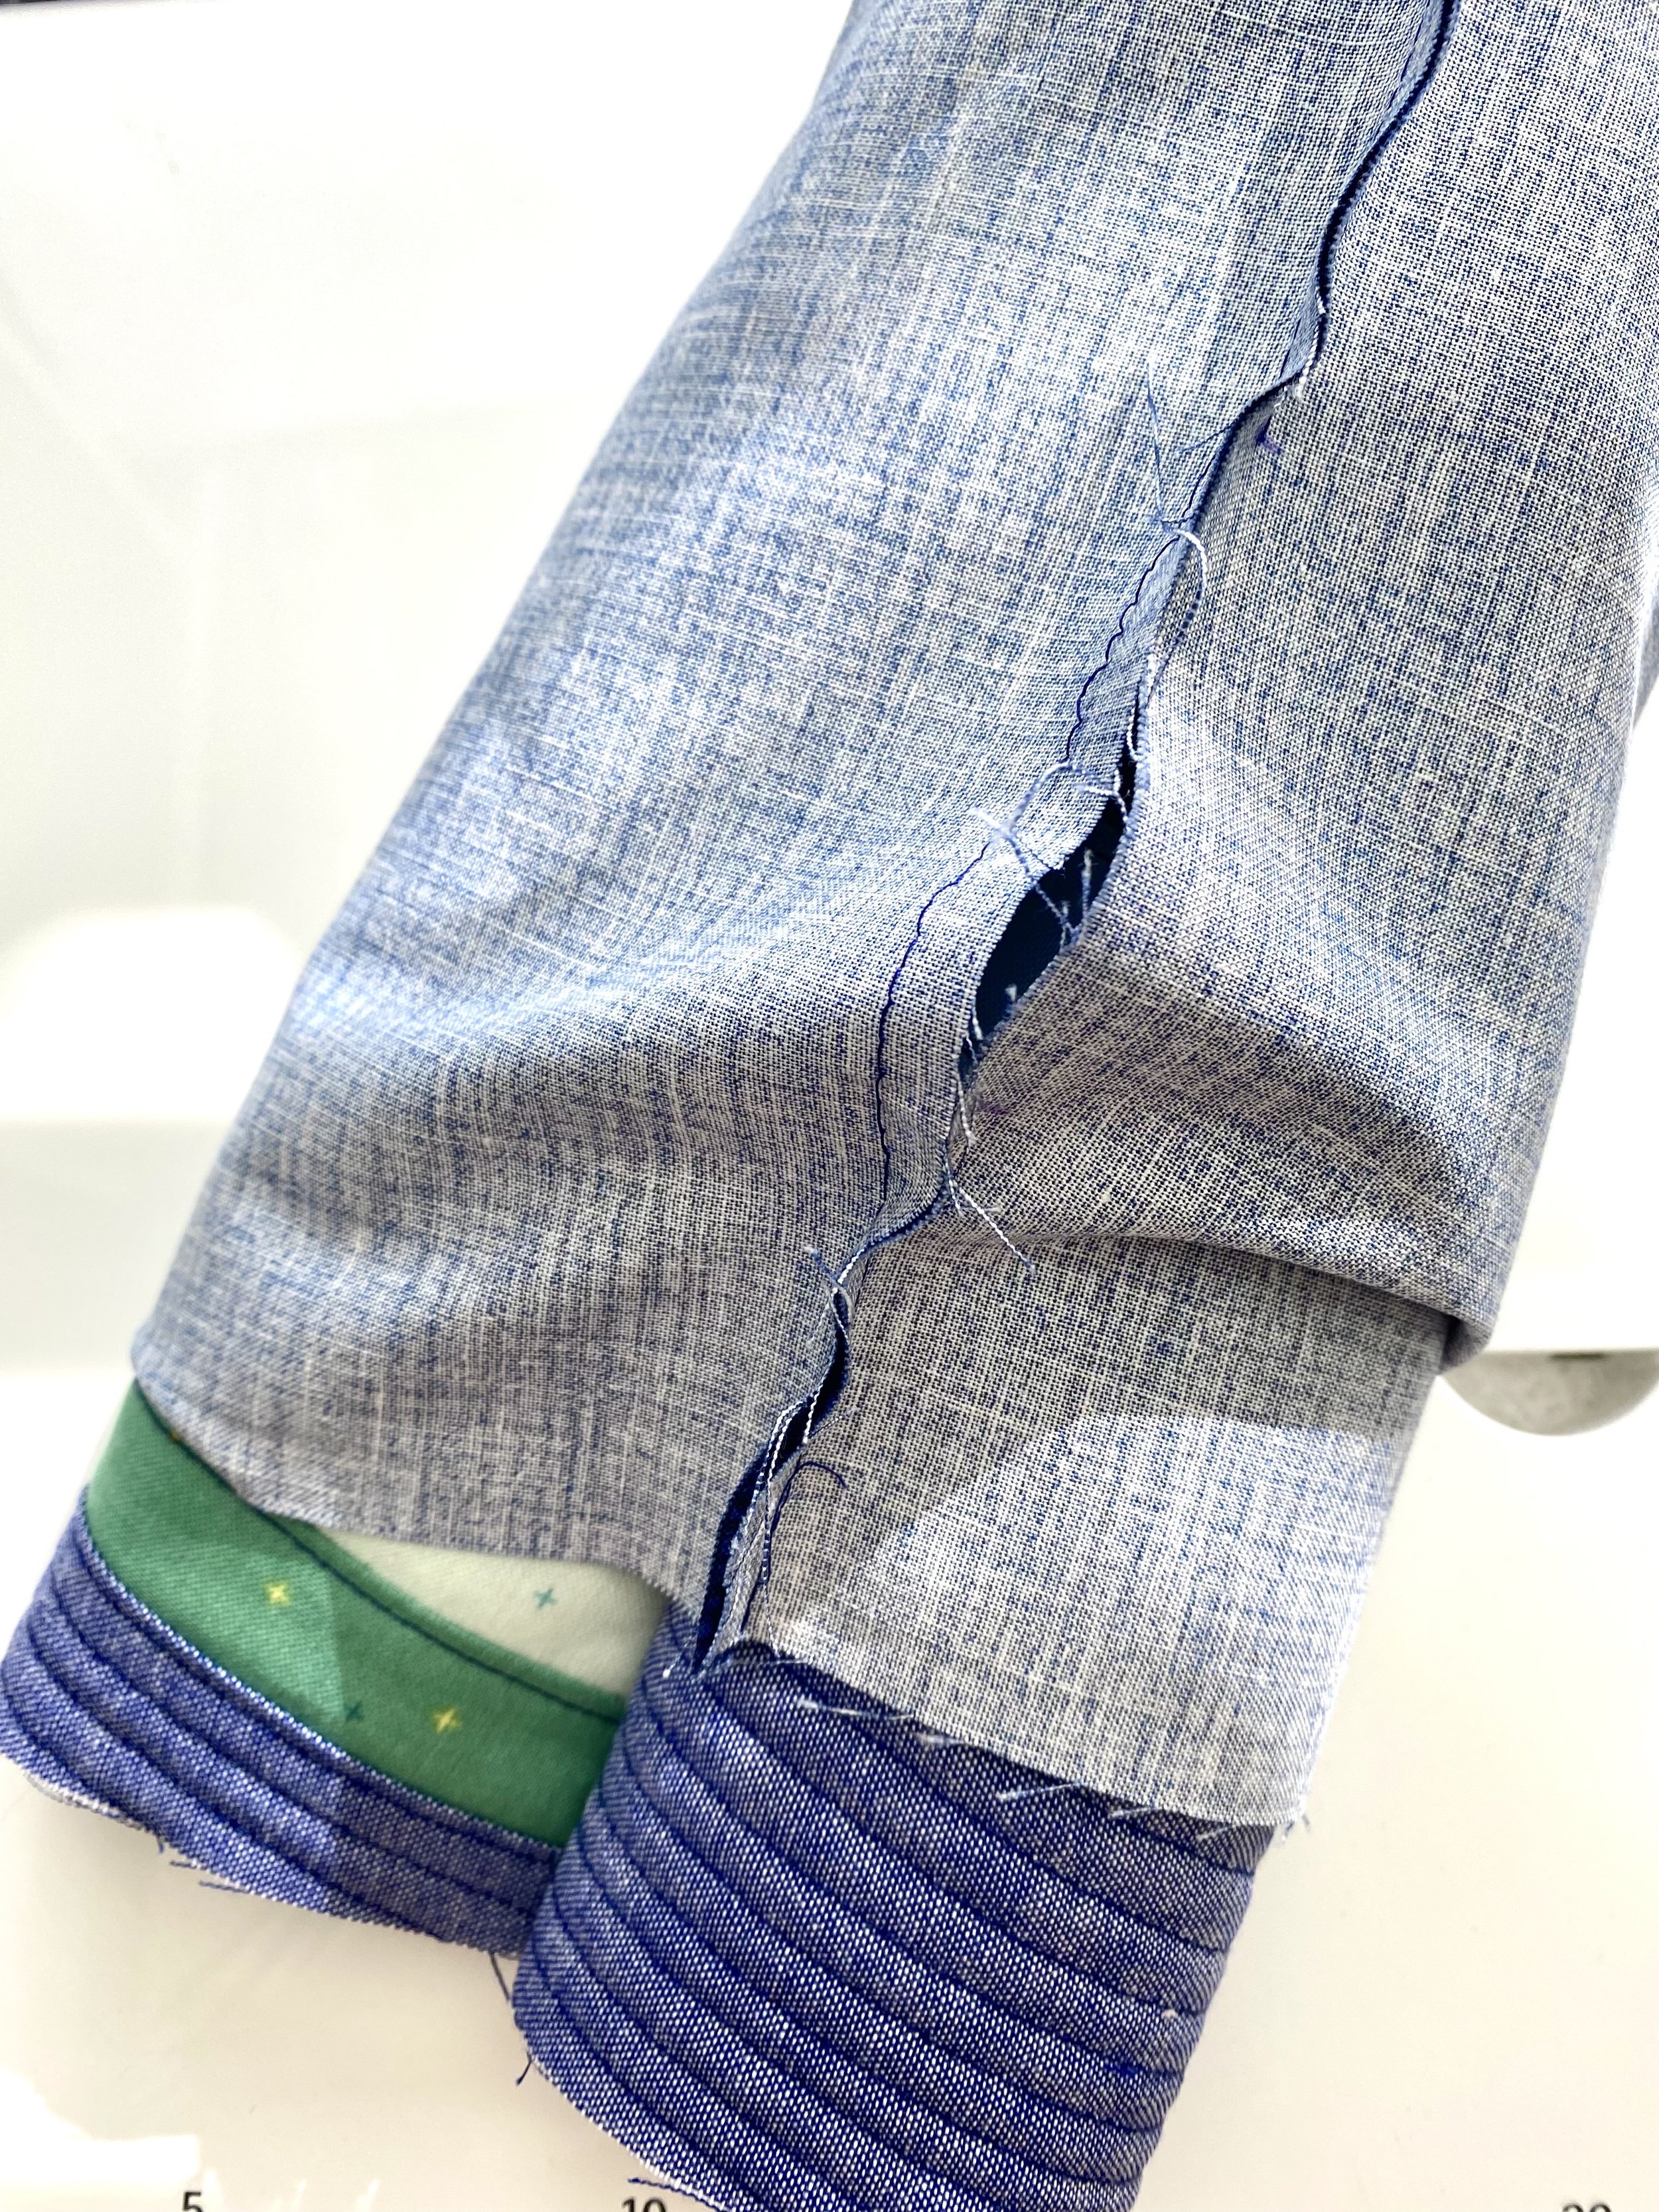
16. Repeat steps 13-15 using the Texture lining fabric. Leave a 3” opening along the side. *I always forget to leave the opening. If this happens to you, that’s okay! Simply take your seam ripper and unpick enough stitches to create your opening like I did here.
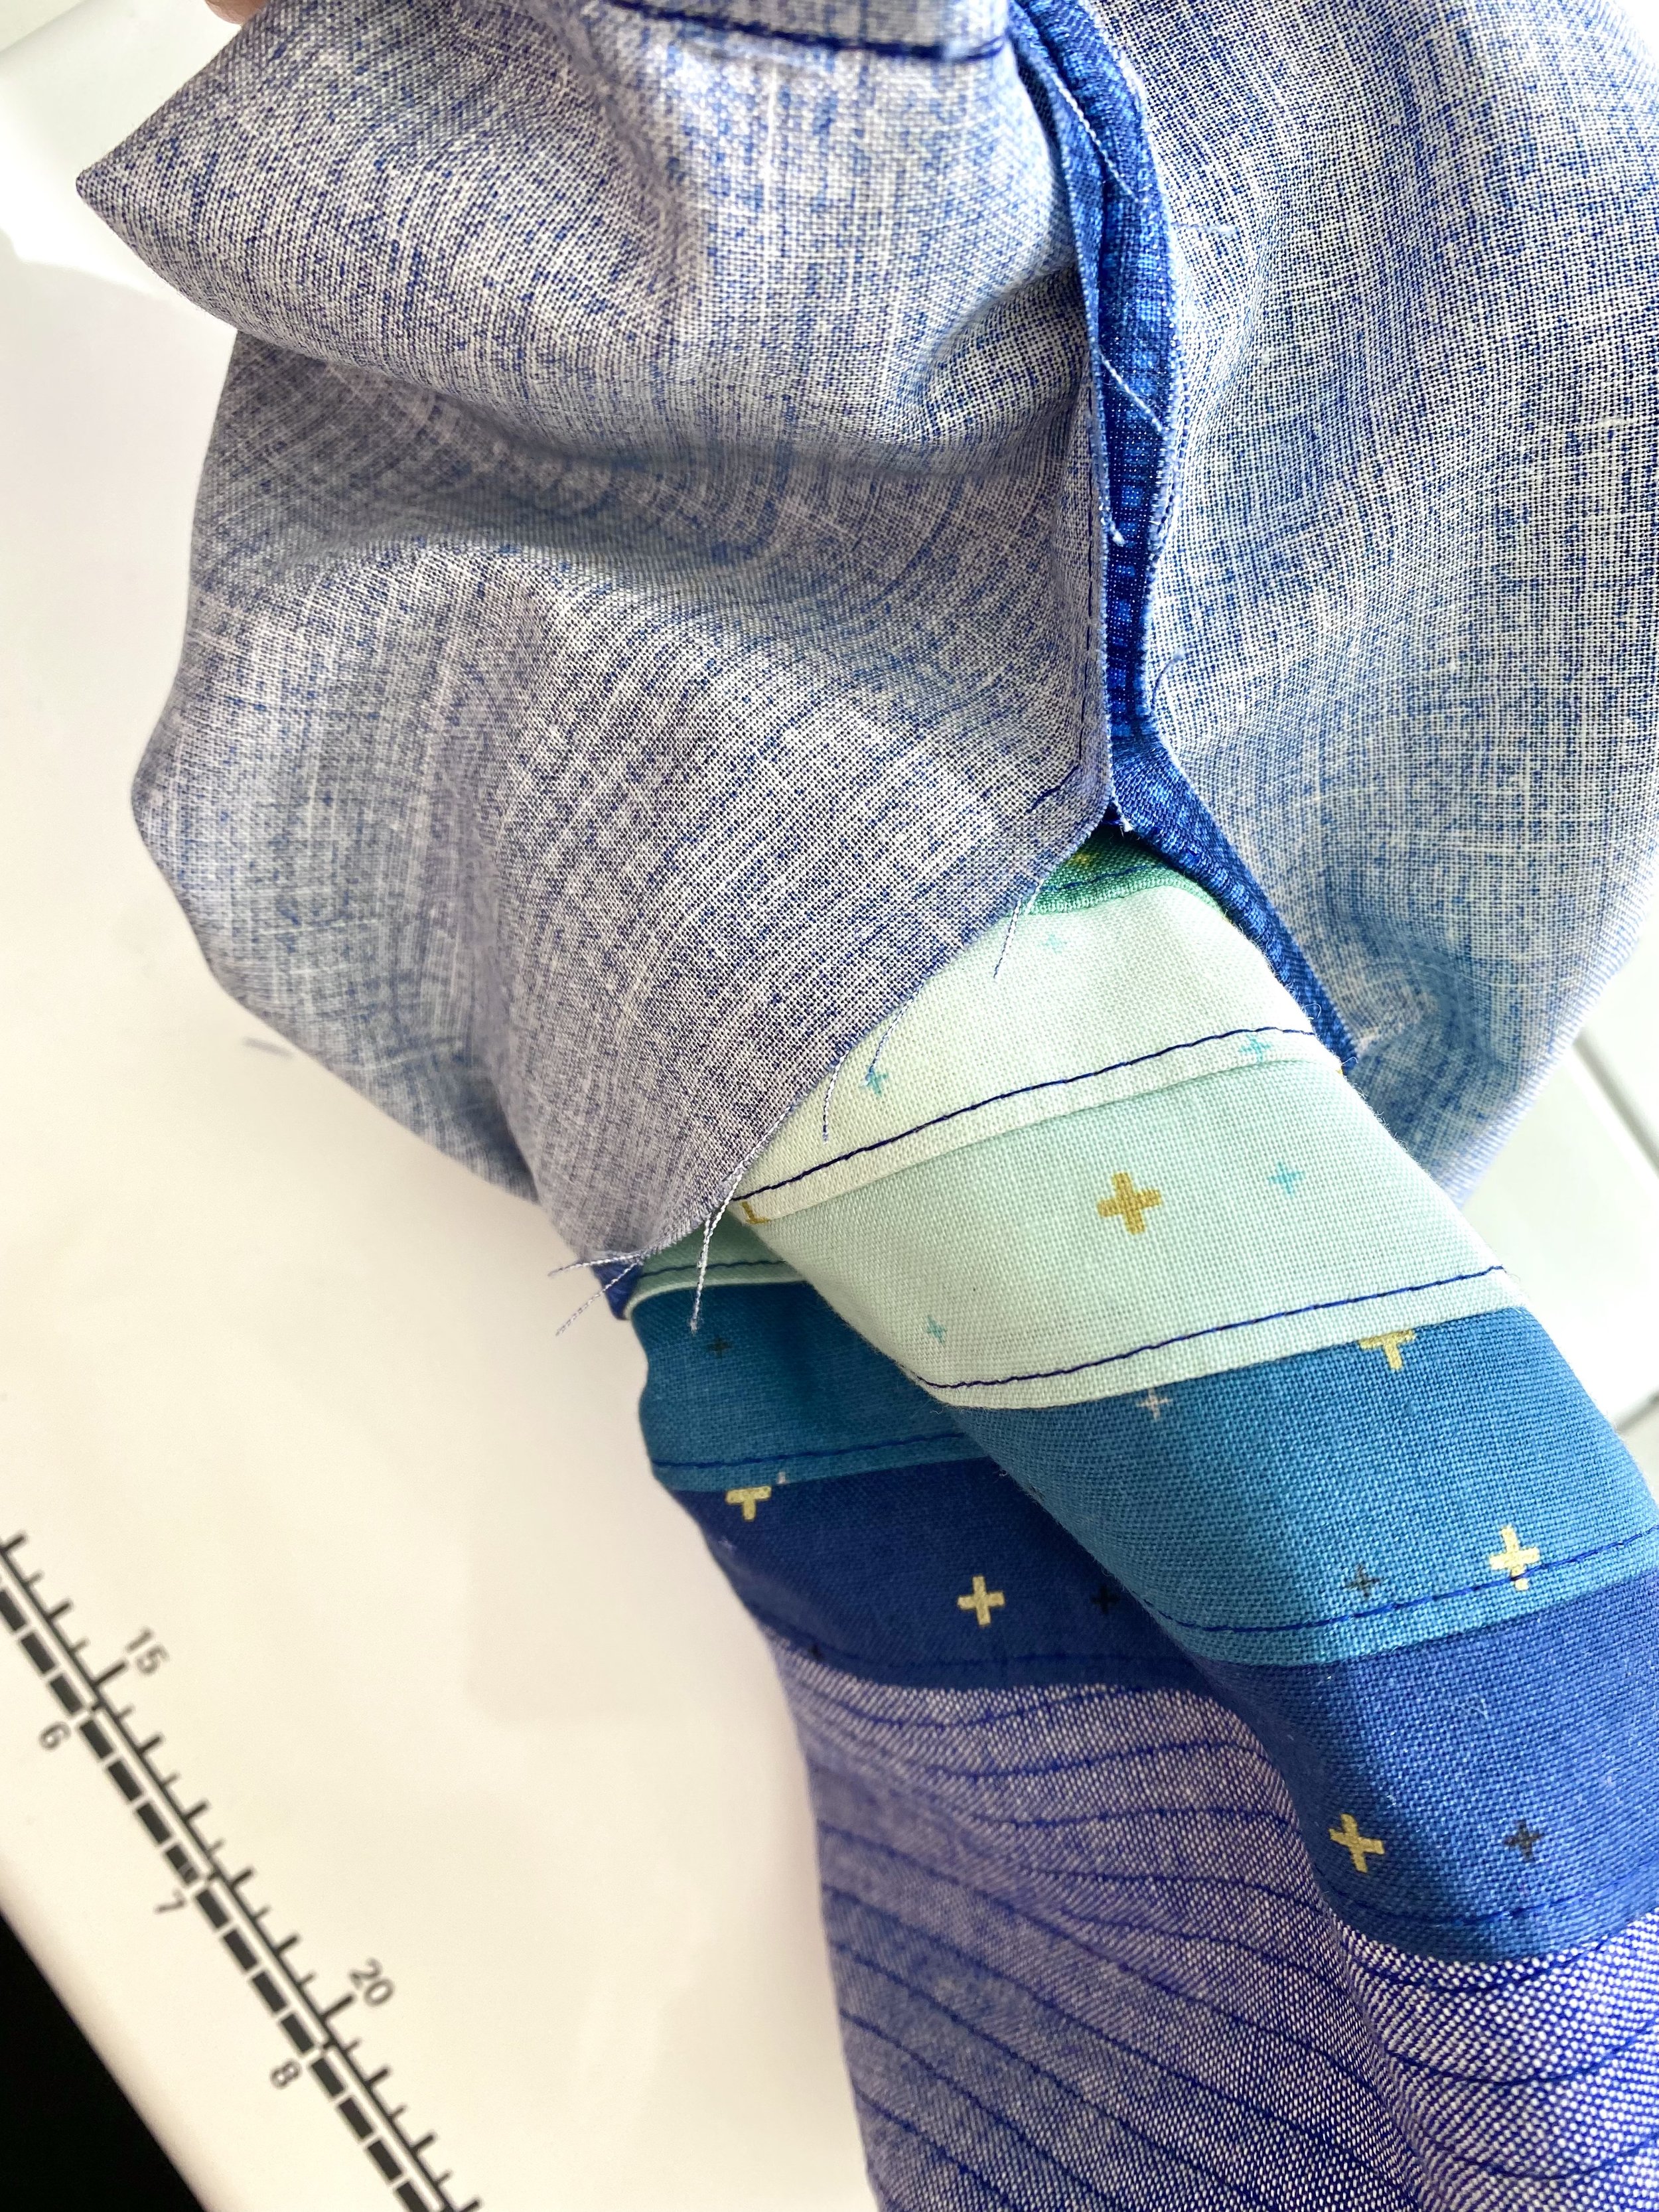
Slide the quilted tube into the lining piece so the seams line up. Pin in place.
Sew the lining and outer tubes together along the top.
Reaching through your side opening, grab the quilted outer layer and carefully pull it though.
Hand or machine stitch the opening in the side of your lining closed. Tuck the lining down into the quilted tube. Press the opening so the top edges are nice and crisp. Top stitch around the opening. I like to do two rows of top stitching - one row 1/4” from the edge and the other row 1/8” from the edge. The extra row is completely optional.
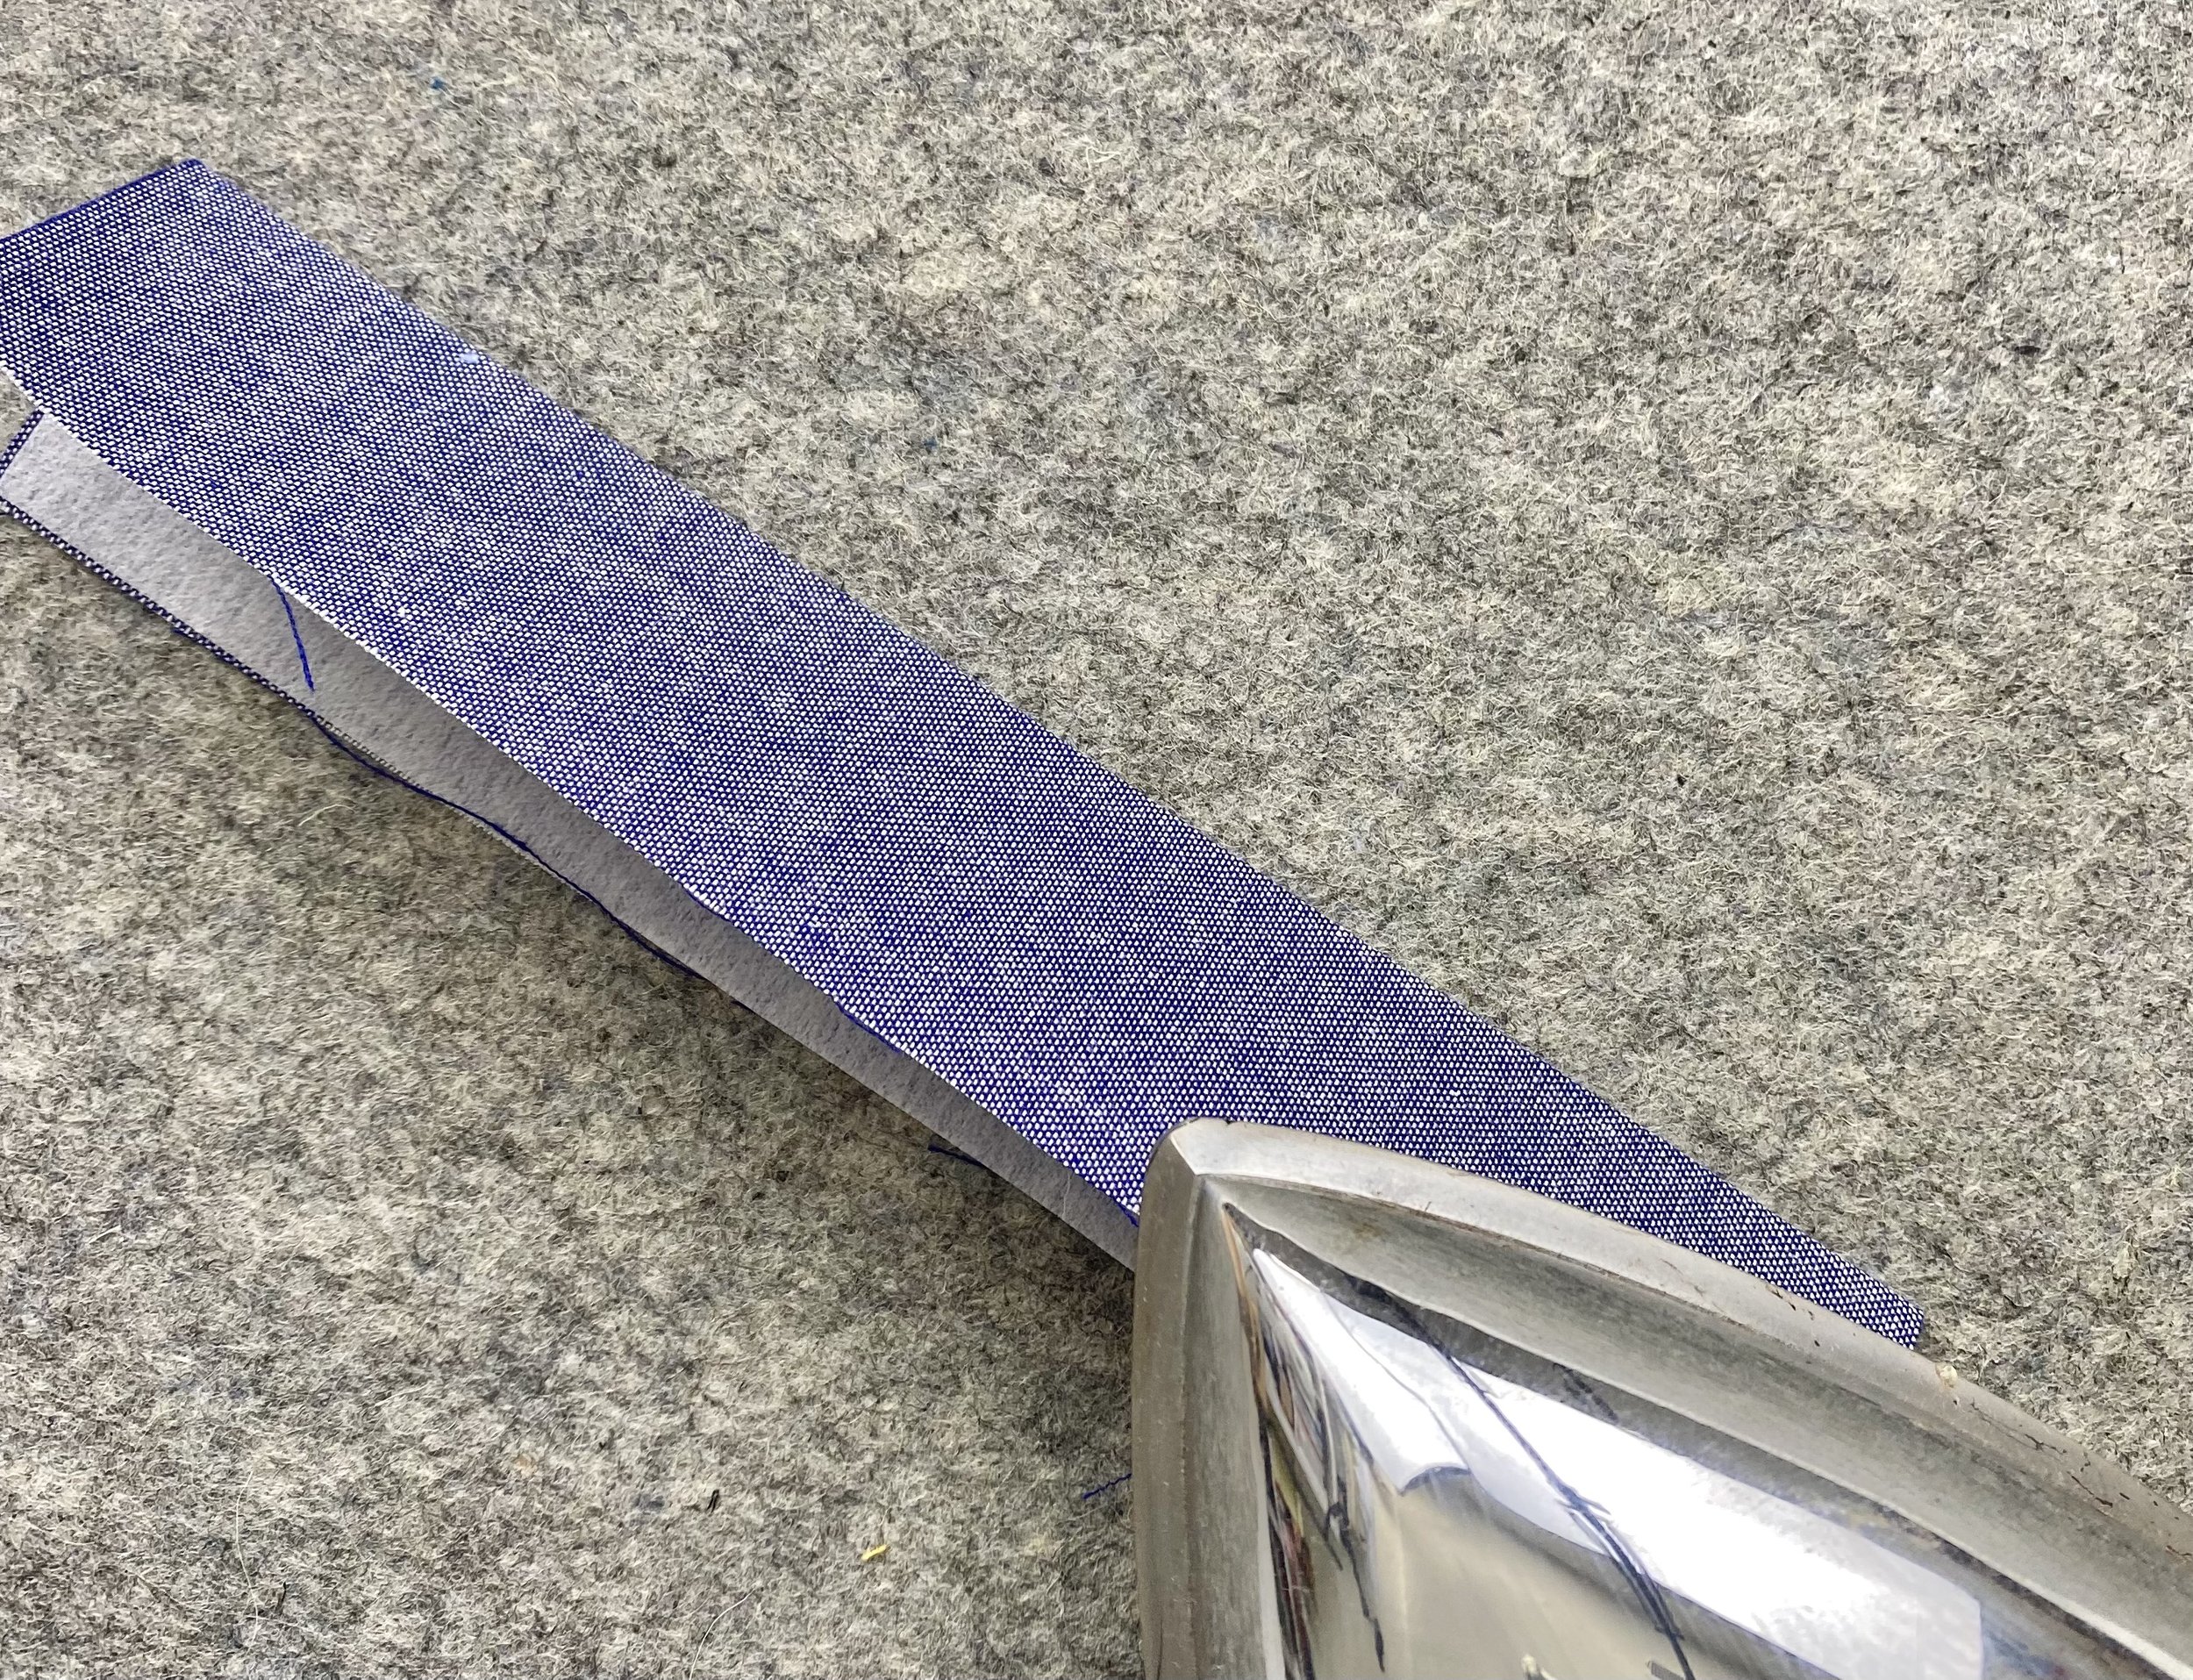
Add the fusible interfacing to your 3” x 8” Chambray strip. Press the strip in half.
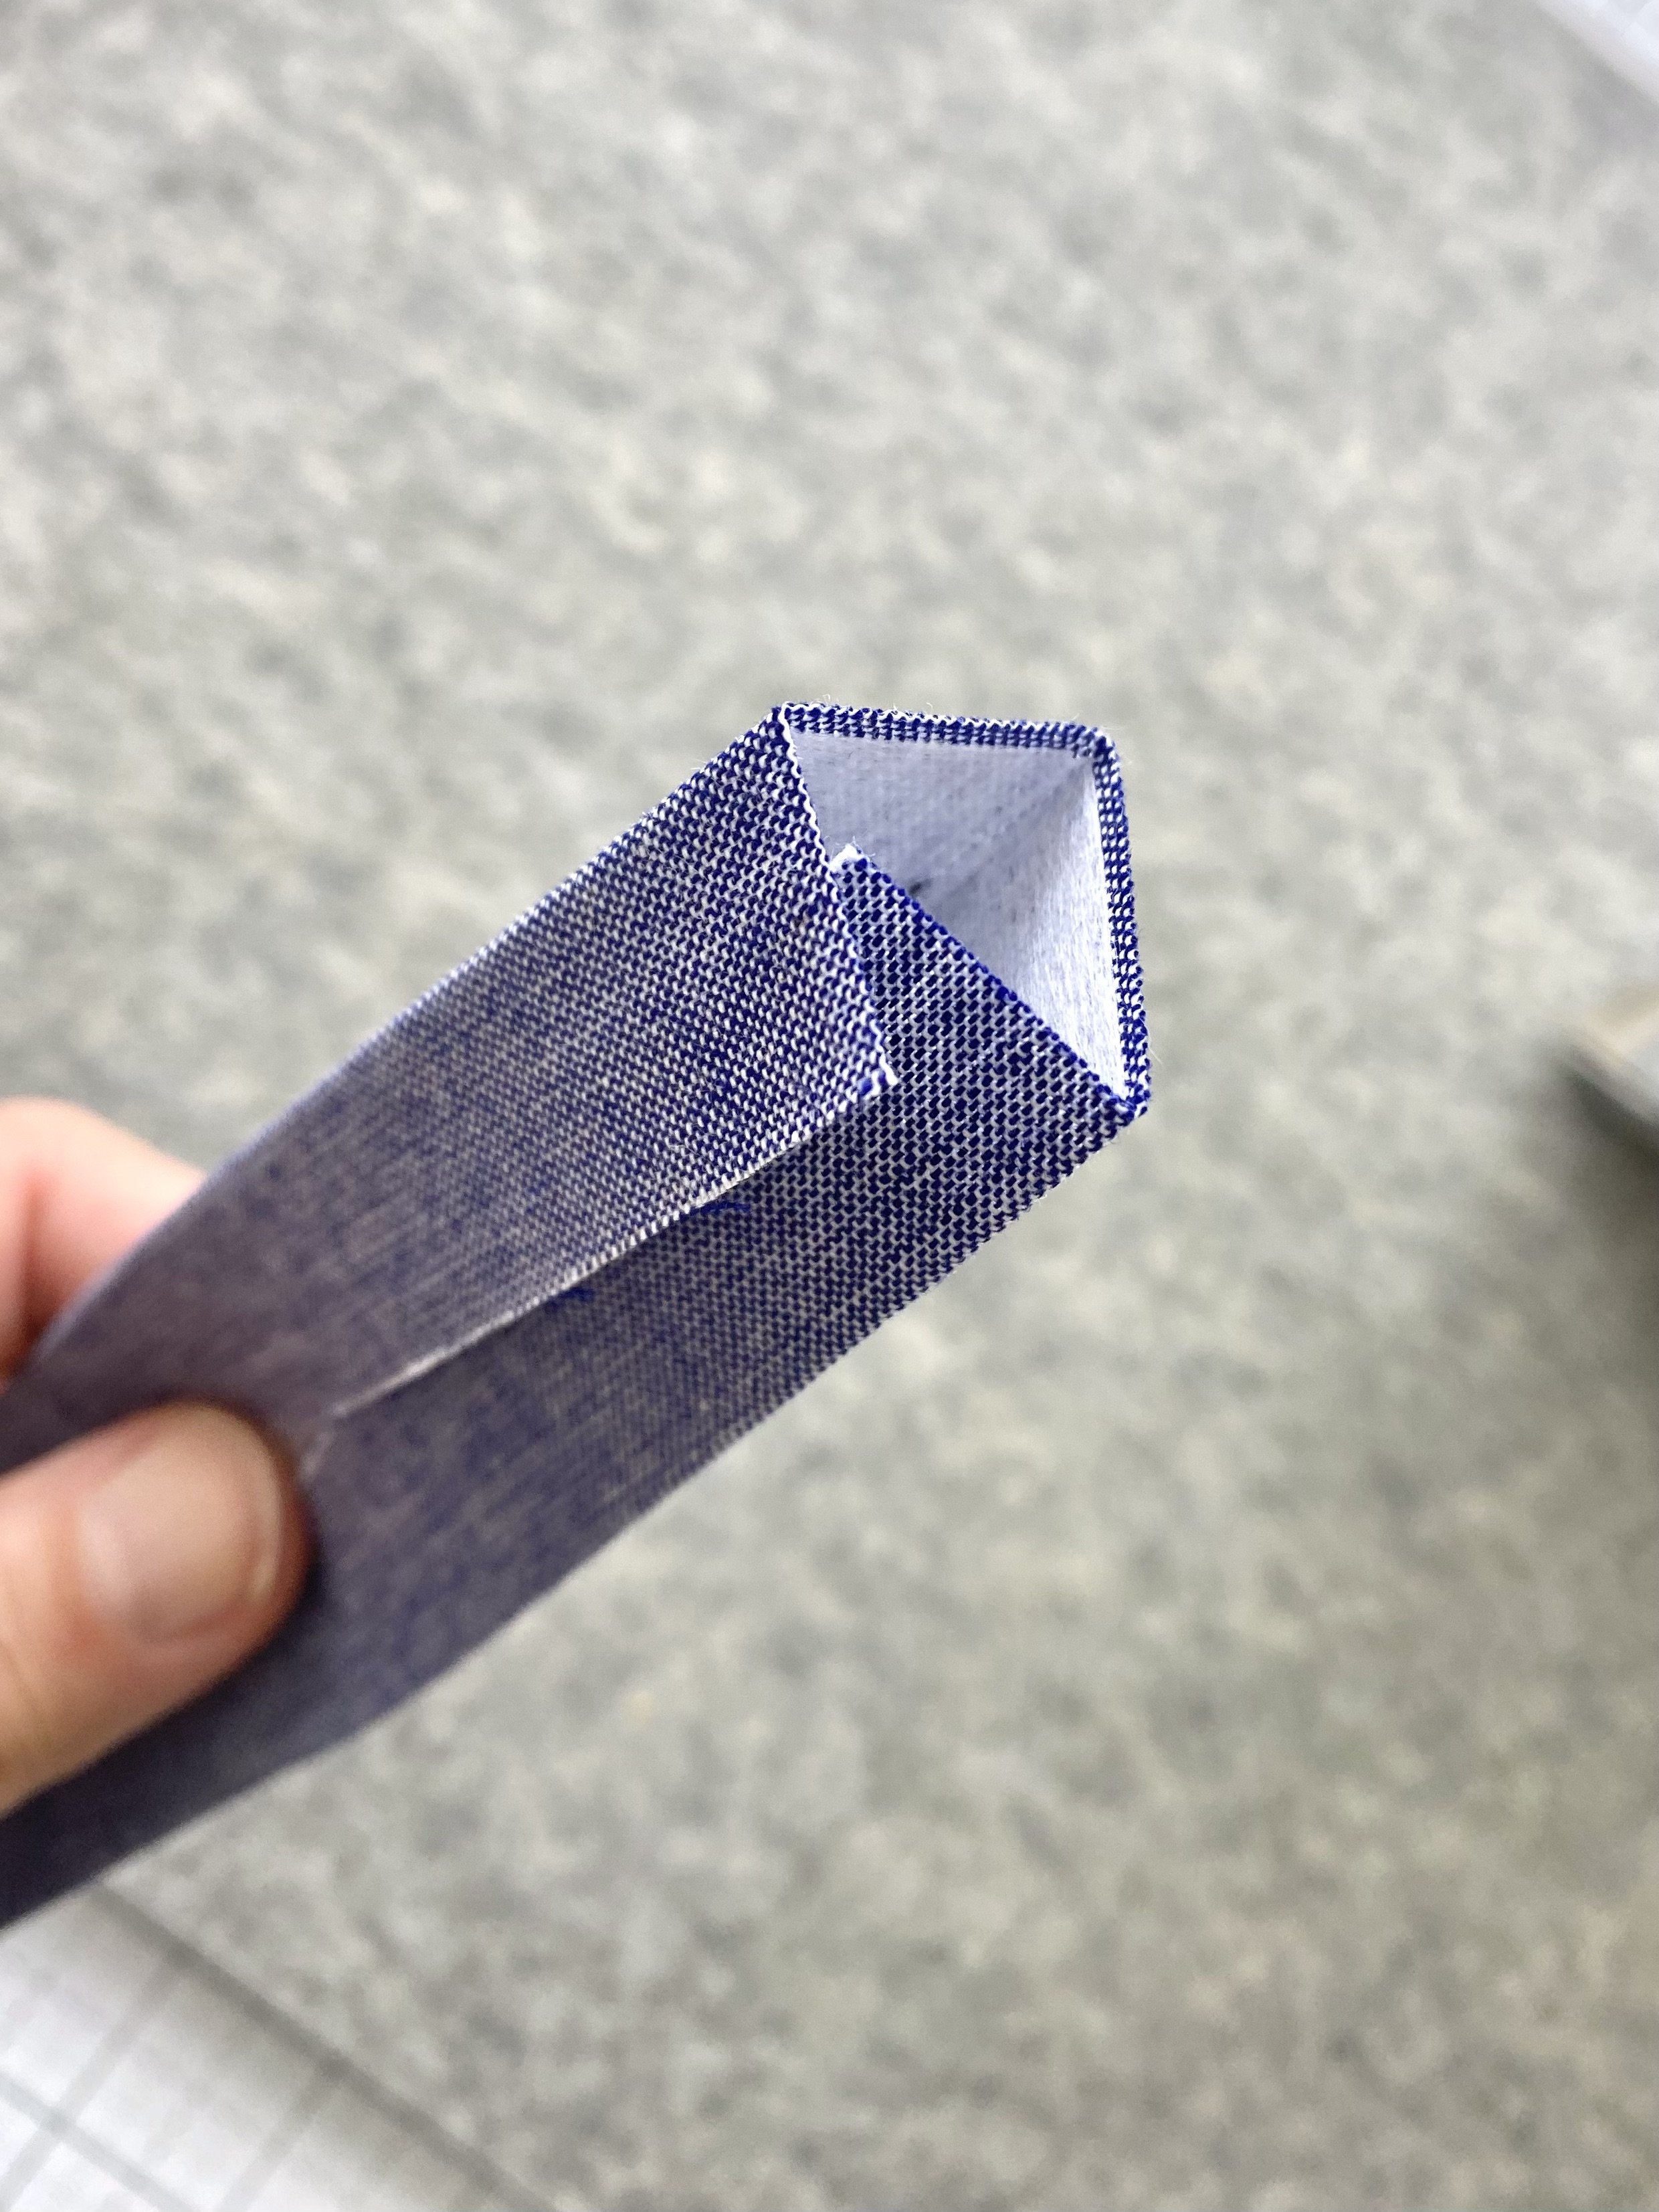
Fold the long edges toward the center fold you just created. Press.
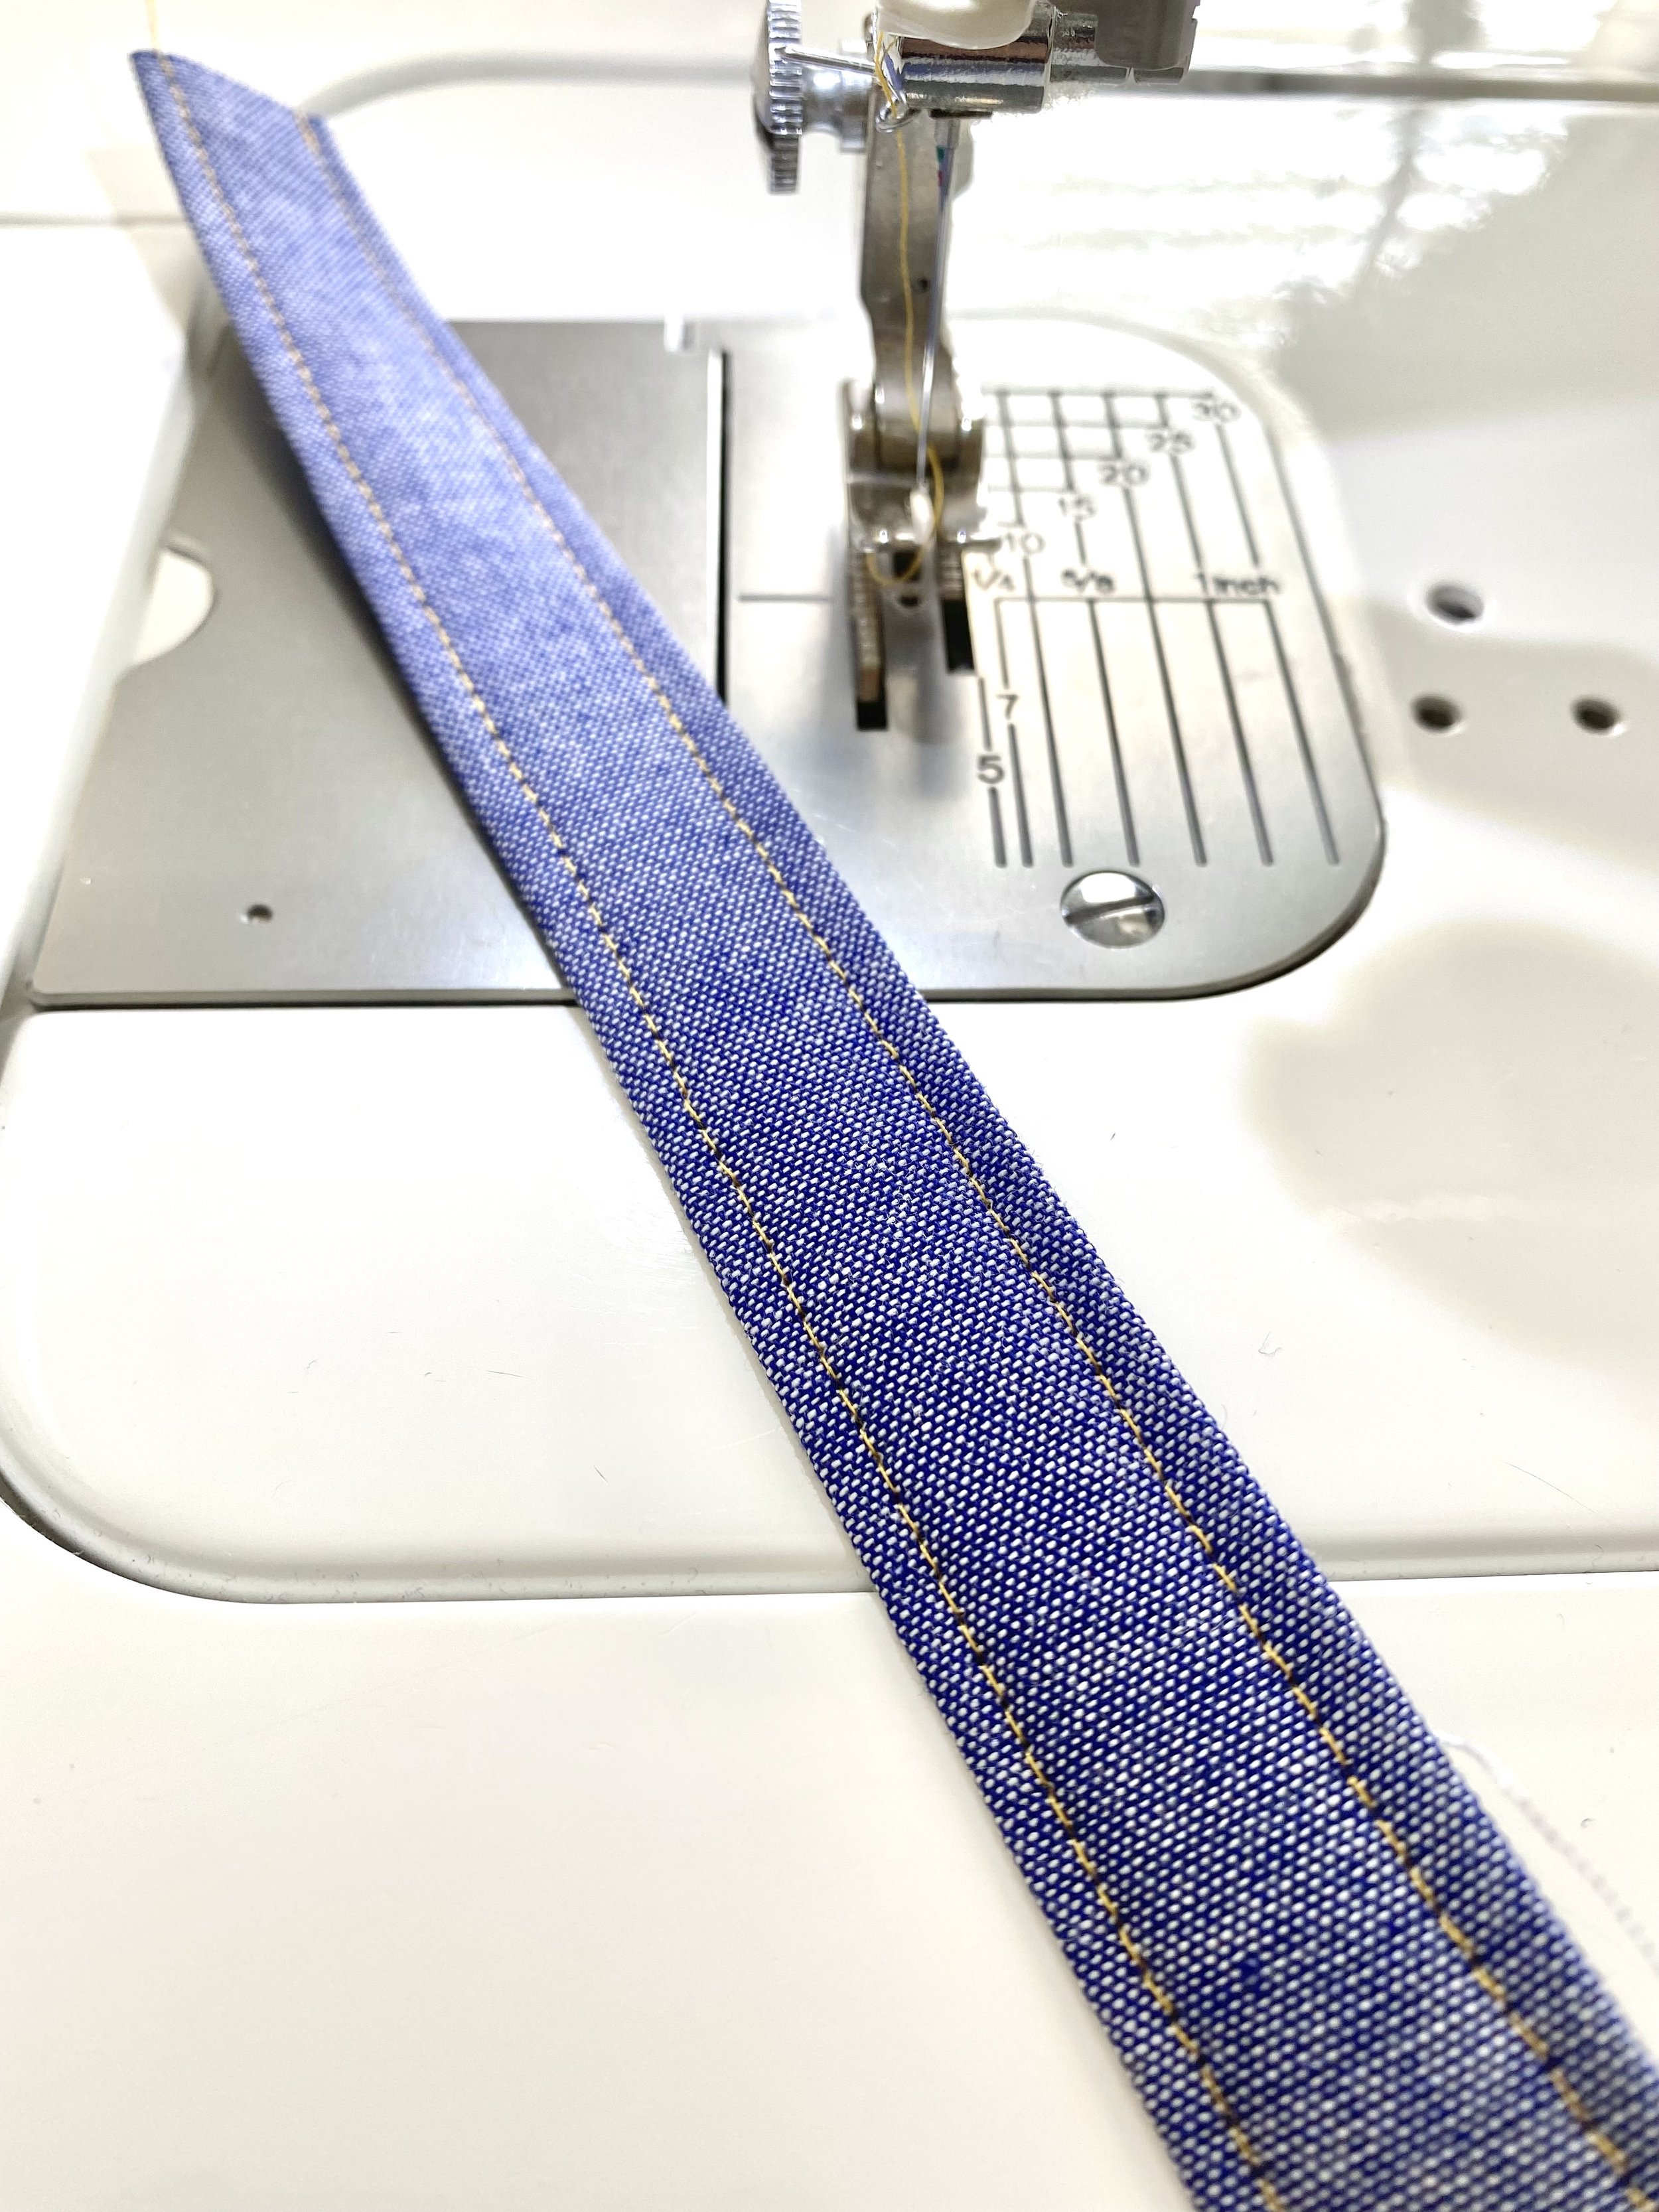
Top stitch along each long edge.
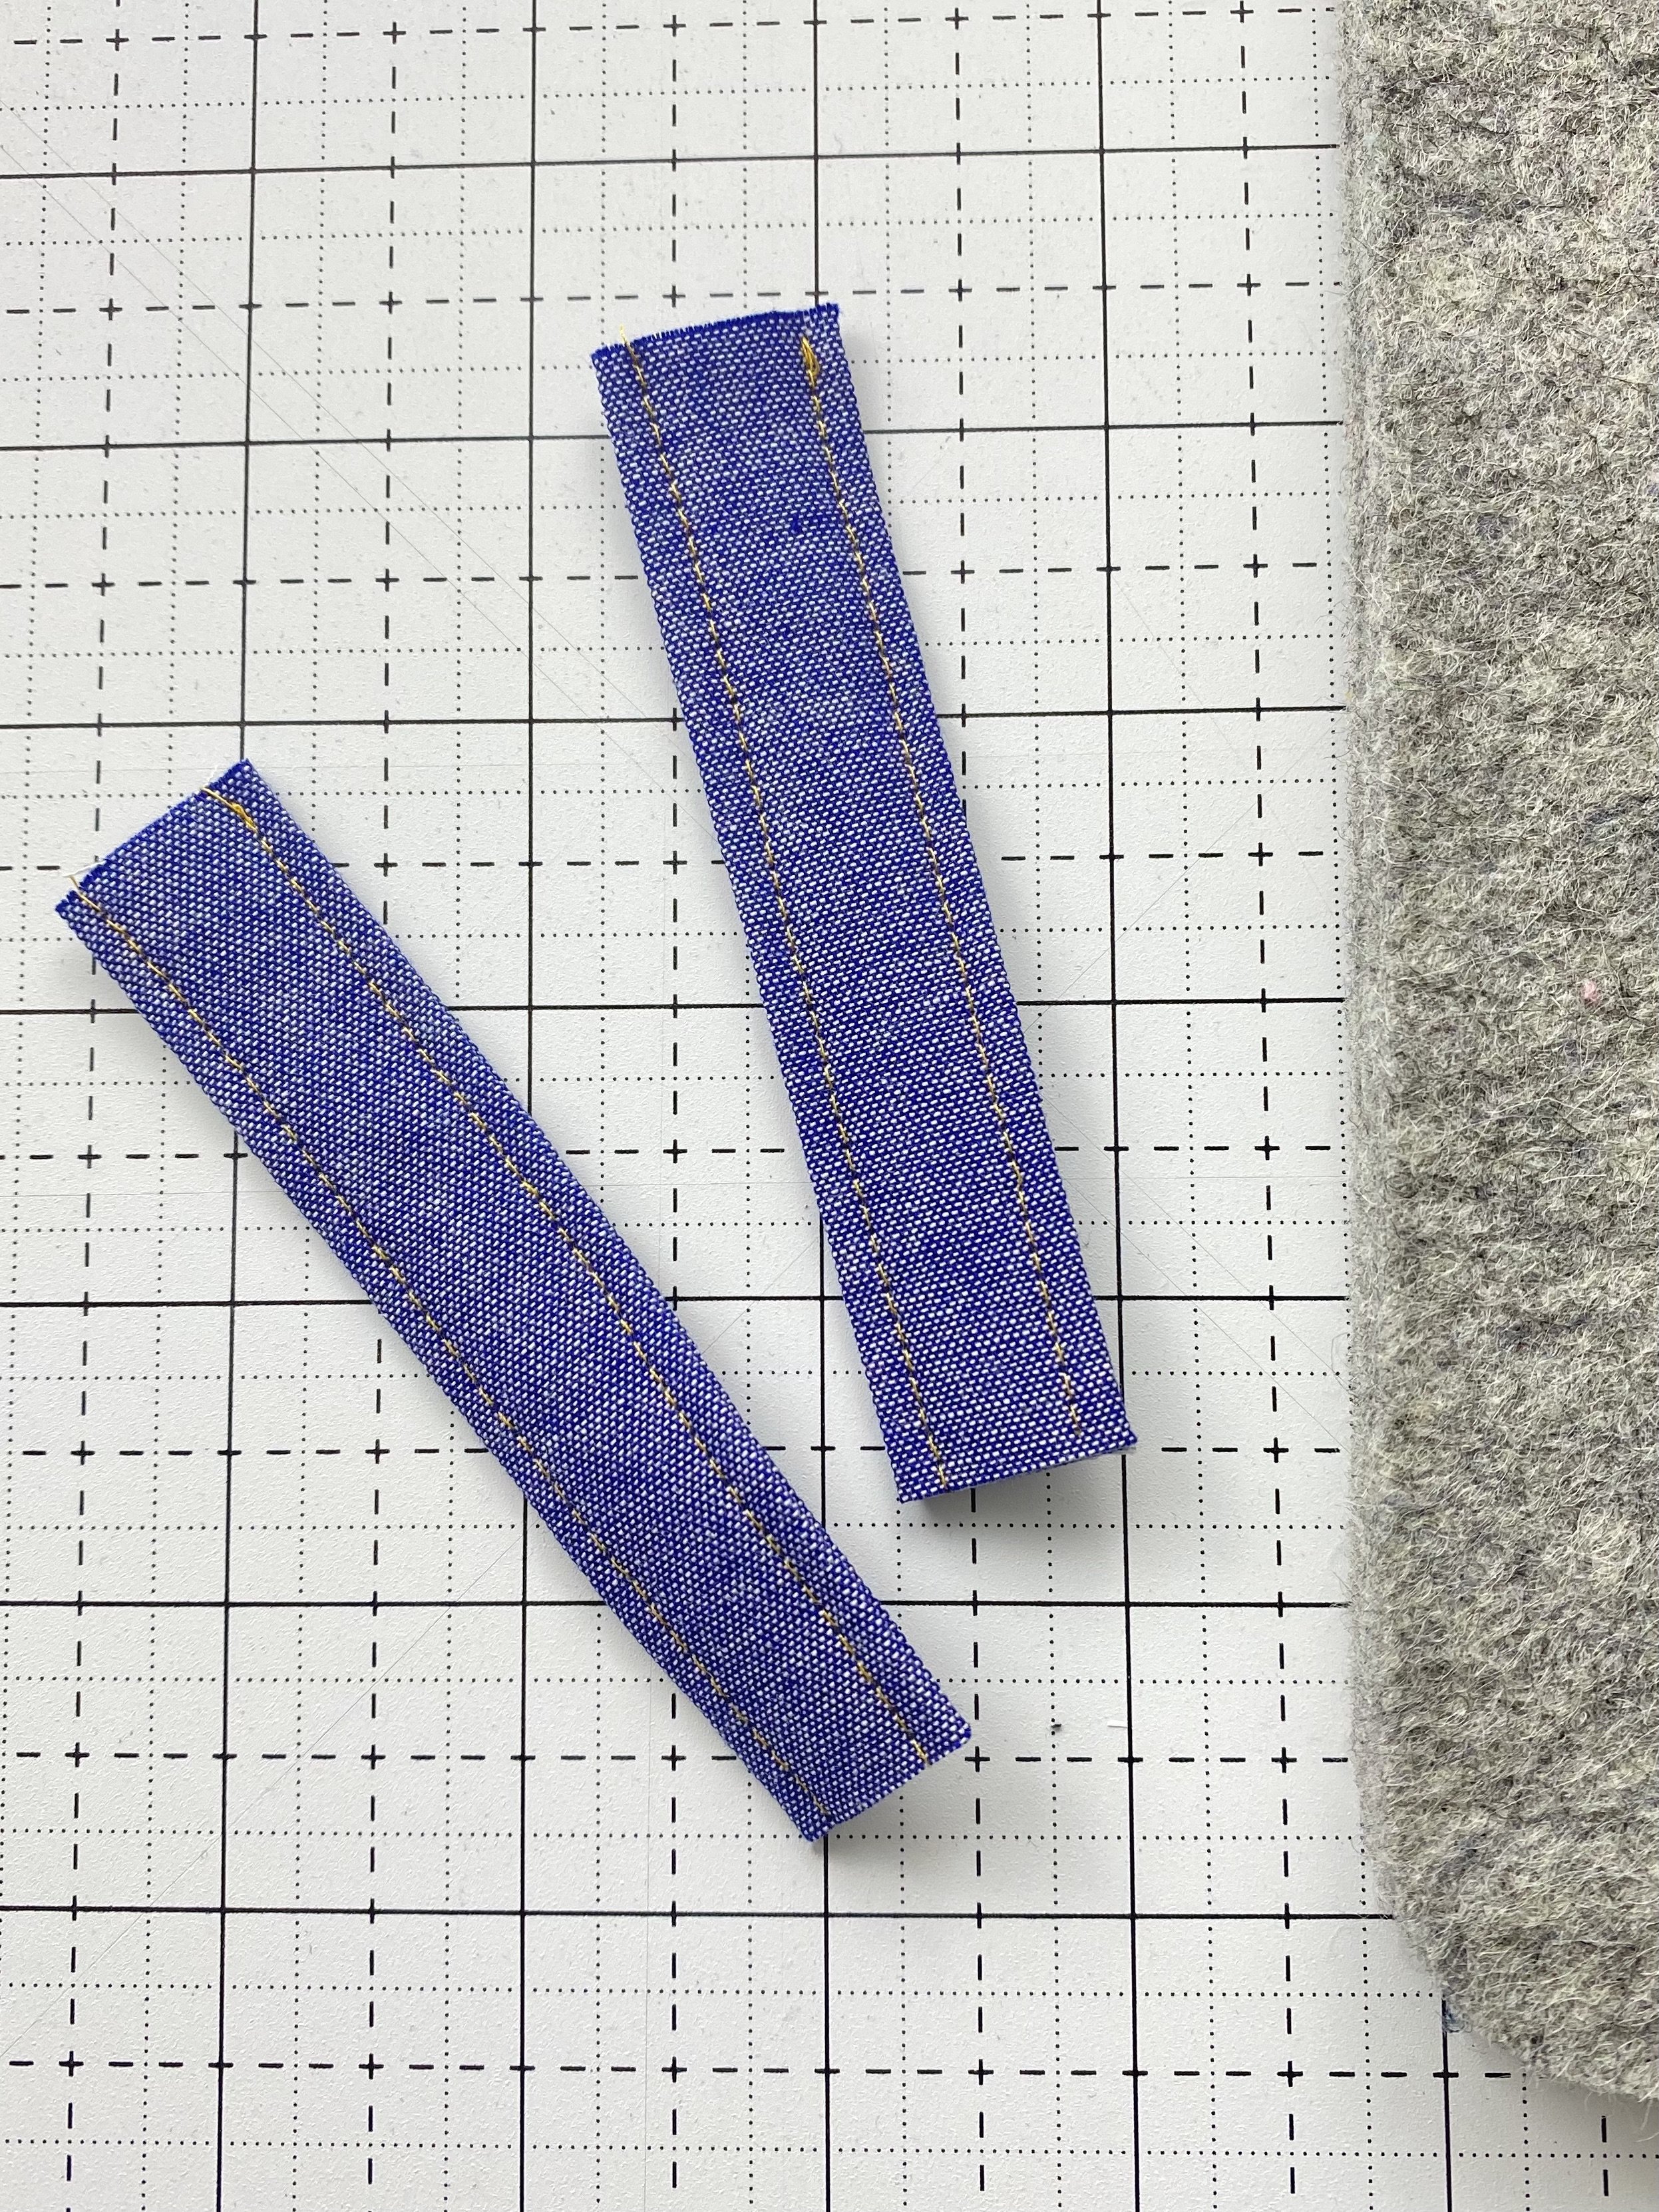
Cut the strip in half so you get two 4” sections. These are your handle tabs.
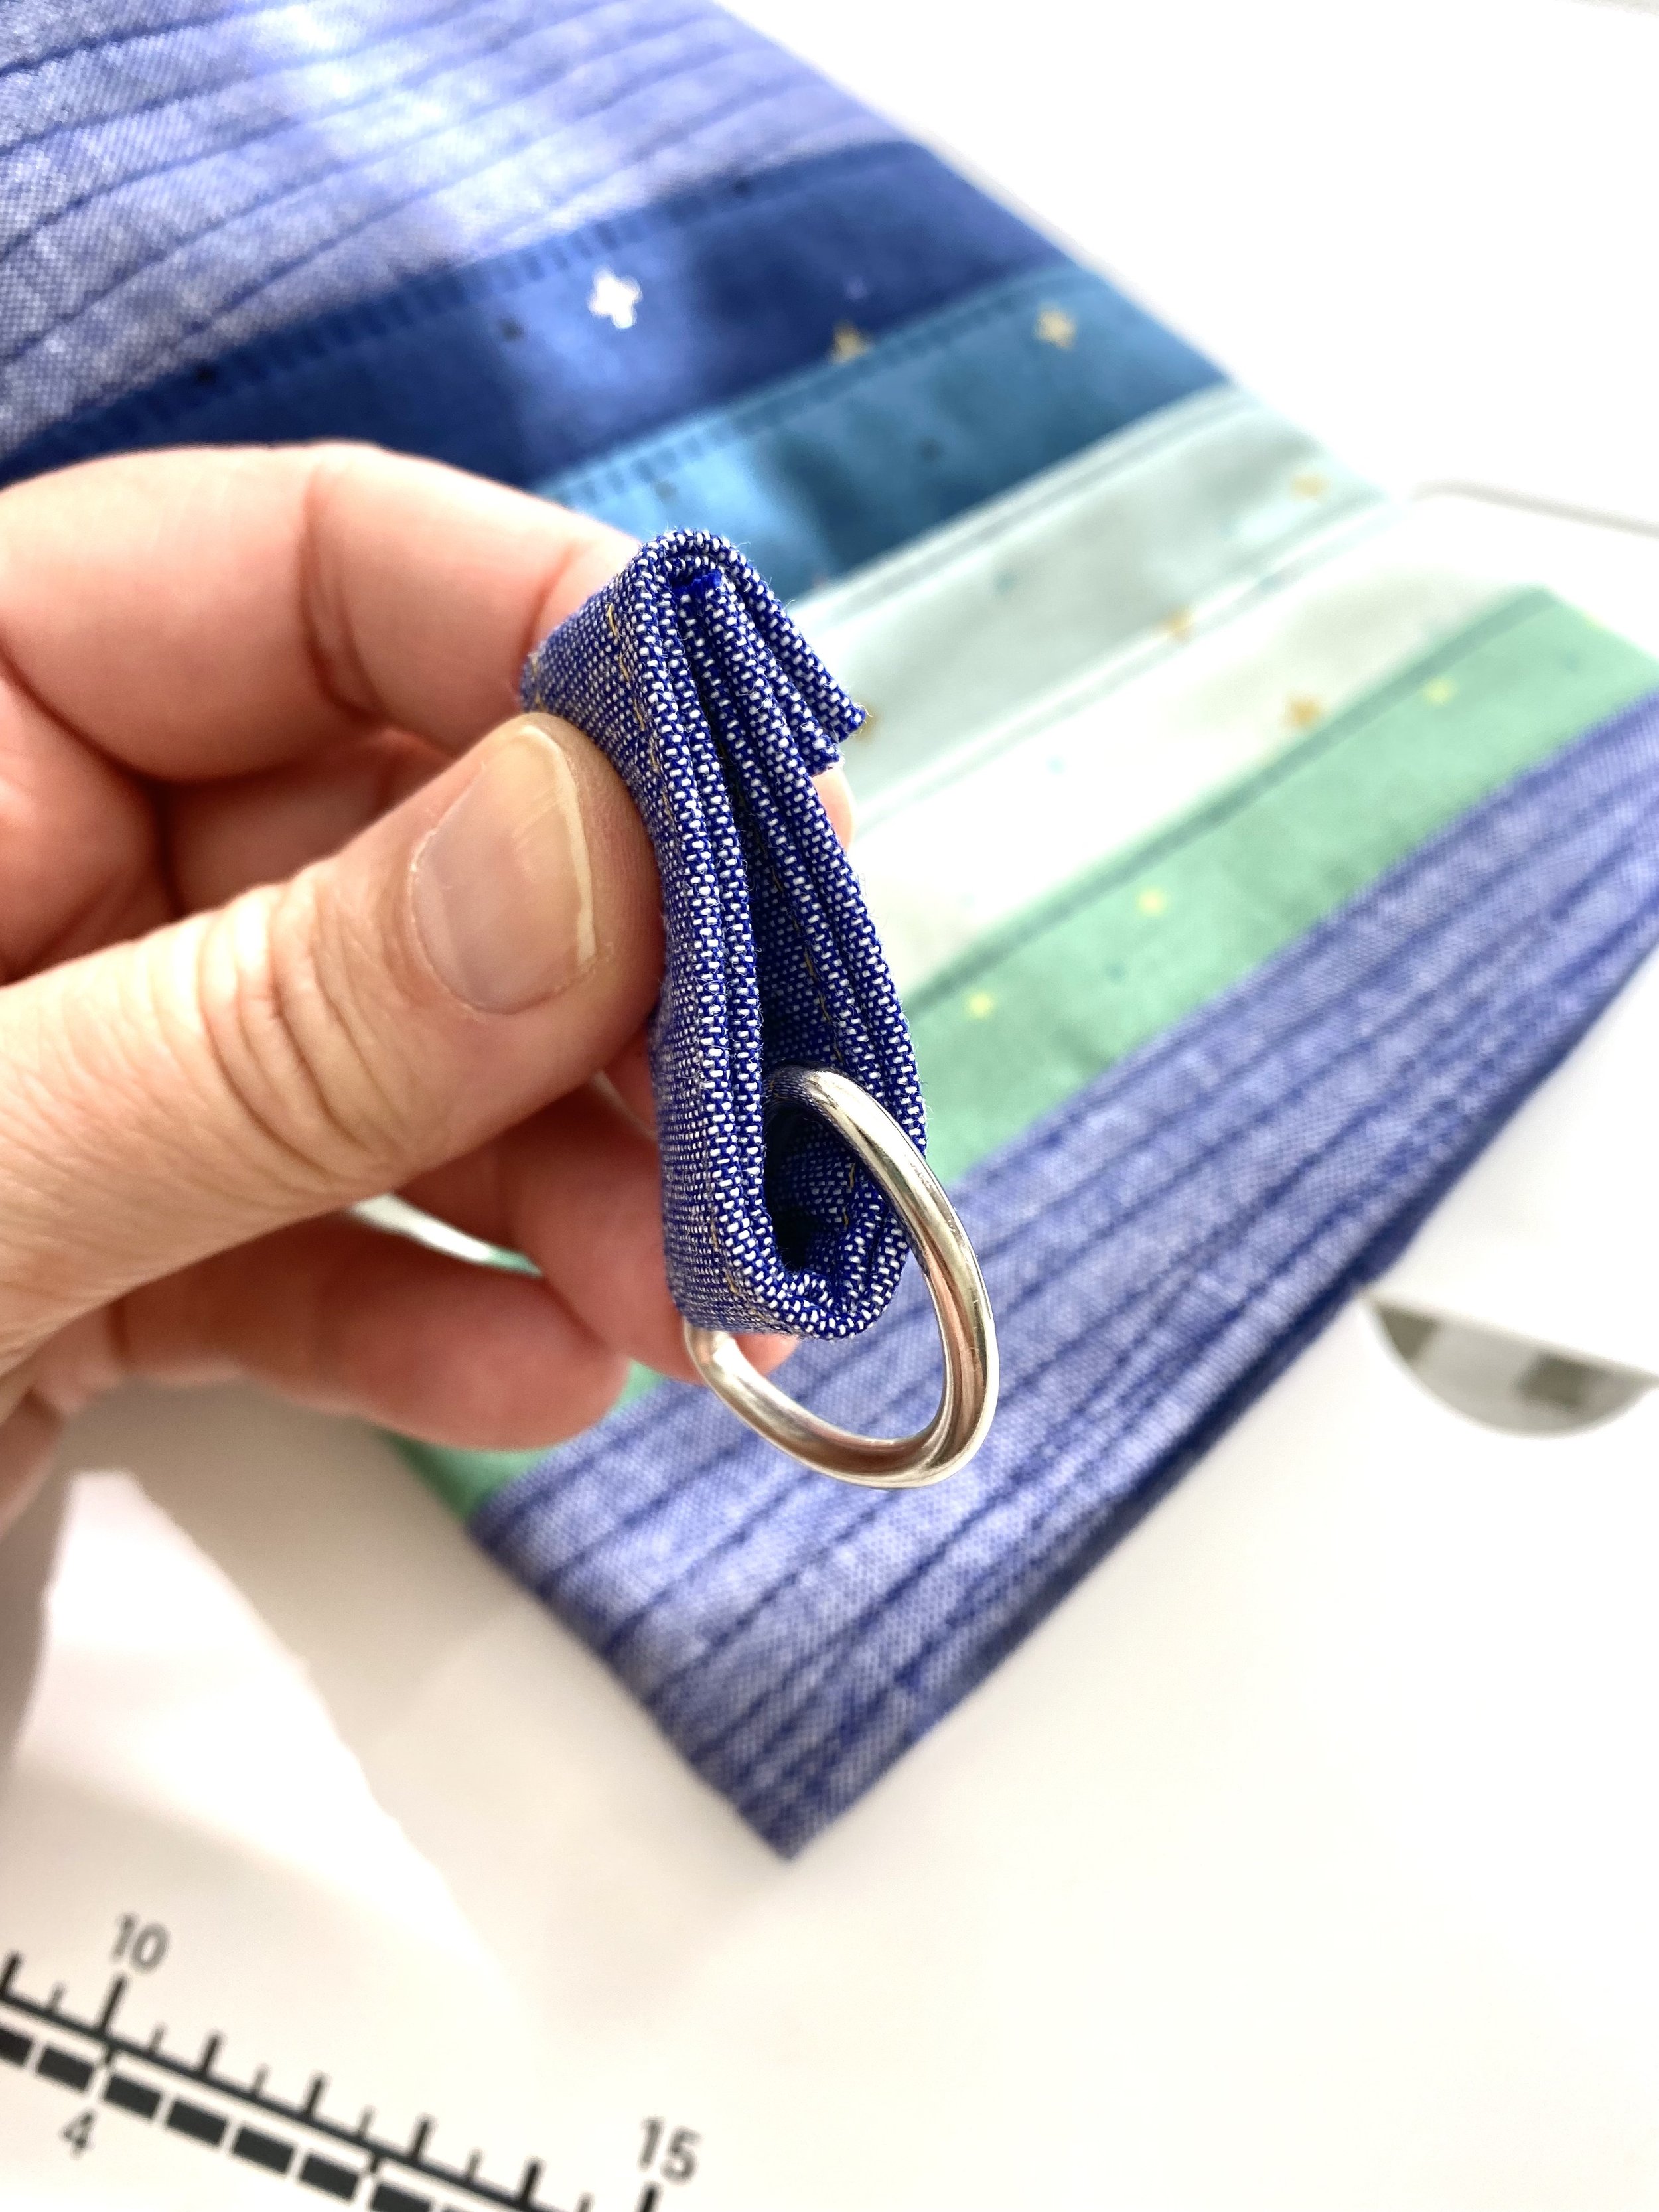
Slide a D Ring onto one of the 4” handle tabs. Fold it so that one side is about an inch longer than the other. Fold the extra inch over (this will be hidden when you stitch the handle tab to the tube.
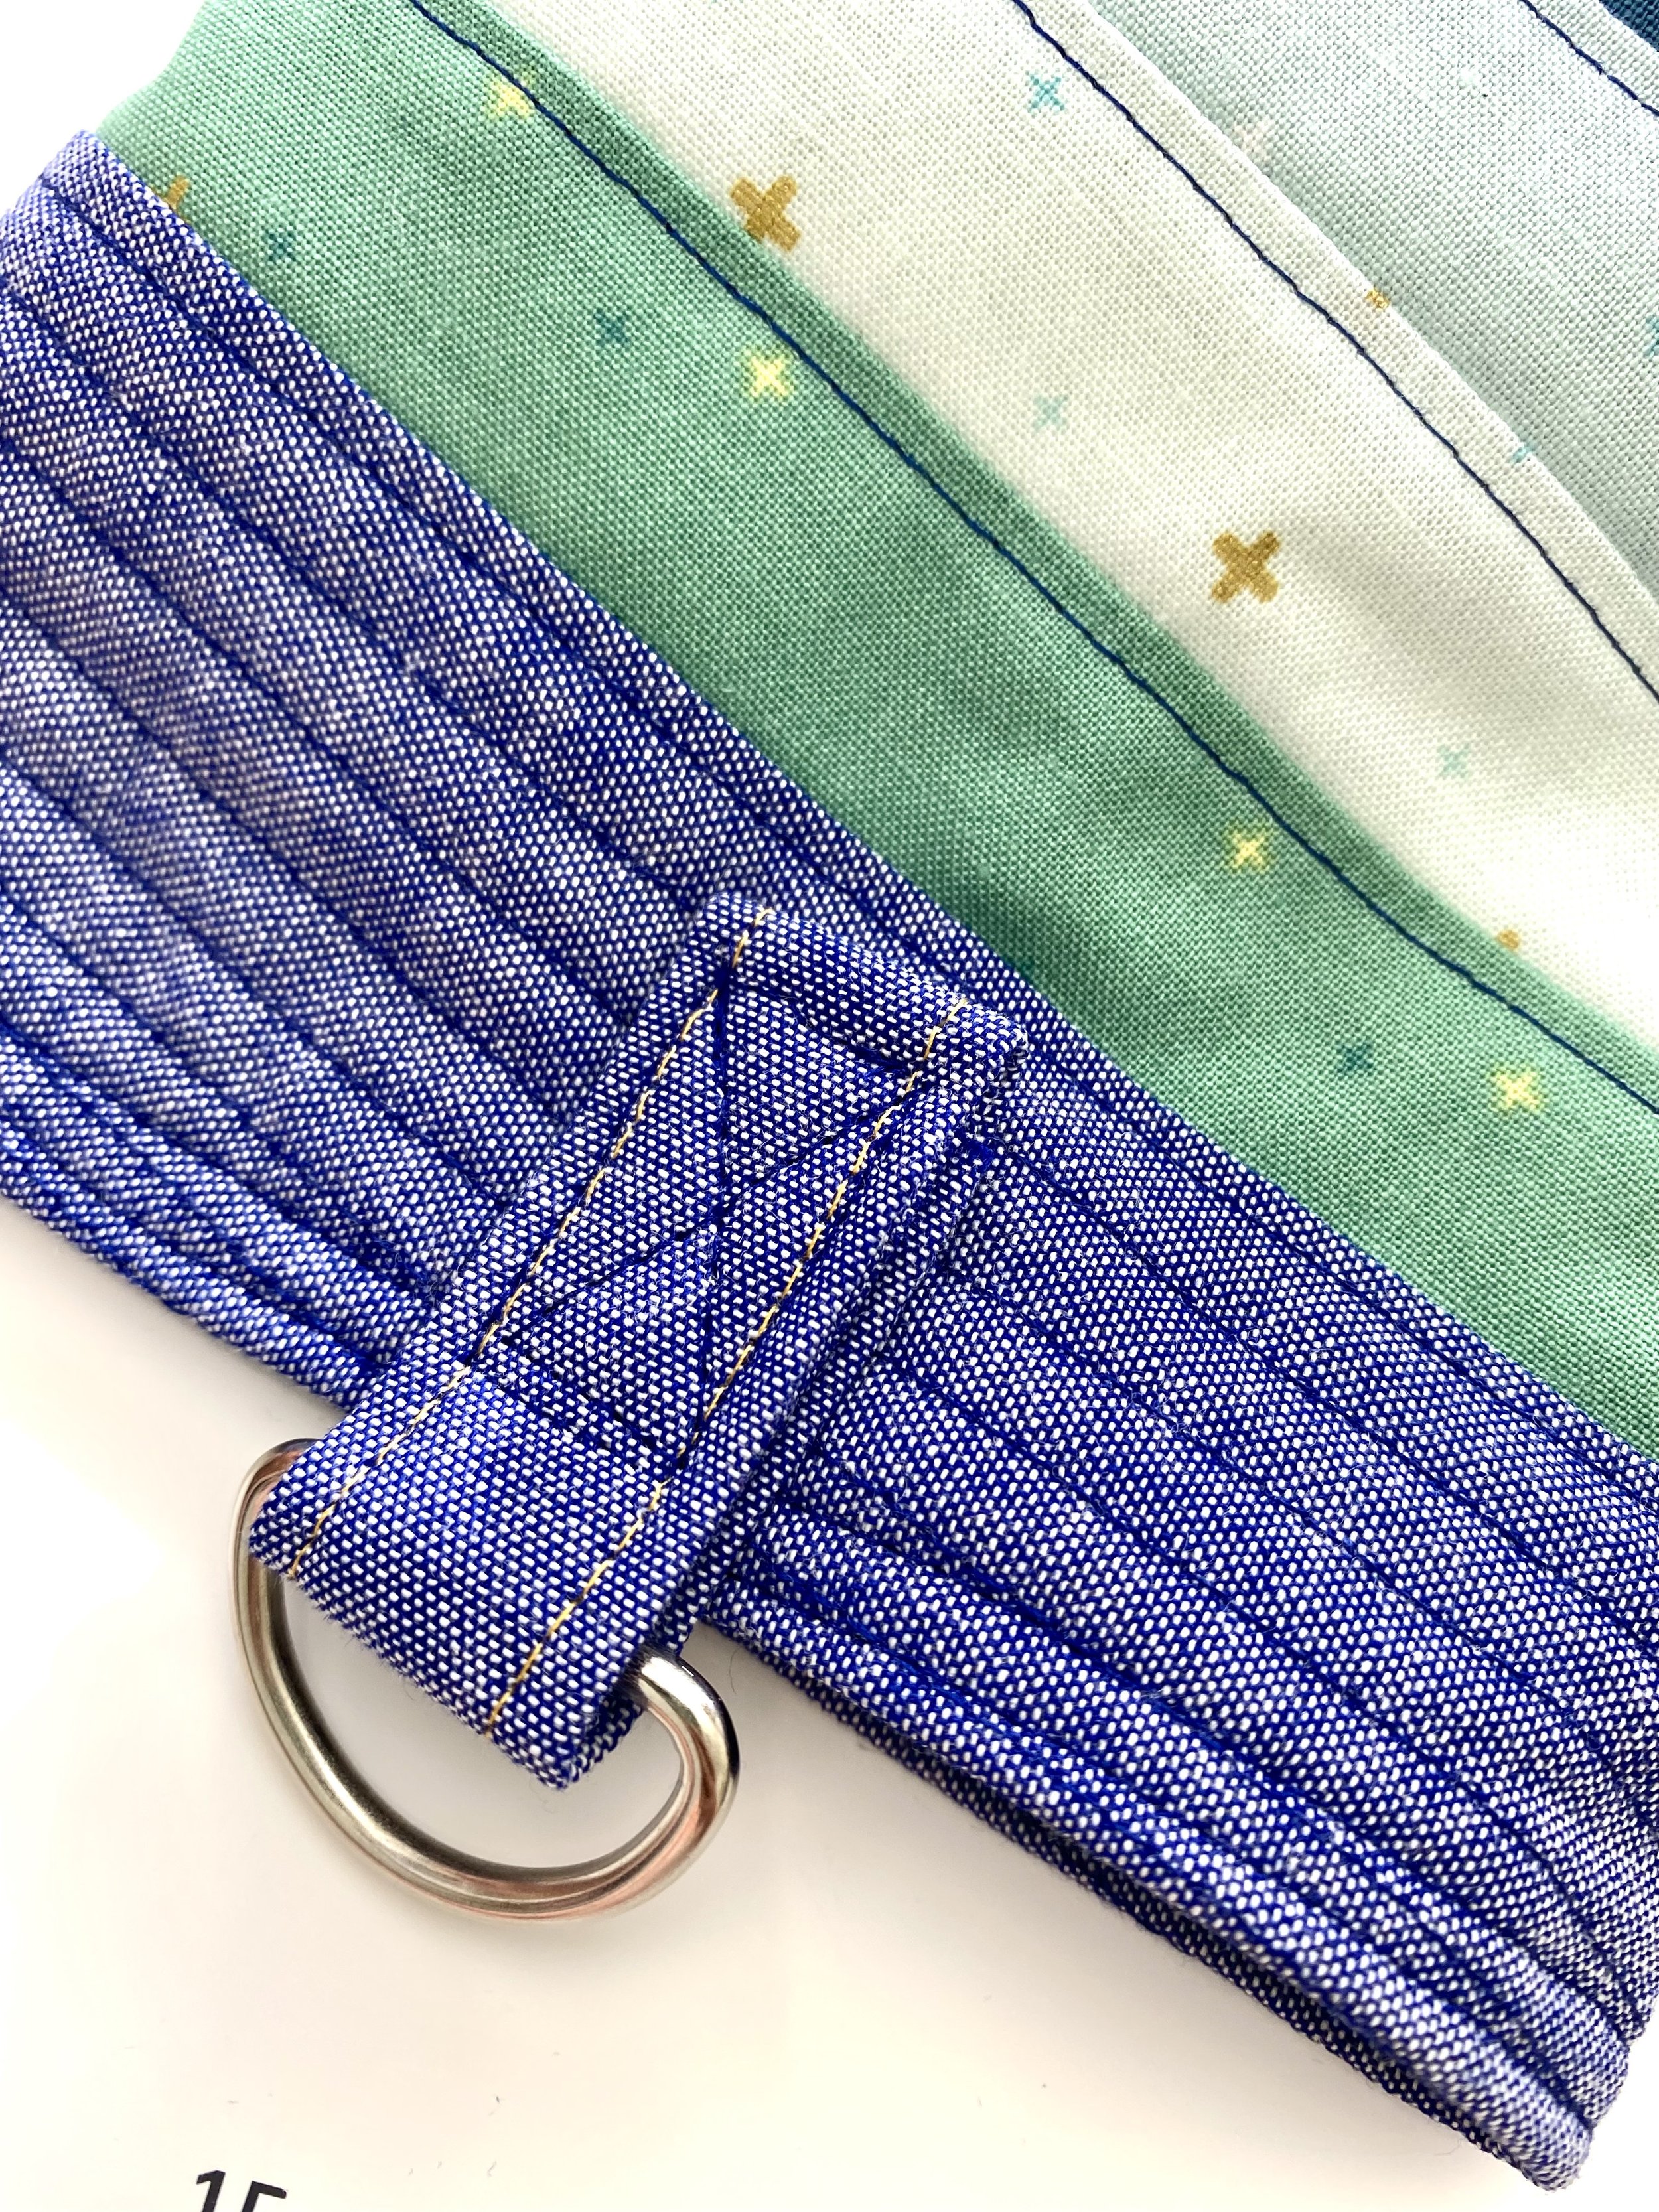
Stitch your handle tab to the tube. Stitch a rectangle shape along your previous stitching lines (I used a different color thread so you can see the two stitching lines), then sew an “X” shape to fully secure the tab to the quilted tube. The little 1” section is hidden in the back.

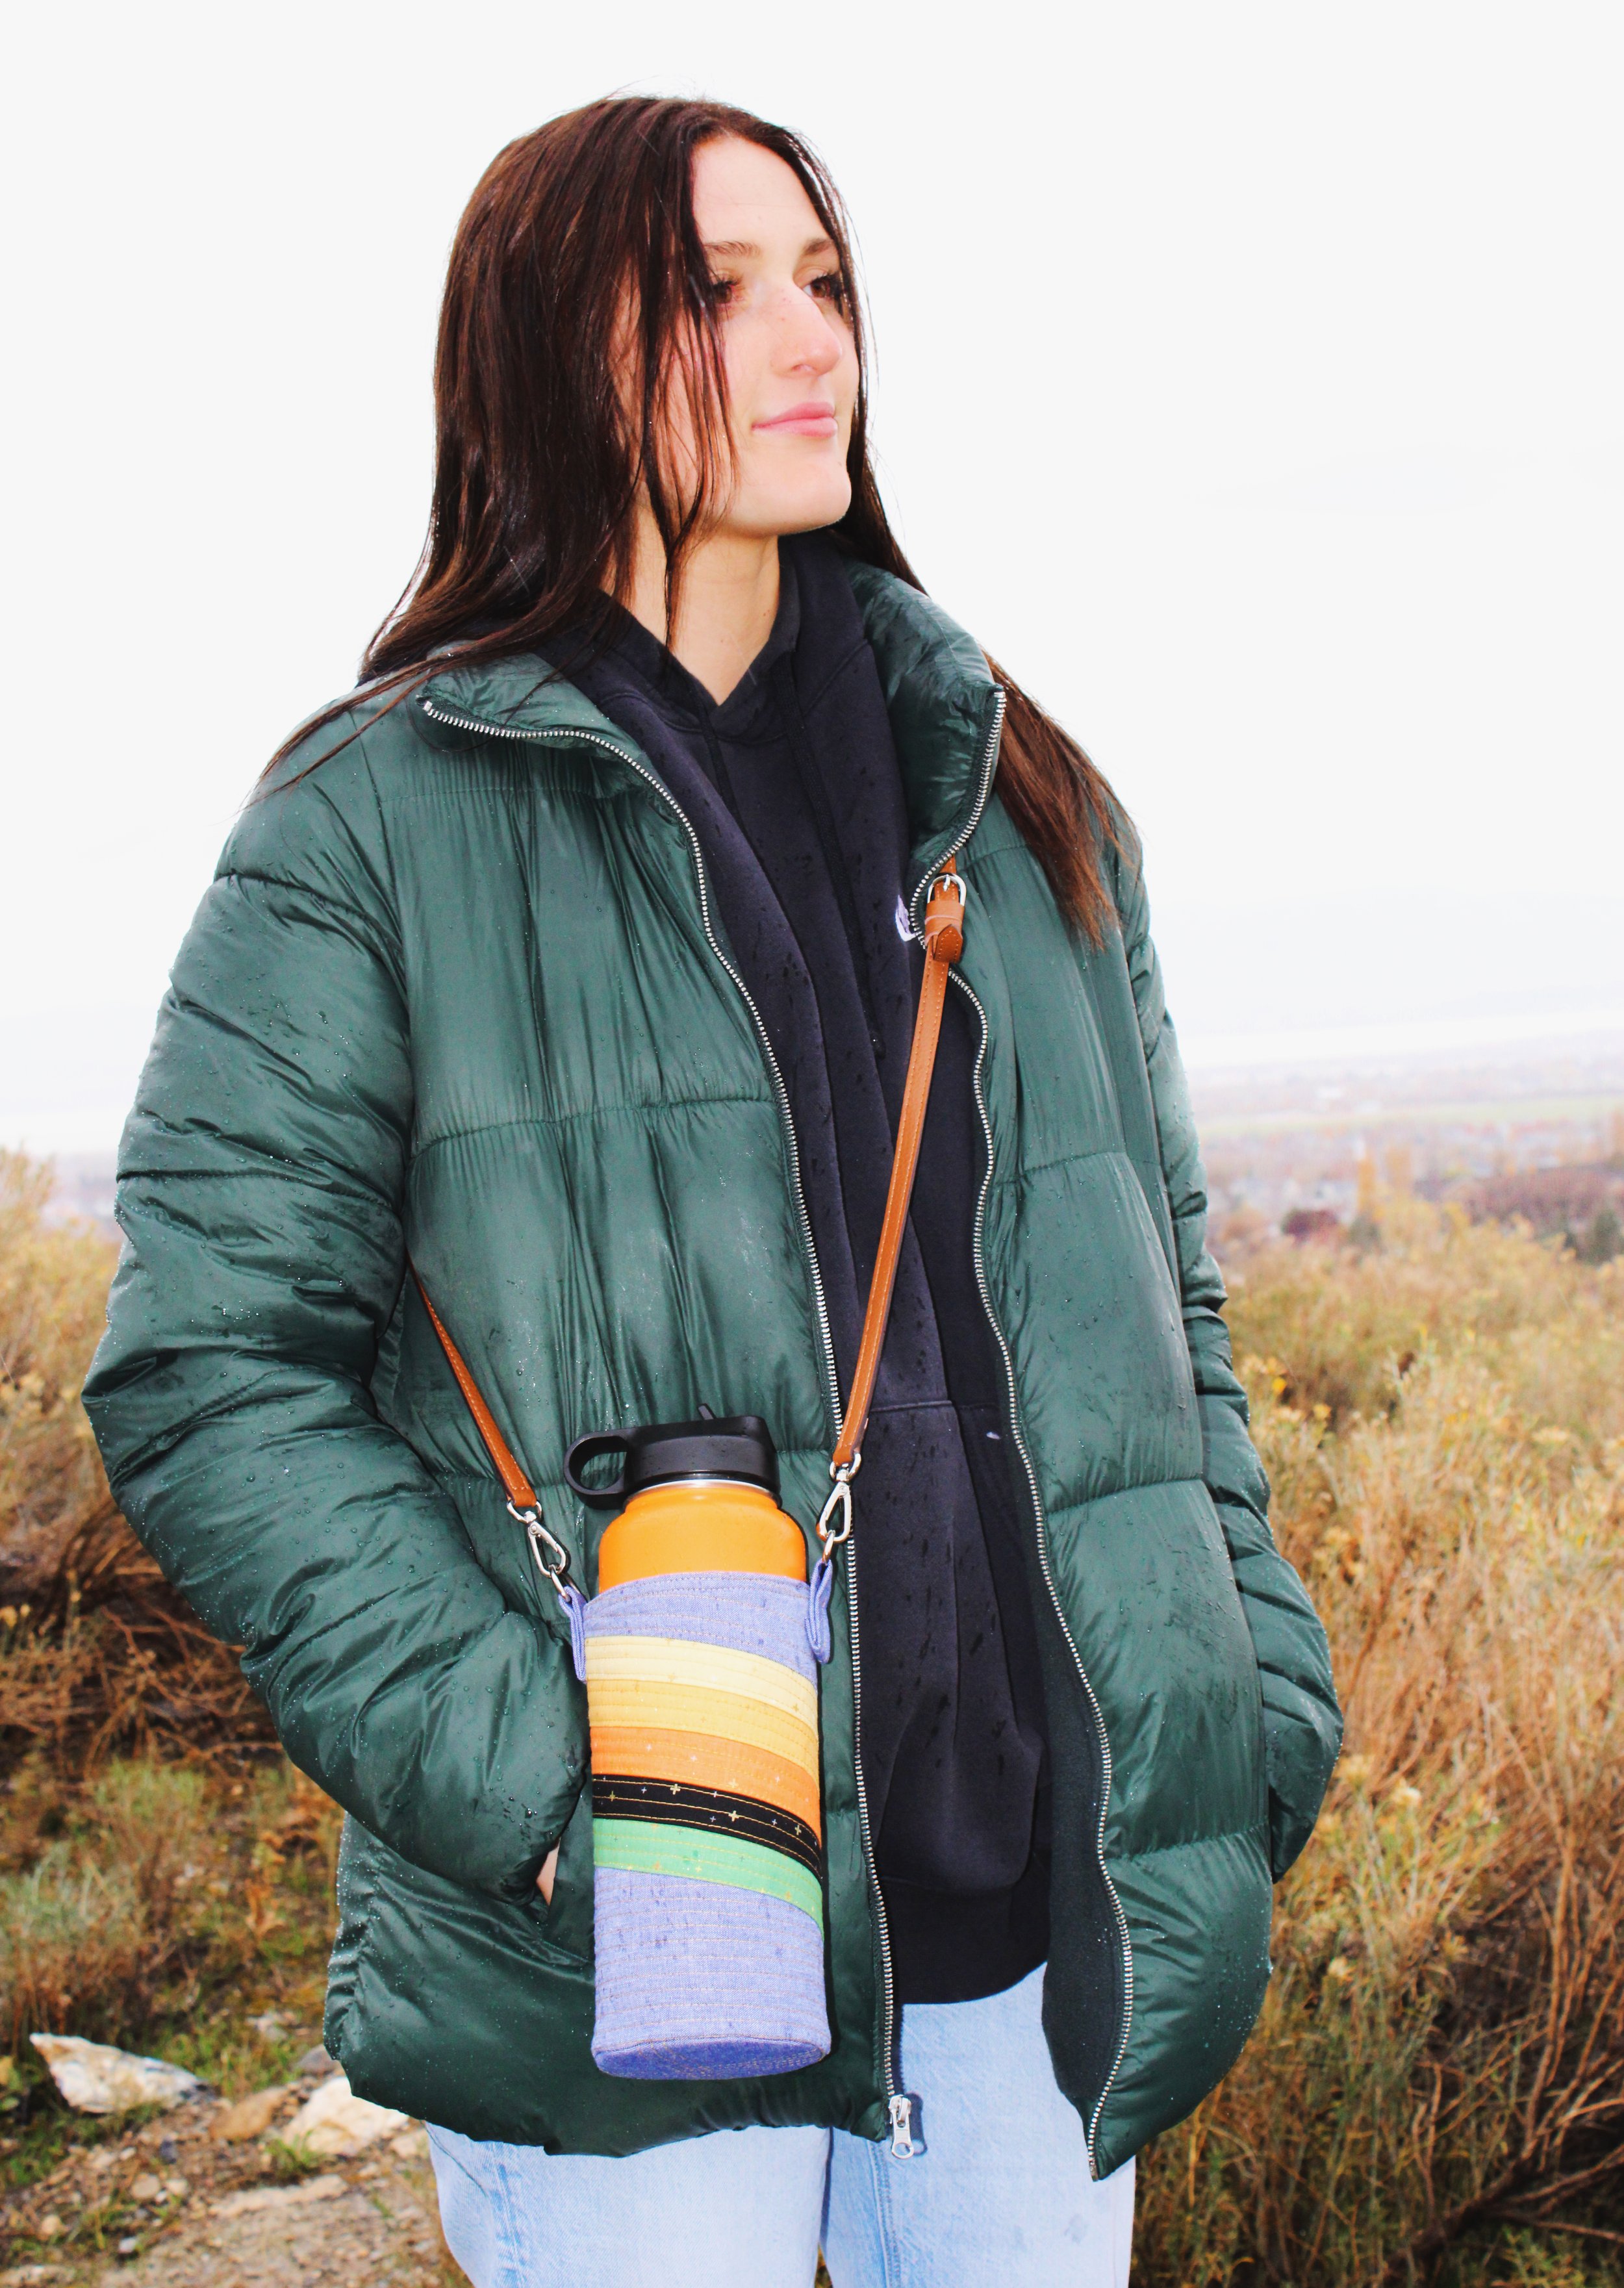
There are two strap options. The first is to purchase a leather Cross Body strap and hook it on to your D Rings. If you can see this option in the above photos. If you opt for the cross body strap, you are finished!

If you prefer the shorter handle, cut a 16” strip of 1” wide leather. Slide a swivel hook over one end and fold about 2” of the leather over and stitch to secure. Using a leather needle, stitch a square or rectangle shape, followed by an “X” shape for extra stability. Repeat on the other side. Attach the Swivel Hooks to the D Rings and you are finished! (Note: the leather is thick. Not all machines can handle sewing leather, so practice on a small piece to test your machine. Be sure to use a leather or jeans needle.)
And that’s it! These are a fun small-scale project, and a fantastic gift idea for anyone who loves their Hydro Flasks they way my kids do. Feel free to reach out with any questions and tag me on Instagram @bayhillstudio to share your own versions of the Quilted Hydro Flask Holder. Happy quilting!