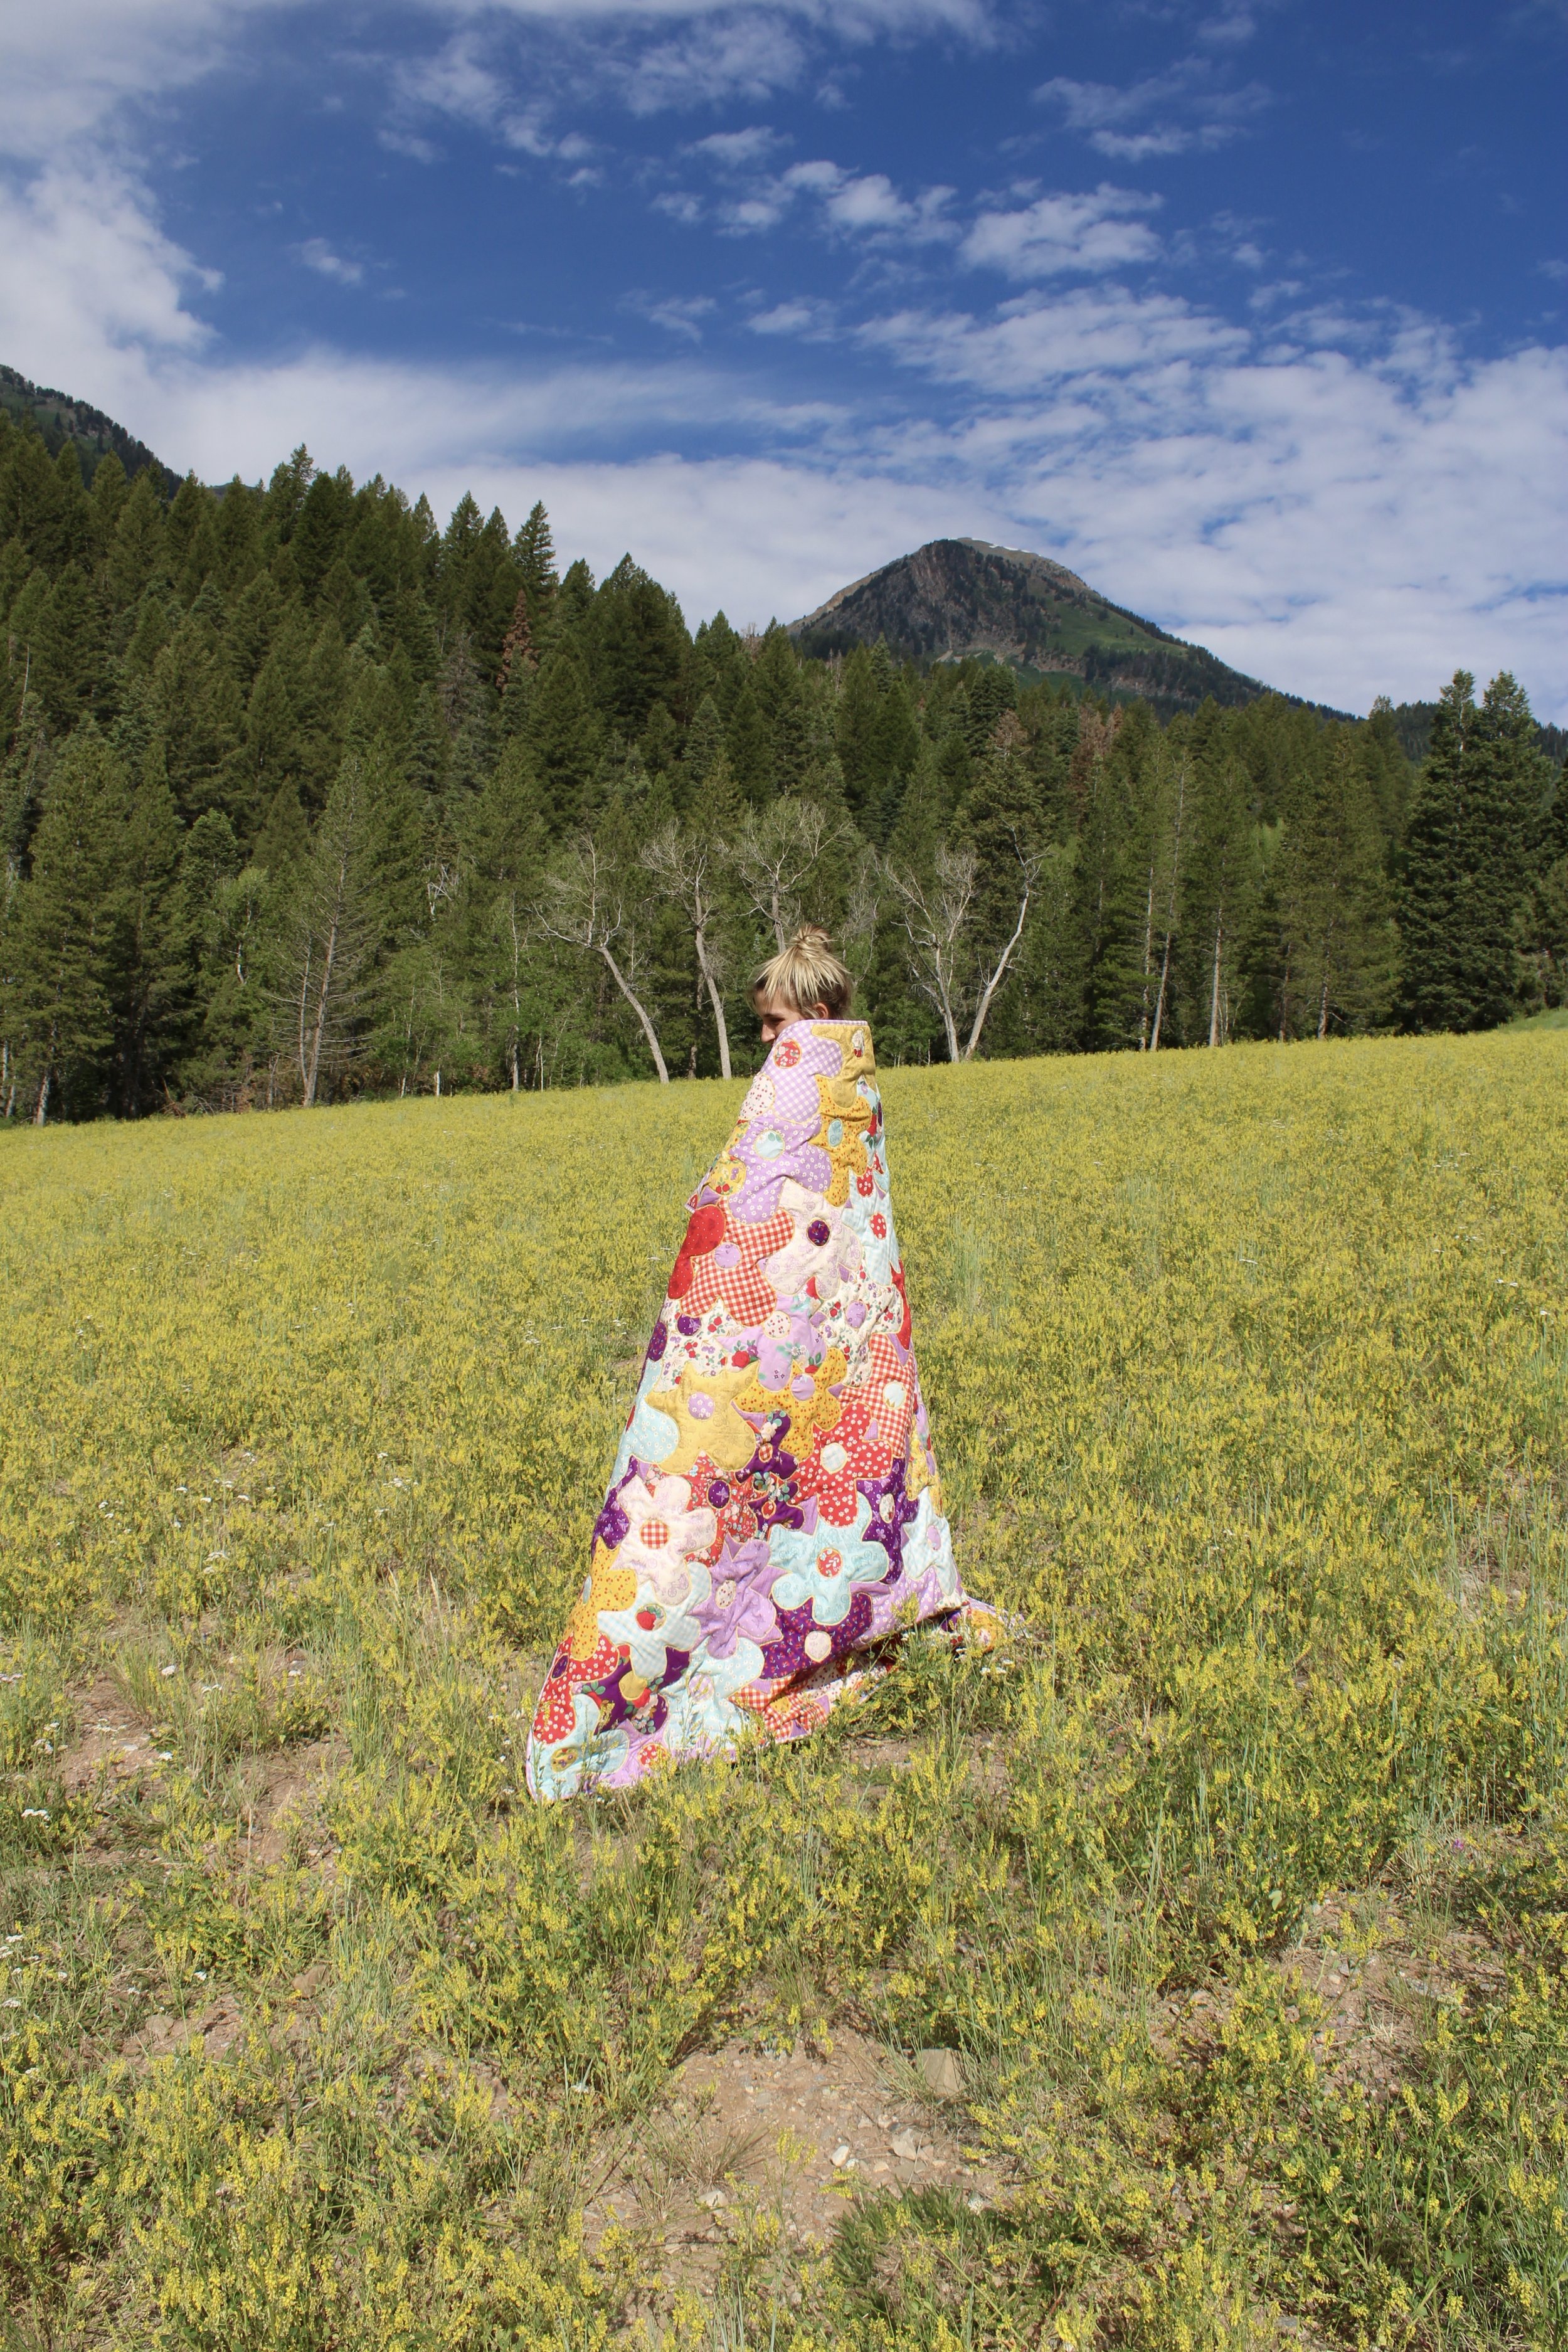
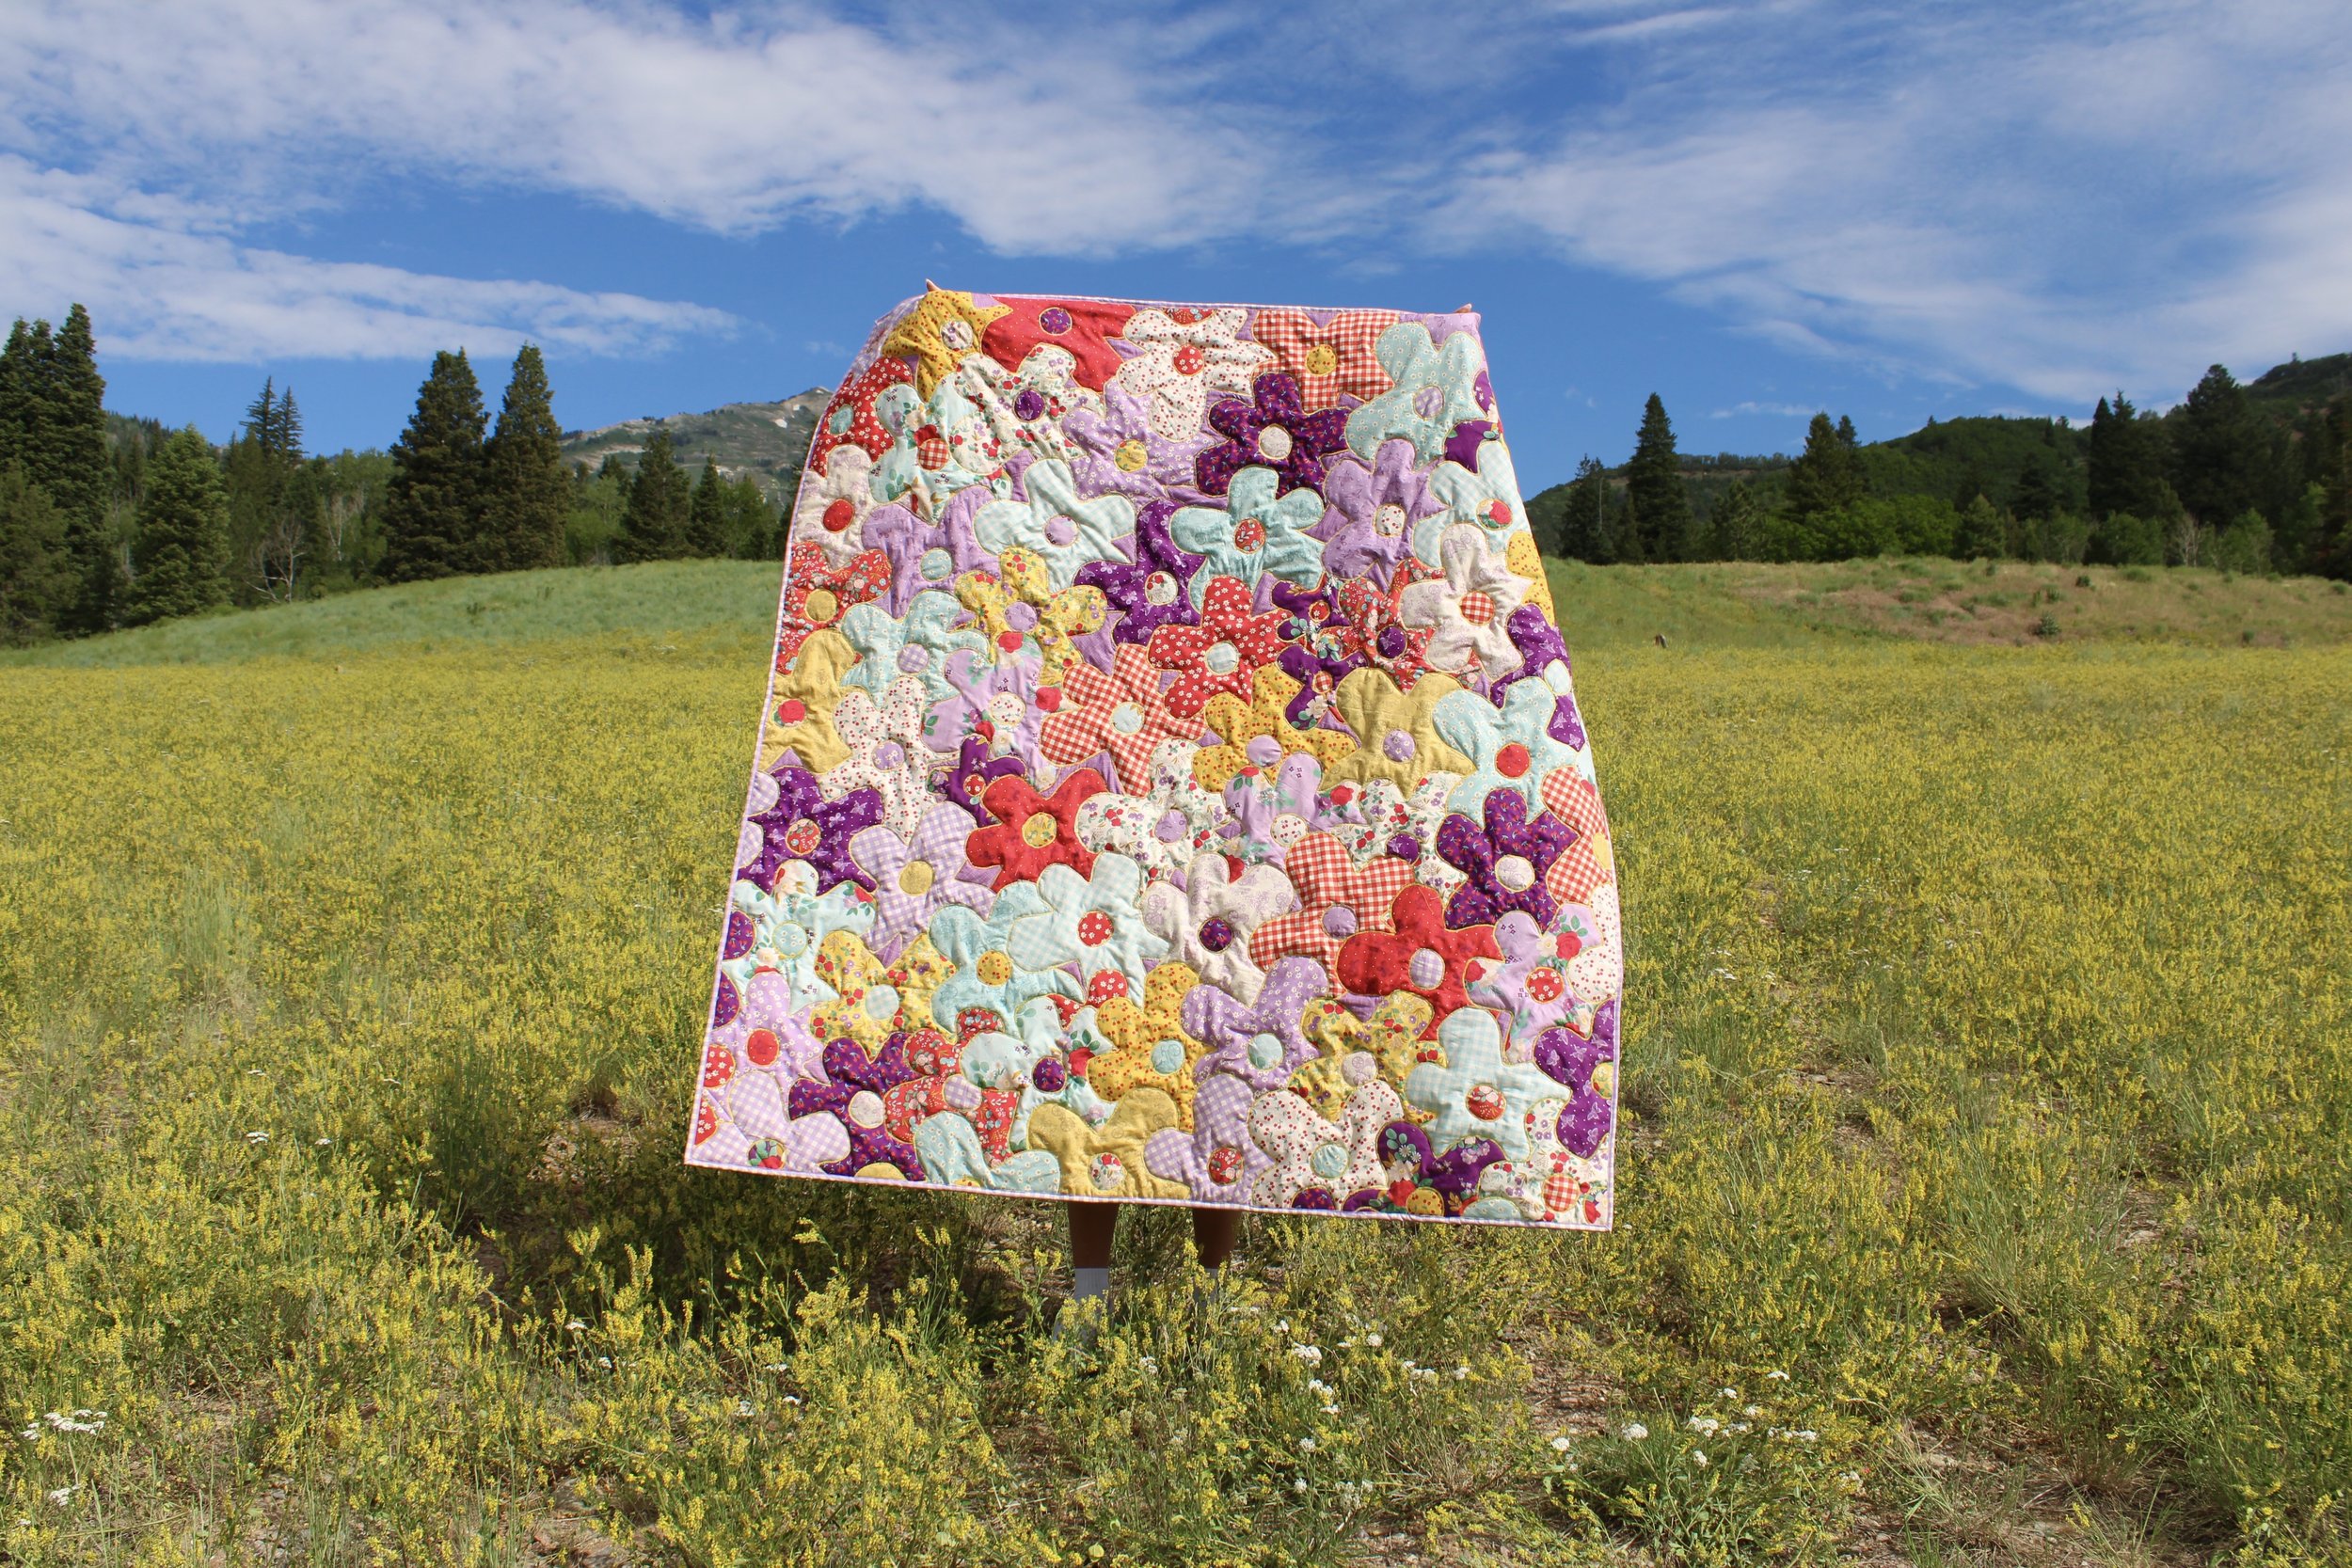
Grandmother’s Groovy Garden Quilt
It’s finally time to share the Grandmother’s Groovy Garden Quilt! I am seriously so excited about this one! I have had the idea for this quilt swirling around in my mind for months and months, and it has felt so great to finally make it reality. The Grandmother’s Groovy Garden Quilt is a modern twist on the classic Grandmother’s Garden quilt design.
When I first laid eyes on the Sweet Picnic collection designed by Natàlia Juan Abelló for Riley Blake Designs, it took my right back to my childhood in the 70’s.
While I’m sure this fabric line wasn’t intended to be a “retro” themed collection, the color palette, the ginghams, and the overall simple sweetness gave me all of the 70’s vibes.
The idea was formed in my mind to create a simple, homespun looking quilt. No intricate cutting and piecing. Just simple unstructured appliqué in the form of oversized and totally groovy flowers. The result is this super fun, and ultra groovy quilt-as-you-go appliqué mashup.

To make this throw sized quilt, you will need:
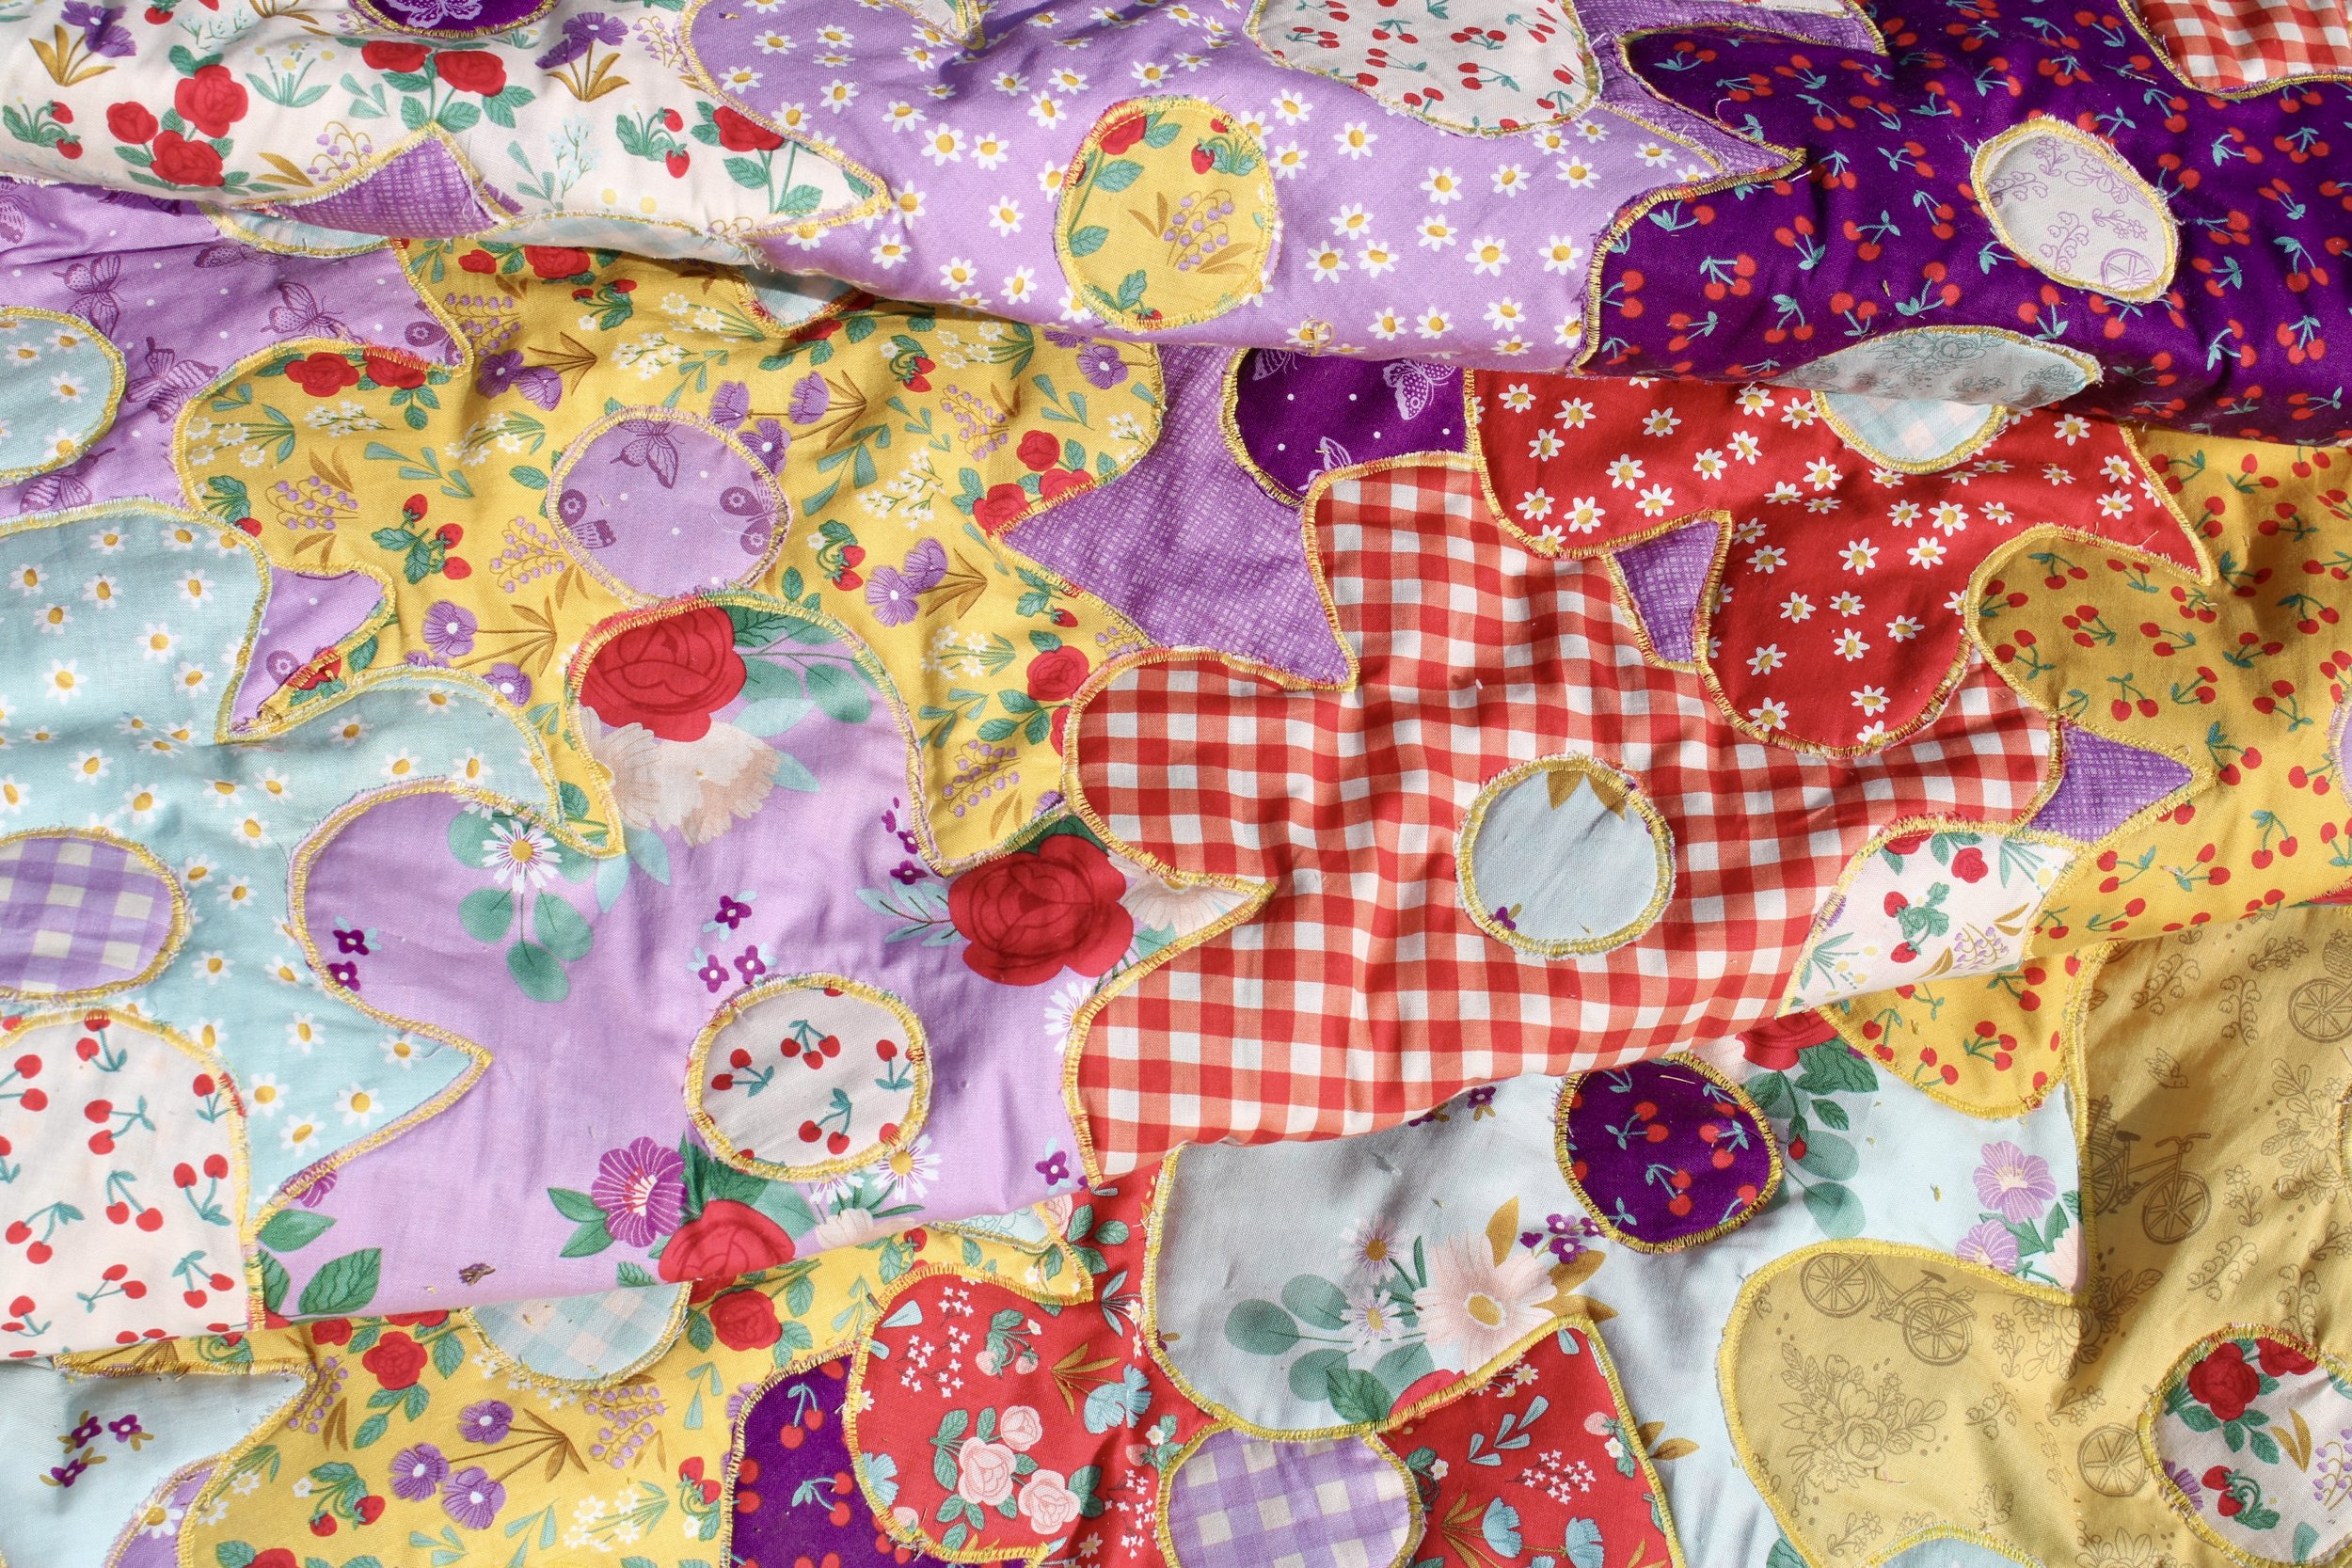
1/3 yard cuts of about 16 different prints. I used Sweet Picnic by Natàlia Juan Abelló, manufactured by Riley Blake Designs
Scrap fabric to fill in any gaps. I used a purple fabric from the Texture basics collection by Sandy Gervais for Riley Blake Designs
Fabric (can be scraps) for filling in gaps
Quilt Batting
Muslin for back of quilt top, or you can skip this part and have the satin stitching show on the back
Fabric for quilt back if you do not want the satin stitching to show
Groovy Flower Template (link below).
You can follow along with me in this video as I make the Grandmother’s Groovy Garden quilt, or follow my simple instructions below.
Step 1: Download the Groovy Flower Template and click “Print.” Under print options, select 150% scale, and the “poster” option. We want the largest flower in the template set to be even larger for these giant groovy flowers. If 150% is still too small for you, you can definitely go larger, just make sure to purchase wide enough yardage.
For templates scaled to 150%, you will need 1/3 yard cuts of various prints. I used about 16 different prints for my quilt. Each 1/3 yard cut yields 4 flowers and four flower centers.
Step 2: Cut out your flowers and flower centers using the Groovy Flower Template.
Step 3: Here you have two options.
Option A — You can assemble the quilt like I did in my video. I laid out batting on a muslin backing, then arranged my flowers on top of the batting, sewing through the batting and muslin. After the entire top was done, I added fabric for the quilt back and quilted right over the satin stitching.
or
Option B — For a truer Quilt-as-You-Go method, you can skip the muslin back and replace it with the fabric for your quilt back. Doing this, your satin stitch will show through on the quilt back, which would make a lovely design on the back. I will be making a quilt using this method in the near future.
Once you have decided which path you want to take from the above two options, lay our your flowers on the batting. Safety pin them into place with quilter’s safety pins. If you see any gaps, place a scrap fabric or any fabric of your choice behind the flower petals for a nice background. Pin these in place as well. ***I recommend laying out about half the flowers this way and stitching the flowers into place before laying out the rest of the flowers. It will be much more manageable this way.***
Step 4: When you have a group of flowers arranged and pinned in place, begin stitching around the edges using a satin stitch. I share thread recommendations in my video (see time stamp in video description) so that your satin stitching really shows up and fills in nicely.
Step 5: After the first group of flowers is stitched down, continue with the rest of the flowers the same way.
Step 6: If you chose option A above, lay quilt top on quilt back fabric and pin in place. Using a free-motion presser foot, quilt right over the satin stitching, around all of the flower edges and flower centers.
Step 7: Trim sides of quilt.
Step 8: Add binding.

I use the purple Sweet Picnic gingham fabric for my binding. So cute!

This quilt is super forgiving. Notice how puffy the flowers are. When you appliqué large flowers like these, they are bound to get loose and bunchy. That’s what I was hoping for. I was not looking for a sleek, polished look. If you want that look, you may want to consider using a fusible adhesive like Heat n Bond or using hand appliqué for more control.

I LOVE these bright colors! I might have fallen in love with this fabric line because of the tiny daisy print. I’m a complete sucker for daisies. And those cherries are just so sweet! I am already dreaming up more projects and quilts using the Groovy Flower Templates, so stay tuned!

You can grab the Groovy Flower Templates in my shop. Follow along with me as I sew this quilt in my YouTube video, and be sure to follow me on Instagram @bayhillstudio for more project ideas and creative content. Have a blessed day!